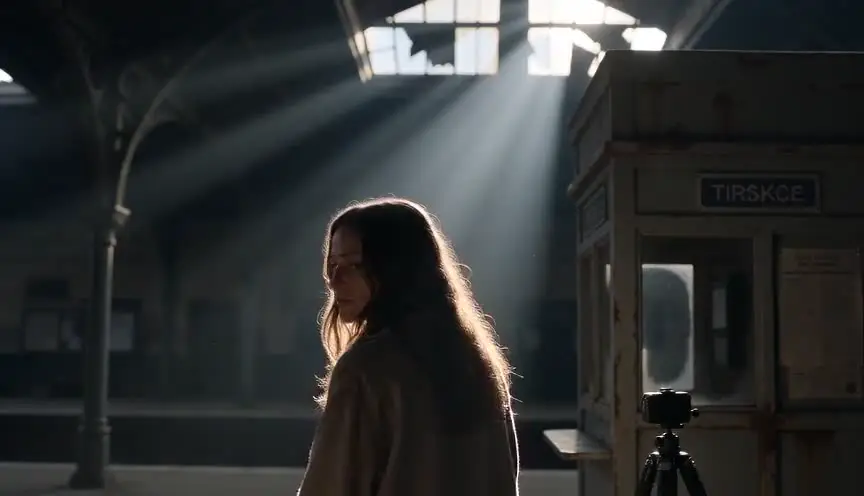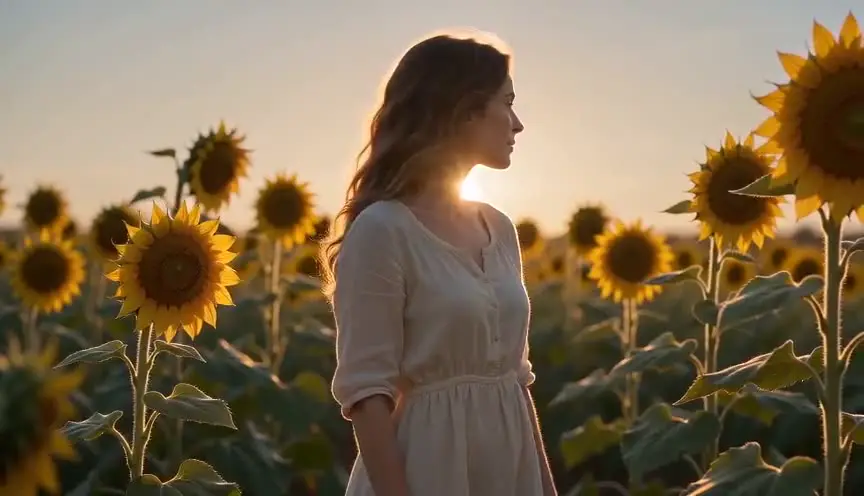

The short answer: fix the look before you generate anything. Write a short script, build a turnaround sheet for each character, write one materials and lighting plate, board every shot as a grey layout frame, then generate shot by shot: one acting beat per shot, two to five seconds each. Voice, music and the edit come last, in other tools.
Stylised 3D is unforgiving in a way realism is not. The moment a cheek stops looking soft, an eye changes size or a glove turns from rubber to leather, the audience stops believing the character is alive. This guide is about holding that look across a whole film, not one lucky clip.
It covers the family-friendly studio 3D look: big eyes, rounded shapes, soft skin, warm light. Our running example is a five-shot comedy scene our team made, with the real storyboard frames next to the real final frames.
What you need
- Time: plan a first sketch of 60 to 90 seconds, not a feature. Most of the time goes into deciding, not generating.
- Budget: the writing is free. Generation is paid in credits, and the bill depends on how many takes you keep. See the pricing and the AI video cost calculator.
- Hardware: a computer with a browser. No GPU, no 3D software, no rig.
- Level: no 3D skills needed. You need to know what each shot should say, which is a writing skill.
What makes good 3D animation, before any tool
Start with the grammar, because the model will not supply it.
1. Shape first, detail later. Round reads friendly, square reads stubborn, sharp angles read as trouble. In our example, Tank is a pear with a dark bandit mask of fur and Pip is a ball of ginger fluff. Shape survives every shot. Small details do not.
2. The eyes carry the performance. Oversized eyes, large irises, clear catchlights, readable brows. Decide eye shape and size once and treat them as fixed facts of the character.
3. Materials sell the world. Soft subsurface skin that glows where light passes through an ear. Fur with visible clumps. Rubber gloves with a slight sheen. When materials stay consistent, the world feels built. When they wander, it feels generated.
4. Light like a render. One warm key that models the face, a rim that lifts the fur off the background, soft bounce light so nothing goes black. One cool accent in a warm frame, like the blue gloves in our scene, and the eye finds it first.
5. One acting beat per shot. A gag has three beats: anticipation, action, reaction. Each gets its own shot, and the reaction gets the longest hold.
6. Cheat physics on purpose. Animators use squash and stretch, anticipation and overshoot. Video models learned motion from cameras and real bodies, so they drift toward stiff toys or real animals. Ask for cartoon physics by name.
Why "in the style of [studio]" fails
The look popularized by Pixar is what most people picture when they say "3D animation", so the temptation is to put a studio name in the prompt. Don't, for two reasons.
The first is rights. Studio names are trademarks and their characters are protected works. A design that copies one is not something you can own, sell or build a series on.
The second is technical. A model has no single "studio style" stored somewhere. It averages everything near that name, and you get the same generic 3D face as everyone else who typed the same words. The look comes from decisions you can name: rounded shapes, big glossy eyes, soft subsurface skin, a warm key and a cool rim. Write those, and the result is yours.
Step 1: Idea and logline
Animated shorts run on escalation: two characters, one set, one small want, a gag that keeps growing. Ours: a cocky hamster champion meets a challenger who showed up without gloves.
Resist a second location: every new place is one more set of references to hold. A good first length is 60 to 90 seconds. With shots of two to five seconds, that is roughly twenty to forty shots, a project you can finish and learn from.
Step 2: Write the script
Write it in screenplay format, even for a 30-second sketch. A script forces you to decide what each shot shows, and the AI shot breakdown reads it directly. ScreenWeaver's screenplay editor is free on the Screenwriter plan, with PDF and Final Draft export.
Three habits make a 3D script render well:
- Write the fixed details once. "TANK, a calico champion with a bandit mask of dark fur, bumps his blue gloves together." That line is a character description, a costume note and a prop list.
- Give the reaction its own line. "His eyes go huge. Hold it." is a direction the storyboard can time.
- Act with the face. "His jaw drops" films better than "he is surprised".
Our guide to writing physical comedy and slapstick goes deeper on gags on the page.
Step 3: Build the reference sheets
Every recurring character, place and key object gets a reference sheet before the first panel: in ScreenWeaver, Characters, Places and Objects, with AI reference sheets or your own uploaded images. This step decides whether the film holds, so it has its own section below.
Step 4: Write the art direction plate
Almost nobody does this step, and it is the one that produces the "studio" feeling. Write one short block that describes materials and light, and attach the same block to every image and video generation in the film.
The plate for our scene:
Stylised 3D animation, simplified rounded shapes, soft subsurface skin,
dense fur with visible clumps, glossy oversized eyes with catchlights.
Warm key light from frame left, cool rim light, soft bounce fill,
no black shadows. Warm palette: ginger, cream, gold, warm brown.
One cool accent: glove blue. Shallow depth of field, lantern bokeh.
No studio, no film title, no artist name. Every word can be checked on screen: if a frame comes back with flat light or photographed fur, you can point at the line it ignored.
Pick one treatment and never mix two in a scene. Toon shading next to realistic fur reads as two films cut together.
Step 5: Board every shot
Board before you spend credits on video. In 3D the board fixes staging, acting beats, eye lines and cut lengths. The camera can still move later, but the order of events and the performance are decided here.
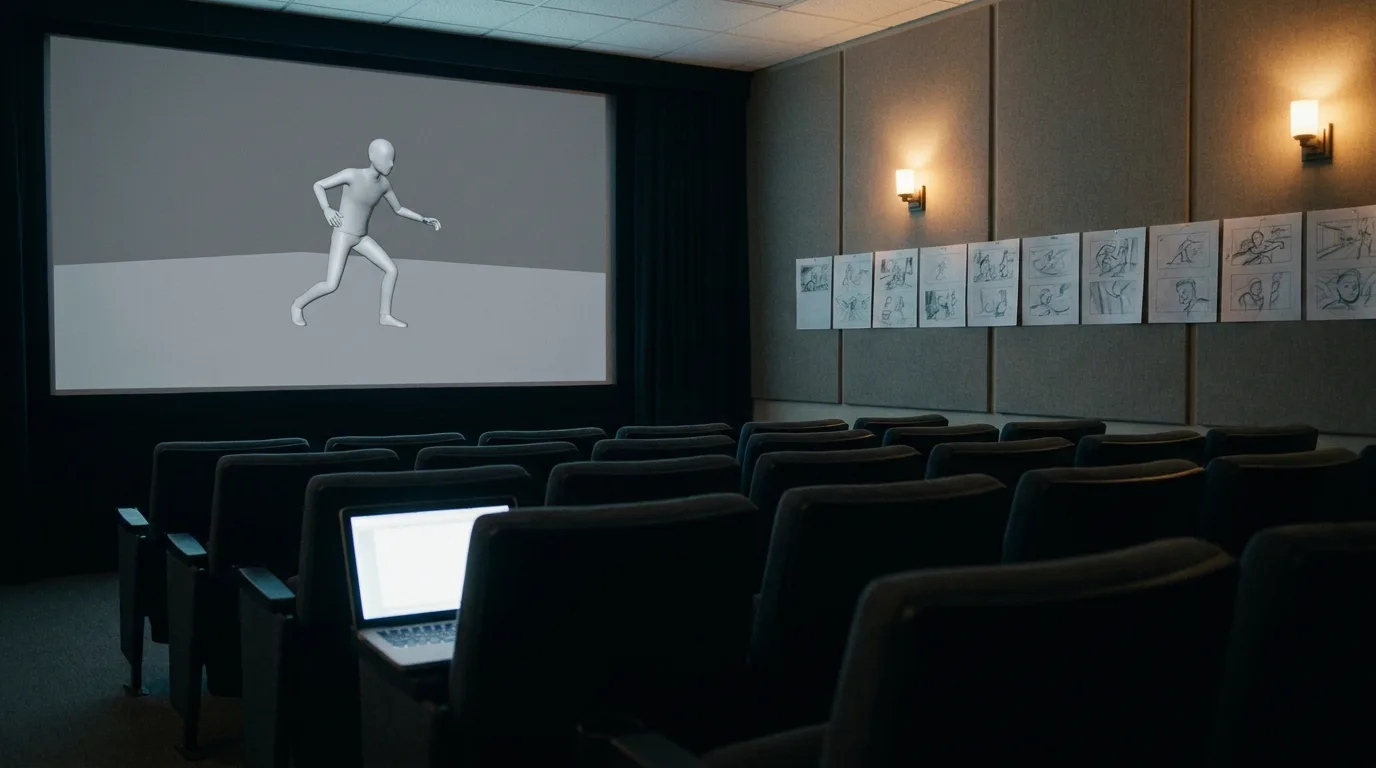
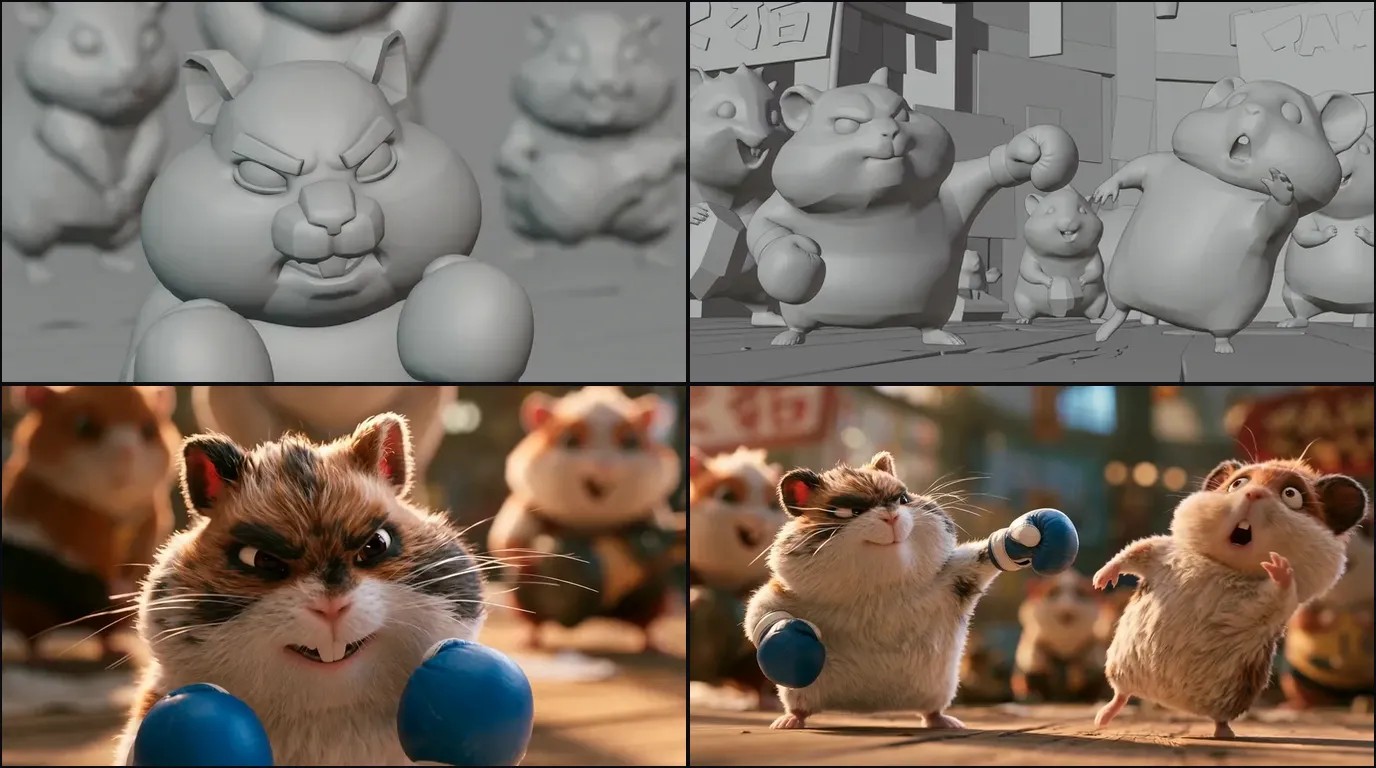
ScreenWeaver breaks each scene into shots with AI, then generates storyboard panels that read like a layout pass in a 3D package: grey clay figures, real lenses, real eye lines, no fur and no final light. Without surface detail, you judge only what matters at this stage: is the pose readable, is the gag staged clearly, does the cut work.
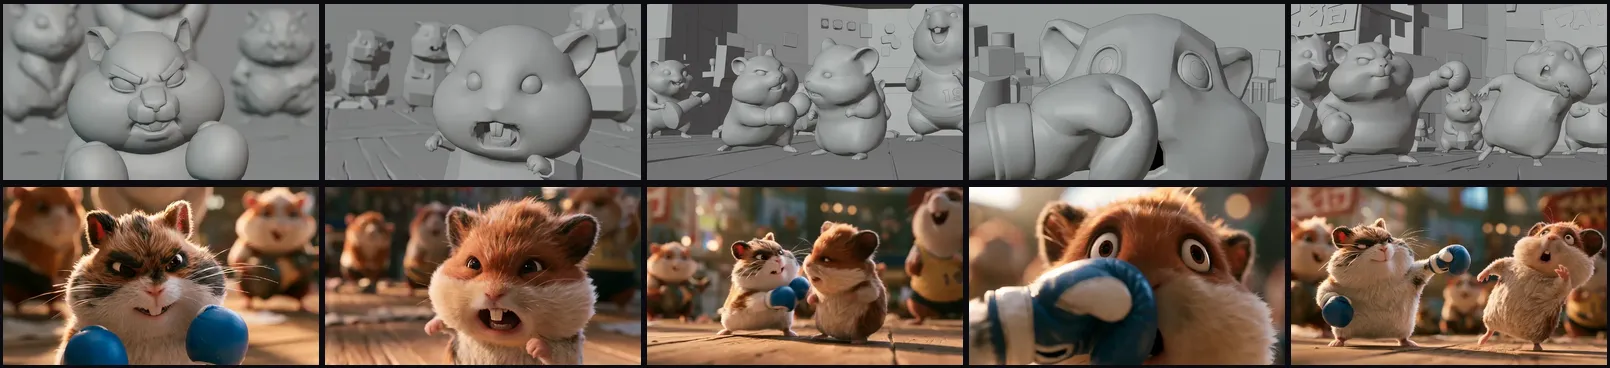
Above, the five boards of our scene and the five final frames. Framing, poses, eye lines and the fan in the number 19 jersey carried over. Fur, light and colour were left open. That split is the method. For the craft side, read 3D animation storyboard: from boards to blocking. For the tool, see the AI storyboard generator.
Step 6: Generate shot by shot
In ScreenWeaver's production canvas, a scene's shots go through one of two pipelines:
- Reference to video: each shot's action becomes a directed prompt, and the characters, places and objects cited in the shot are attached at the video step.
- Storyboard panels to video: the boarded panels of a scene, up to 14, guide the order and composition of the sequence, alongside the references.
Seedance 2.5 is the default video model: clips from 4 to 30 seconds, up to 1080p, up to 30 image references. Seedance 2, Veo 3.1, Kling 3.0, MiniMax H3 and Grok Imagine Video are also available per shot. Aspect ratios are 16:9, 9:16, 2.39:1, 4:3 and 3:4. Choose the ratio before the first generation, because reframing later loses the staging you boarded.
Rules that save credits:
- Anchor shots first: each character's first close-up, the set's establishing shot.
- One beat, one shot. If the prompt contains "then", split it.
- Name the motion: "anticipation pose", "squash and stretch", "overshoot", "held reaction".
- Several takes, then choose. The first take is rarely the keeper.
- Draft cheap, finish sharp. Test motion at a lower resolution, pay for 1080p only on the take you keep.
When a frame is almost right, fix the image before animating it. Crop, Angle (re-angle the camera) and Edit mean a wrong glove colour costs one image edit, not a new video.
Step 7: Voice, music and sound
ScreenWeaver does not generate voices or music. Record dialogue yourself, cast a voice actor or use a text-to-speech service, and do it before the final edit: comedy timing lives in the voice, and picture is cut to it. For music, use a licensed library, a composer, or a generator whose terms allow your use. Our sound workflow for AI films covers the audio pass.
Step 8: Edit and export
ScreenWeaver does not edit or export a finished film. Bring the kept clips, voice and music into an editor such as DaVinci Resolve or Premiere Pro. Cut reactions long, gags short, one grade over everything. For both 16:9 and 9:16 versions, generate both ratios instead of cropping.
Character consistency in 3D: the section that decides everything
In AI animation, every generation reinvents the character from whatever it is given. Describe "a round ginger hamster with big eyes" in ten prompts and you get ten different hamsters that all match the sentence. Words describe a category. You need one specific character.
Stylised 3D makes this harder: the audience learns the character in the first shot. If his eyes are slightly smaller in shot 6, nothing in real life tells them which version is right, so they just feel something is off. The mechanics are in character drift in AI video.
The rule: attach, don't redescribe
Once a character has a reference sheet, stop describing his look in prose and attach the sheet. The prompt only says what changes in this shot: pose, expression, action. Rewriting the description in every prompt invites a new interpretation every time.
In ScreenWeaver, a Character's sheet follows him into the storyboard panels and into the video step. Nano Banana 2 accepts up to 14 reference images and Seedance 2.5 up to 30: enough for a character from several angles, a second character, the set and a prop in the same shot.
The 3D character kit
Build this for each recurring character before the first panel:
- A hero frame: one image you love, in the final look, with the plate applied. Everything else derives from it.
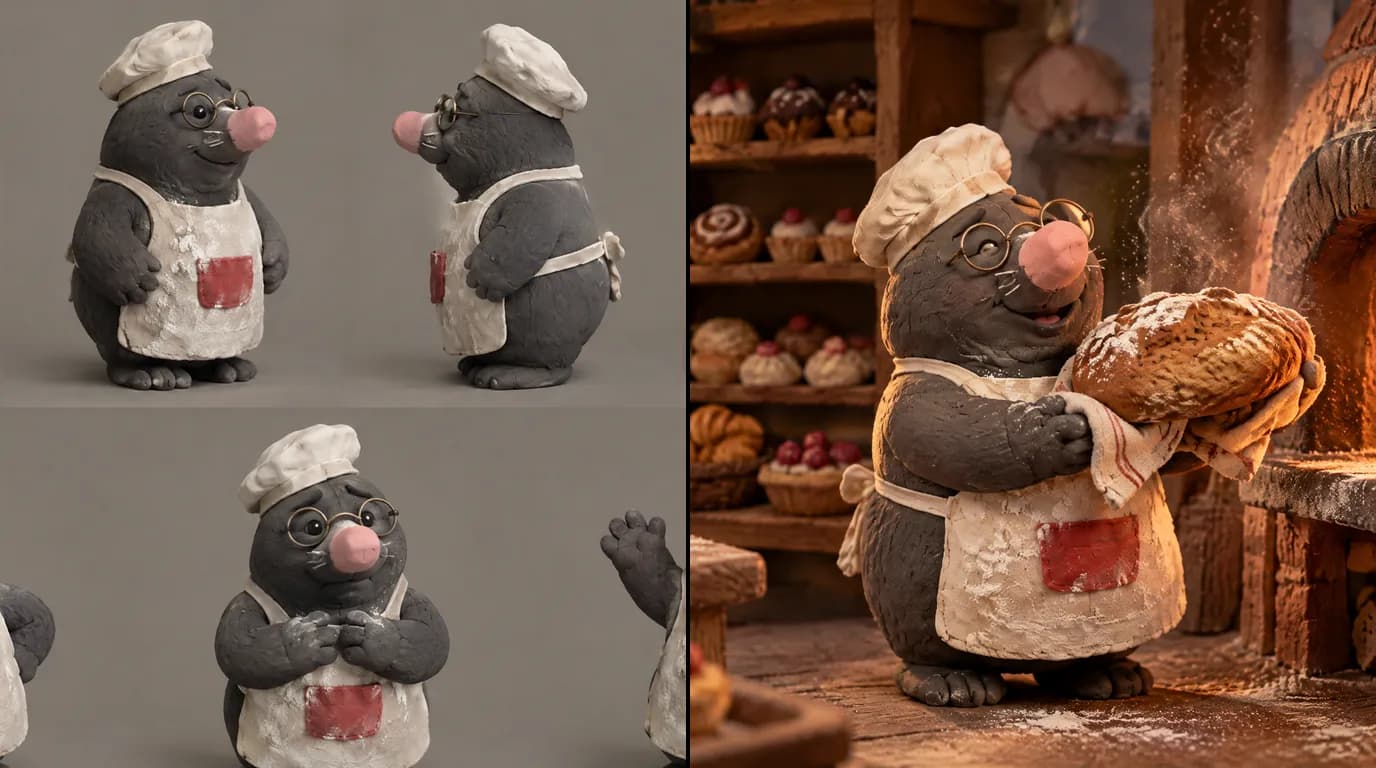
- A turnaround sheet: front, three-quarter, side and back, same pose, same light, neutral background. The single most useful image in the project. Generate it from the hero frame, and use the Angle tool to fill a missing view instead of describing it again.
- An expression sheet: neutral, delighted, shocked, angry, sad. Same head, same light. In comedy, reaction shots are where drift shows first.
- Material close-ups: the fur pattern, the skin, the costume fabric, any prop the character holds. Tank's gloves get their own close-up because they are in every shot he is in.
- A cast line-up: every character side by side at the right scale. Models forget relative size the moment two characters share a frame.
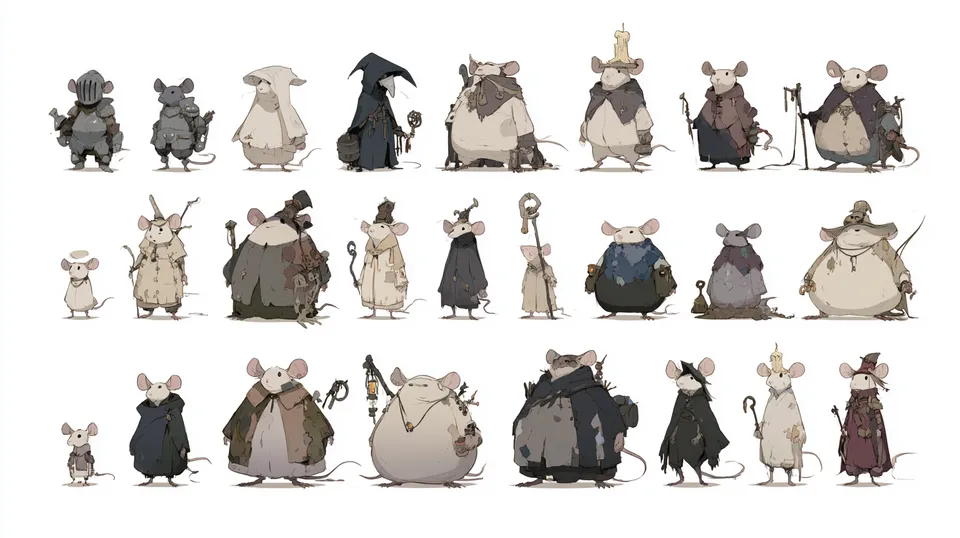
A line-up like this one, from our team's gallery, does one job: every silhouette reads at a glance and every size is fixed relative to the others.
What to lock in 3D, specifically
The attributes that drift, roughly in the order they go:
- Proportions. Head-to-body ratio, limb length, hand size. Write the ratio on the sheet and check it in wides, where models tend to normalise it.
- Eye shape and size. Size relative to the head, iris colour, pupil size at rest, eyelid shape. A change here changes the character's age and personality.
- Markings. Fur patches, a bandit mask, freckles. Markings are the first casualty of a three-quarter view, so show them from every angle on the turnaround.
- Materials. Fur density and length, skin softness, how cloth folds, how shiny a prop is. A glove that turns from rubber to leather is a different glove.
- Costume and props. What the character always wears and what he never wears. Pip has bare paws in every shot because the script and the sheet both say so.
- The style itself. A cartoon hamster can quietly become a real one, with photographed fur and small realistic eyes. Keep the plate on every generation and reject any take where the surface starts to look photographed.
Use your own 3D if you have it
If someone on the team can model, render a turnaround in Blender or any 3D package and upload it as the reference. It is consistent by construction, with exact proportions.
The drift test
Before generating the second half of a scene, put shot 1 and shot 10 side by side. Same eye size? Markings on the same side? Same glove material? Same height next to the other character? If anything moved, fix the reference or the panel first. Drift compounds when you reuse a generated frame as the next reference instead of the sheet: a copy of a copy. Always go back to the sheet.
The full reference method for boards, including a three-panel probe before boarding a scene, is in character consistency in AI storyboards. To build a sheet from a description, try the AI character consistency sheet.
Try it free
Try Screenweaver for free on your script
It is free. Import your existing project, get a clearer view of your outline, and regain control of your story structure in minutes.
Start FreeOne shot, taken apart
Shot 4 of our scene is the punch. Here is each layer, from page to frame.
The script line: "Tank's glove lands. Pip's cheek folds around it like dough. His eyes go huge. Hold it."
The board: an extreme close-up, the glove filling the left of frame, the cheek deforming around it. The board decides that the impact plays on the face, not on a camera shake.
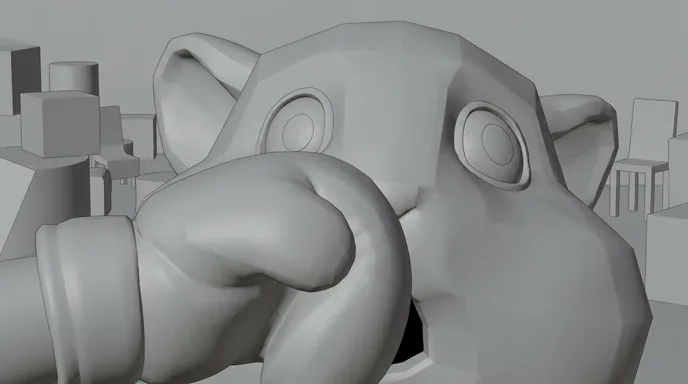
The direction: "The glove fills the left of frame and Pip's cheek deforms around it, eyes wide open. Squash on the cheek, no camera shake: the face does the work."
What gets attached: Pip's sheet, Tank's glove close-up, the art direction plate. Pip's colours are not written in the prompt. The sheet carries them.
What we reject: a glove that changes colour or material, a cheek that stays rigid, eyes that shrink to realistic size, a camera that shakes instead of letting the face work, a reaction cut before the eyes can read.
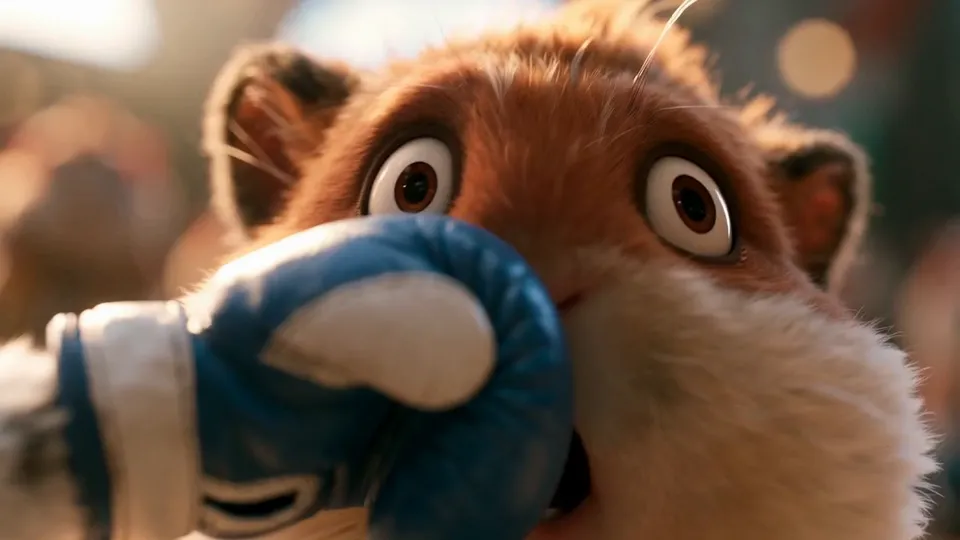
The edit decision: the punch plays in two cuts, the glove first, then Pip's eyes. That was decided on the board, not discovered in the edit.
How long it takes and what it costs
We won't quote a fixed price, because it depends on three numbers only you control: how many shots, how long each one runs, and how many takes you generate before keeping one. Budget it this way:
- Board the whole scene first. Boards give you the real shot count.
- Generate the first scene fully and count your own takes per kept shot.
- Multiply by the number of scenes, using the AI video cost calculator.
Time goes mostly into decisions: hero frame, turnaround, boards. Writing is free on the Screenwriter plan, and the paid plans are in the pricing section. For a broader breakdown, see AI film production costs.
Common mistakes, and how to fix them
1. Generating before writing. Clips without a script become a mood reel. Fix: logline, script, boards, then video.
2. A studio name in the prompt. You get an averaged look and a design you cannot own. Fix: describe shapes, materials and light in the plate.
3. Redescribing the character in every prompt. Each rewrite is a new interpretation. Fix: attach the sheets, and let the prompt carry only the action.
4. Stacking style adjectives. "Ultra detailed, cinematic, 8k, masterpiece, cute" pulls in every direction. Fix: one short plate, the same in every generation.
5. Several actions in one shot. "He winds up, punches, and the other falls" gives mush. Fix: one beat per shot.
6. Motion without cartoon physics. Stiff toys or realistic animals kill the look. Fix: name anticipation, squash and stretch, overshoot, and keep the fastest action in one short shot.
7. Letting the cartoon turn photoreal. Fur looks photographed, eyes shrink. Fix: keep the plate attached and check every take against the hero frame.
8. Short reactions and sound added last. A reaction cut after half a second kills the gag. Fix: give reactions a second or more, record the voice first, cut picture to it.
Which tool to use
| Kind of tool | Good at | Where it breaks for 3D animation |
|---|---|---|
| Clip generators on their own | One beautiful shot | No memory between clips, so characters drift. Script, boards and edit live elsewhere. |
| All-in-one video apps | Fast social clips from a prompt or template | Little control over staging and acting, generic looks, hard to hold a cast |
| Traditional 3D software (Blender and others) | Total control, a real rig, a real camera | Weeks of modelling, rigging and animating before the first finished shot |
| A production suite: script, storyboard and video in one project | Holding characters, sets and decisions from page to frame | You still write, board and choose the takes |
We built ScreenWeaver to be that last row, because it is the only one where the character you write on page 1 is still the same character in shot 40. To see what it does for this genre, the AI 3D animation generator page walks through it. For family films in other looks, see the AI family movie generator.
Proof: what this method produces
Round One, a demo by the ScreenWeaver team. A five-shot 3D comedy scene written for our 3D animation page: 12 seconds, 16:9, boards and final frames shown shot by shot. It is a demo, not a released film. The edited scene plays on the 3D animation generator page linked above.
Lost Garden, the long-form proof of the same pipeline. Two episodes, 38 minutes of finished anime, made by one person in ScreenWeaver. Episode 2 cost $1,850 and 75 hours. It is anime, not 3D, but its boards were generated in the same grey 3D previz style you saw above, and its characters were held with character sheets. The full case study: how I made a Japanese-style anime with AI.
FAQ
Can I make 3D animation with AI for free?
You can write the full script for free on ScreenWeaver's Screenwriter plan. Storyboard and video generation use credits on a paid plan, and voice, music and editing happen in other tools, some with free tiers. The writing, which decides most of the quality, costs nothing.
What is the best AI for 3D animation?
No single model wins every shot. Seedance 2.5 is our default because it takes up to 30 image references, which is what holds a stylised character on model. Test the same board on two models and keep the one that respects the sheet.
How do I keep a 3D character consistent across shots?
Build a turnaround sheet, an expression sheet and material close-ups before the first panel. Attach them to every shot instead of redescribing the character, and compare shot 1 with shot 10 before generating the rest of a scene.
Can I get a famous studio look without naming the studio?
Yes, and it works better. Describe what makes the look: rounded shapes, big glossy eyes, soft subsurface skin, dense fur, a warm key and a cool rim. A studio name gets you an averaged copy and a design you cannot own.
Can I make a 3D animated series or kids' videos for YouTube?
Yes. Series work because the same sheets carry over from episode to episode. For a children's channel, YouTube requires you to say whether each video is made for kids (YouTube Help, checked October 2026). Its AI disclosure label targets realistic content, and clearly animated content generally does not need it (YouTube Help, checked October 2026). For monetisation, YouTube's "inauthentic content" policy, renamed on 15 July 2025, excludes mass-produced, template-made videos (YouTube monetisation policies). An original script with your own characters is the opposite of a template.
Start with the gag
Write the logline and the first scene tonight. The free Screenwriter plan is enough: open ScreenWeaver. When the script is ready, build the turnaround, write the plate and board every shot.
For the full fiction pipeline beyond animation, read how to make an AI film.
Final Step
Build your next script with Screenweaver
Move from ideas to production-ready pages faster with timeline-native writing and AI-assisted story flow.
Try Screenweaver