
The short answer: a moodboard answers "what does it look like?", a storyboard answers "where is the camera and what happens?", and production answers "what will the audience actually see?". Work in that order: describe each character, place and object, block every shot in a rough previz, then apply the film's style and shoot the video. Fix each problem in the stage that owns it, and your shots stop drifting apart.
The three words are often used as if they were three drafts of the same picture, each one a bit prettier than the last. They are not. They are three different jobs, and each one answers a different question. When an AI film looks inconsistent, it is usually because one stage was asked to do another stage's job.
This guide takes one question per stage, compares the three in a table, then follows one scene through all of them in ScreenWeaver. The example is The Photo, a demo project with one scene (INT. THOMAS'S CAR - NIGHT, rain), two characters, one car, one old photograph and four shots. Thomas hands his sister Émilie a photo of the two of them as children, found at their mother's house. Her eyes fill with tears, then she smiles.
What the three words mean on a traditional film
Before any AI tool, these were three moments of a production, done by different people.
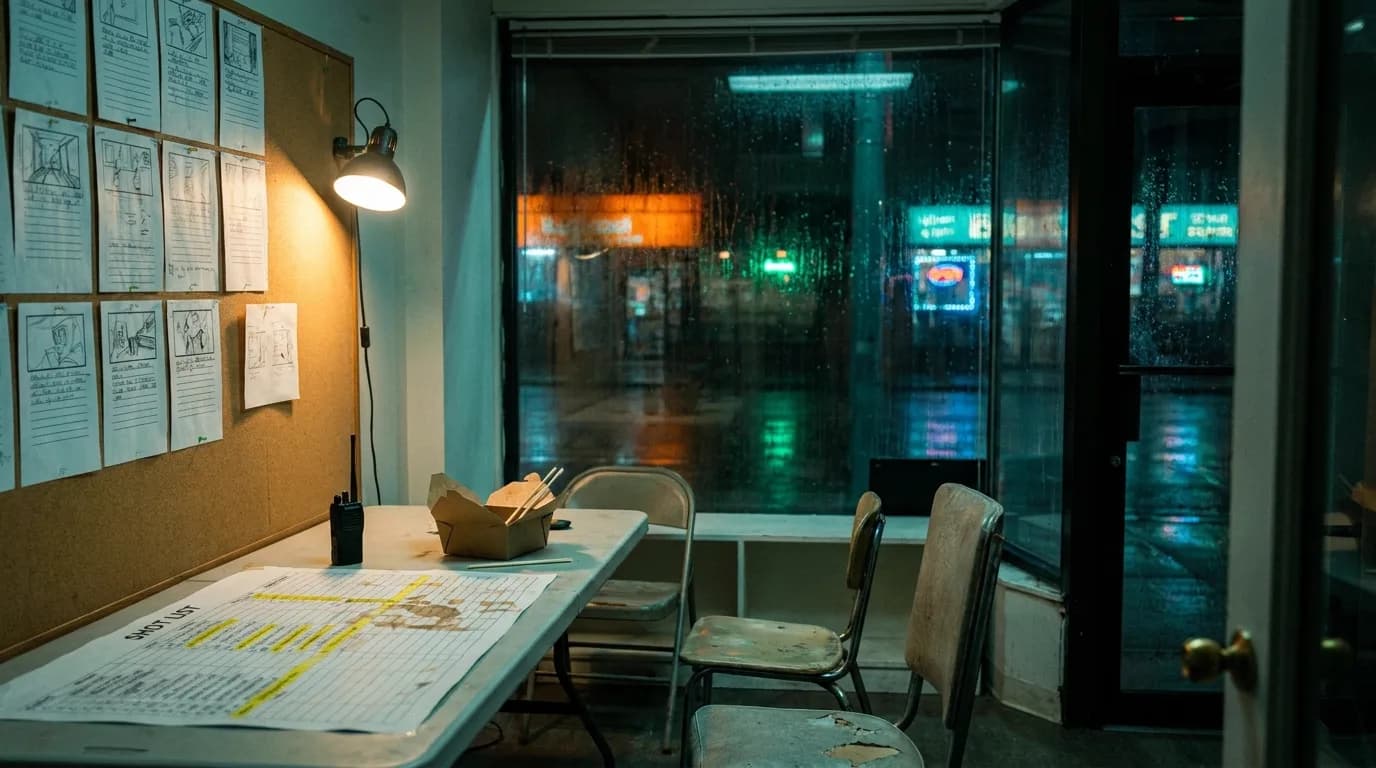
A moodboard is a collage of references: photographs, paintings, fabric, colour swatches, frames from other films. A director or a production designer puts one in a pitch deck to show producers the feel of a project, and the art department, the costume designer and the director of photography use it to agree on a tone before anything is built or bought. Nobody shoots a moodboard. It is about taste and texture, not about shots.
A storyboard is the film drawn shot by shot, in order. Each panel is a frame: who is in it, how big, seen from where, often with an arrow for the camera move. It is a working document for the crew. The director, the director of photography and the assistant director plan their setups from it, and every department checks what will be in frame. A shot list often sits next to it; the difference is explained in shot list vs storyboard.
Previz (previsualization) goes one step further: the storyboard rebuilt in rough 3D, with timing and camera moves, so the team can watch the scene play before shooting it. It is deliberately plain: simple shapes, flat light, stand-in characters. Its job is blocking and timing, not beauty.
Production, and the post-production that follows, is where the final image is made: real light, real costumes, real lenses, the grade, the takes. In animation and visual effects, people call it the final render.
The AI version keeps these jobs. It just lets one person do all three, in one project.
Moodboard vs storyboard vs production: the comparison
| Moodboard | Storyboard | Production | |
|---|---|---|---|
| Question it answers | What does each character, place and object look like? | Where is the camera, and what happens in each shot? | What does the finished shot look like, and how does it move? |
| What goes in | A description a camera could film, reference images, notes, audio | The script, the shot breakdown, the reference sheets | The art direction, the production reference sheets, the action of each shot, your choice of video model |
| What comes out | One reference sheet per element | One 3D blocking panel per shot, playable as an animatic | Final frames and video takes, in the film's style |
| Who it is for | You and your collaborators, and the model that draws the sheets | The director's eye: framing, staging, rhythm | The audience |
| What to change there | Age, hair, wardrobe, the model of the car, the details of the photo | Shot value, camera movement, duration, shot order, the action of a shot | The look of the film, the take you keep, the video model and its settings |
Read the last row twice. Most wasted hours come from fixing something in the wrong column: rerolling a video to fix a framing, or rewriting a style prompt to fix a coat.
How the three connect in one project
In ScreenWeaver, the header shows three numbered tabs, Script, Storyboard and Production, and each one feeds the next. The moodboard is not a separate tool: it lives in the Story elements of your script. Here is the same scene, The Photo, at each stage.
Stage 1, the moodboard: what things look like
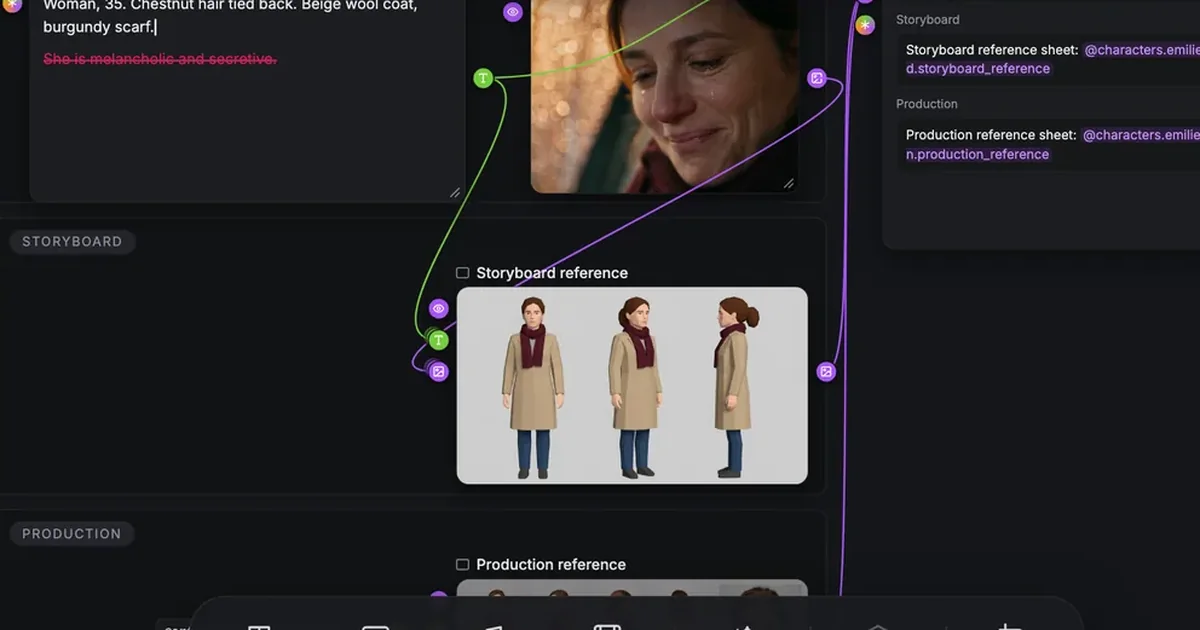
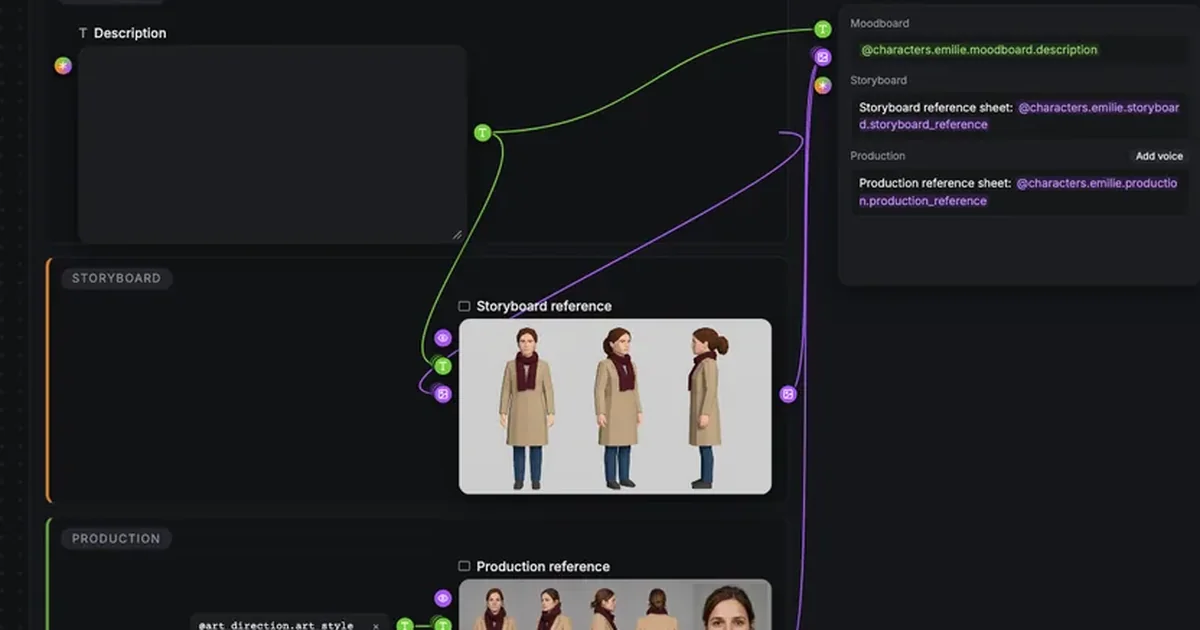
Open Story elements from the sidebar of the Script tab. Every character, place and object of your film gets one group on this canvas, and every group has the same three stages stacked from top to bottom: Moodboard, Storyboard, Production.
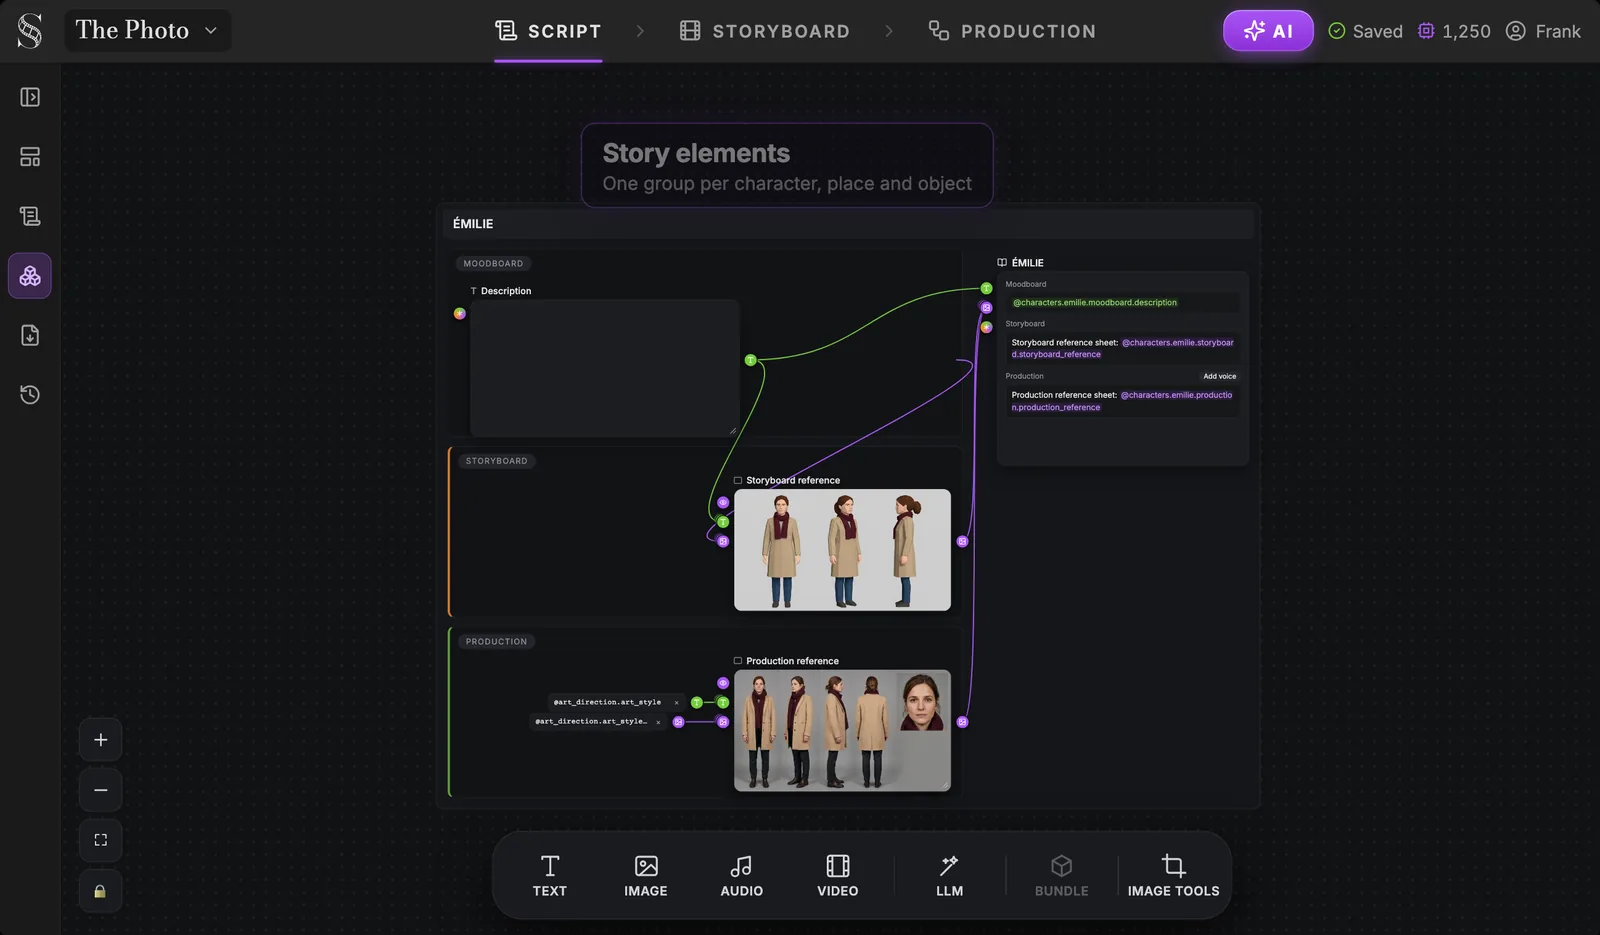
The three stages of this group are the three stages of this guide, applied to one character. The Story element node on the right gathers them in three fields, Moodboard, Storyboard and Production, with an Add voice button that attaches an audio reference.
The Moodboard stage holds a pinned Description and anything you drop next to it: images, text, audio. One rule matters more than anything else in the whole pipeline: write a description a camera can film.
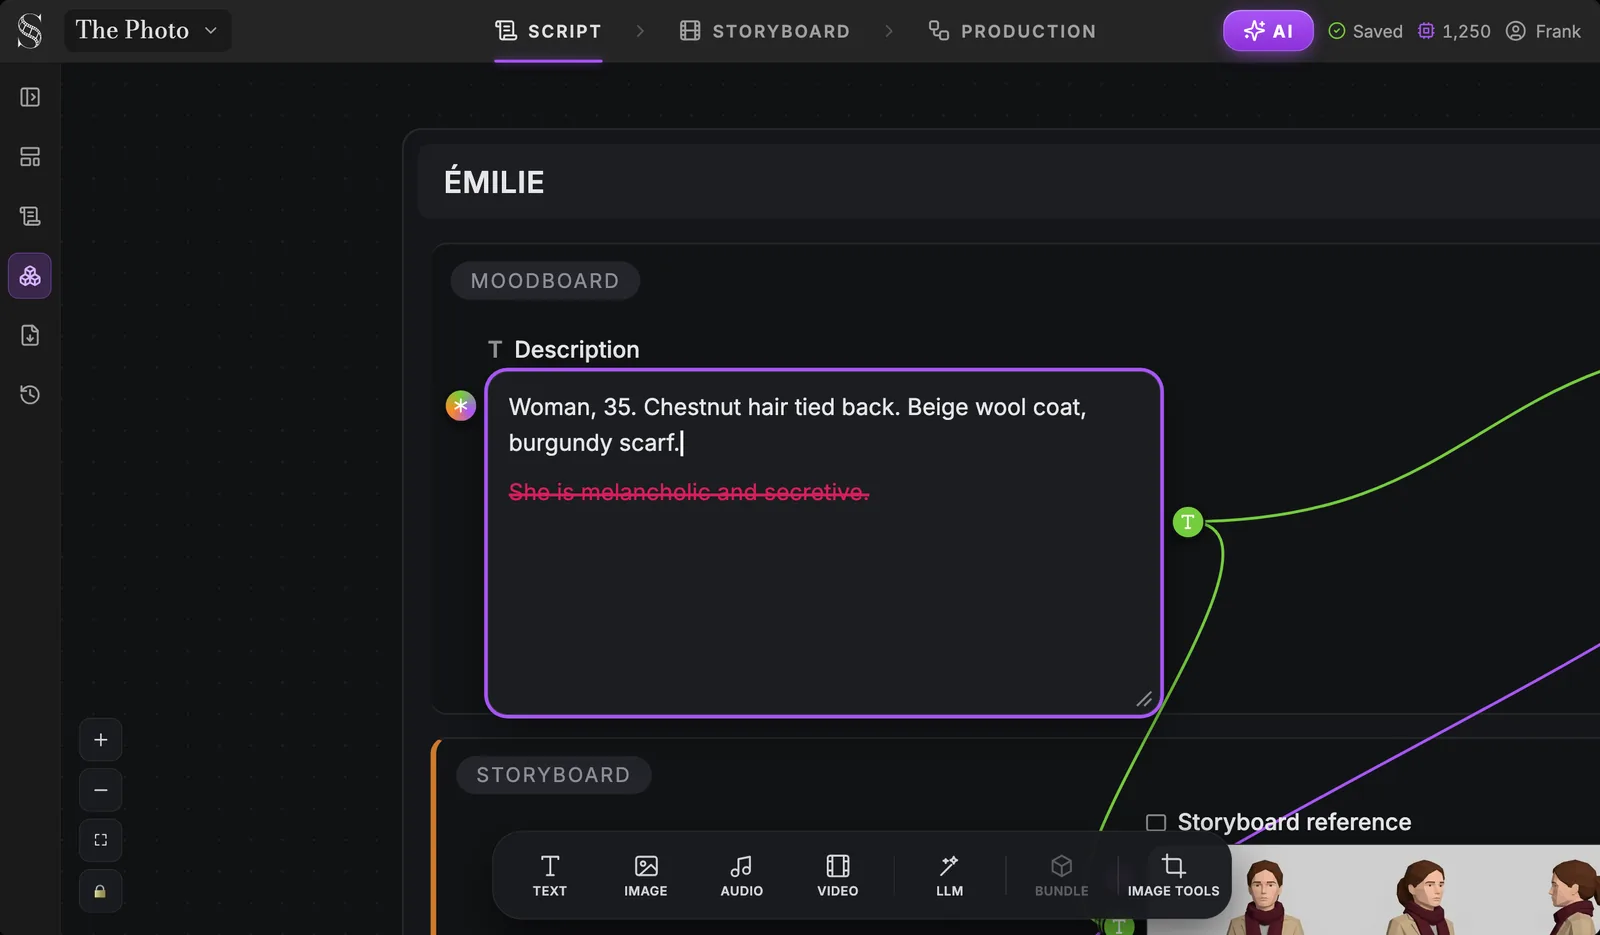
"Woman, 35. Chestnut hair tied back. Beige wool coat, burgundy scarf." Every word of that line can be checked in a frame. "She is melancholic and secretive" cannot: there is no such thing as a secretive coat, so the line either does nothing or pushes the face somewhere you did not choose. Keep personality in the script, in what she does and says. The same goes for places and objects: "a parked sedan at night, engine off, rain streaming down the windshield" gives the model something to draw; "a cramped, tense space" does not.
Then drop your references. In the demo, a photo of the actress's face sits next to the description.
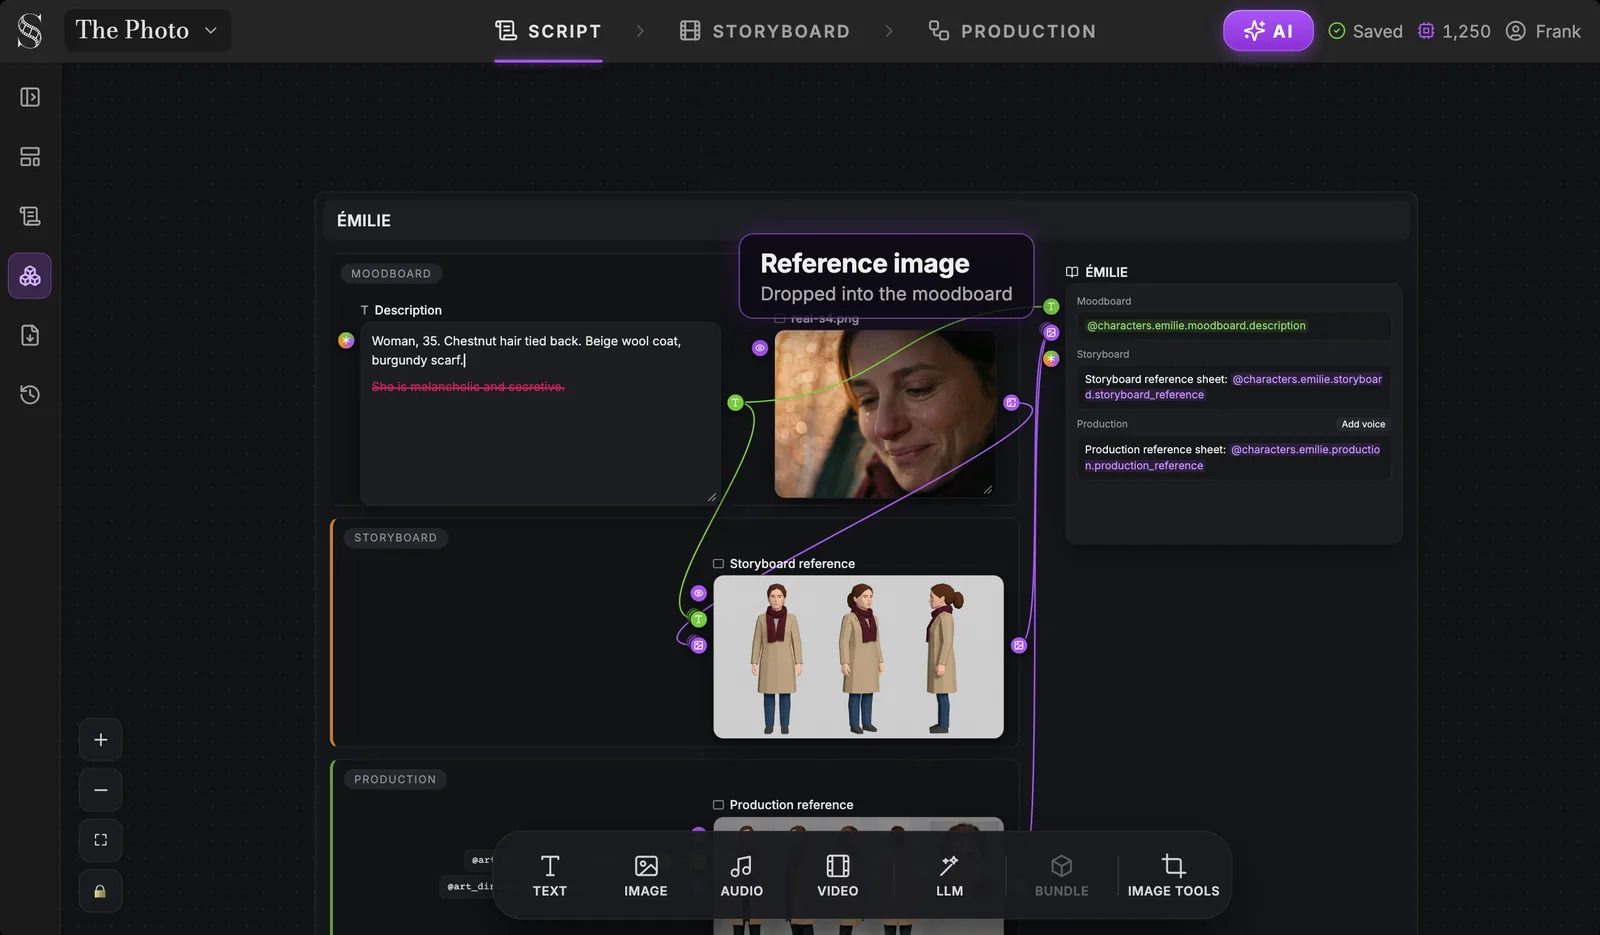
One limit to know: you cannot generate images inside the moodboard. It is a place for your words and your references. The generated material starts one stage lower, with the Storyboard reference sheet: a clean full-body model sheet of the character, in previz style on plain white, made once and reused in every shot. The method for these sheets, from description to final sheet, is in how to make an AI character sheet for film.
Stage 2, the storyboard: where the camera is and what happens
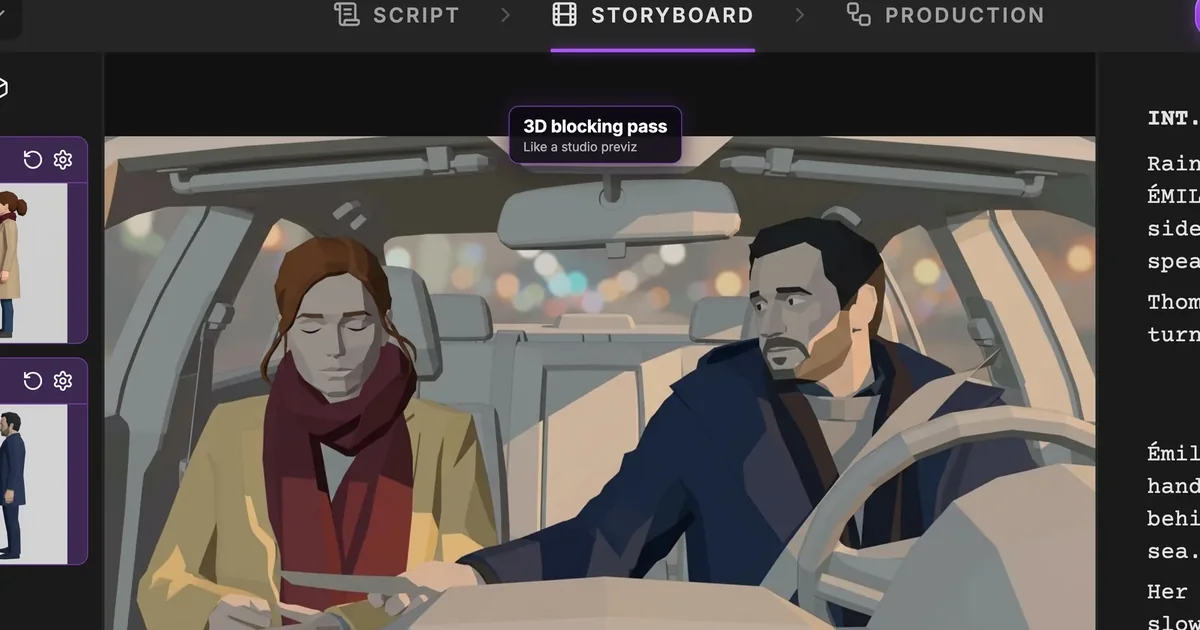
Switch to the Storyboard tab. Every shot of the scene gets a panel, and here is one at full size.
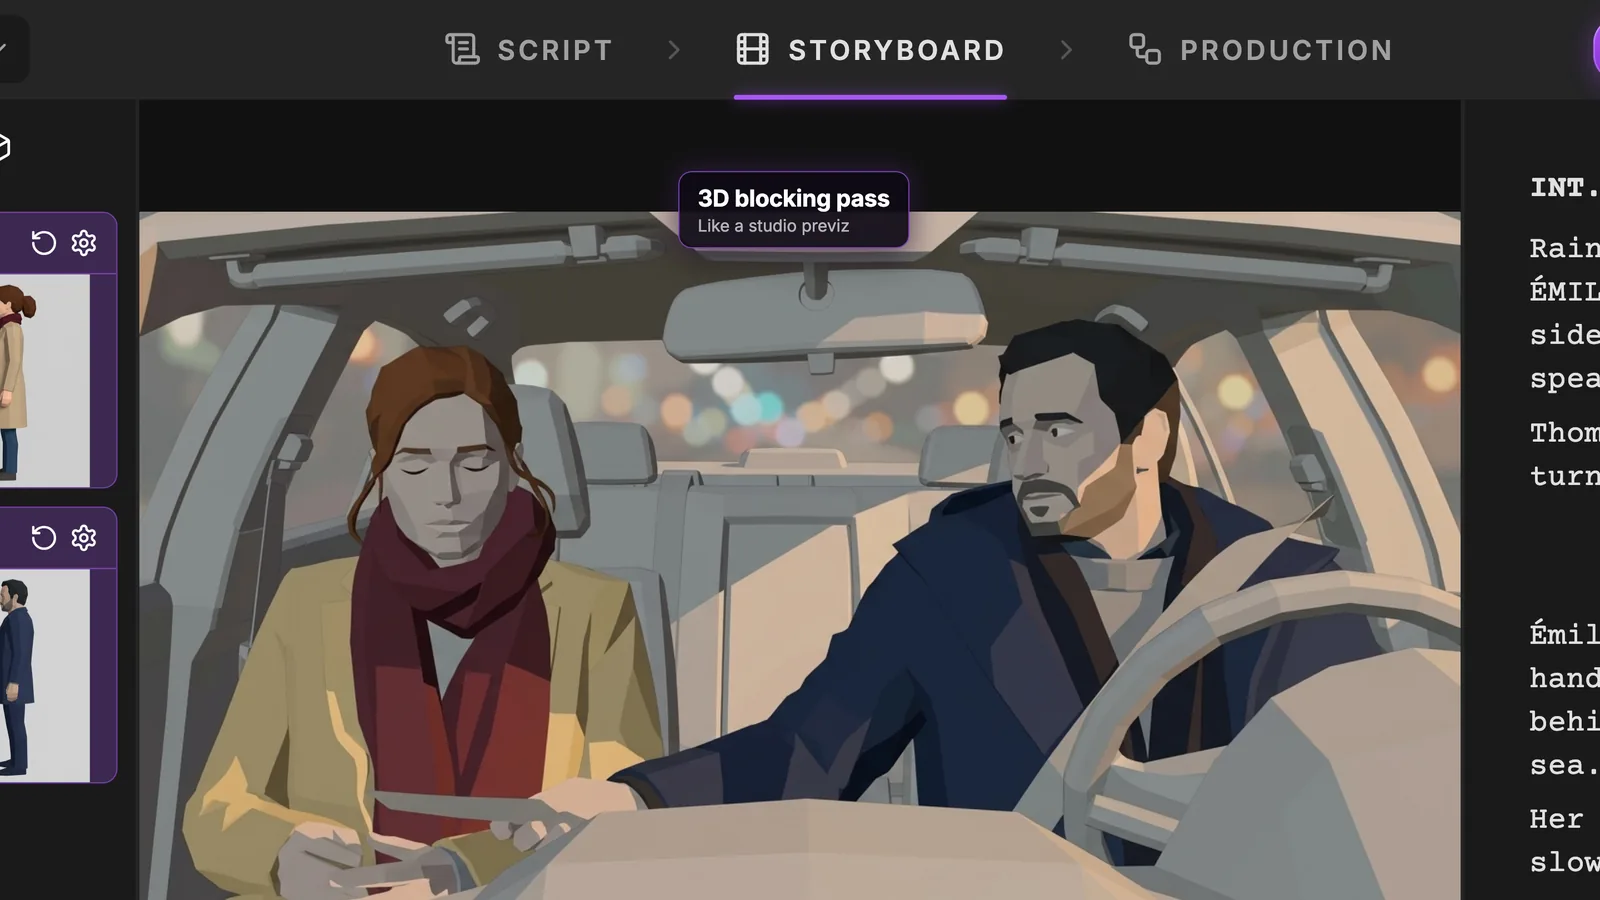
That panel is not a rough draft of the final film. It is built that way on purpose: a 3D blocking pass, the same idea as studio previz. Simple shapes and flat shading leave you nothing to judge except what a storyboard should decide. Who is in frame, and how big. Where the camera stands. Where the light comes from. Who looks at whom. Here, Thomas has turned toward his sister, the photo is between them and the city lights sit behind the windshield. Those decisions carry over to production. The flat faces do not.
The storyboard also answers "when". Every shot has a duration, and the Play button runs the whole scene as an animatic, with the script following along.
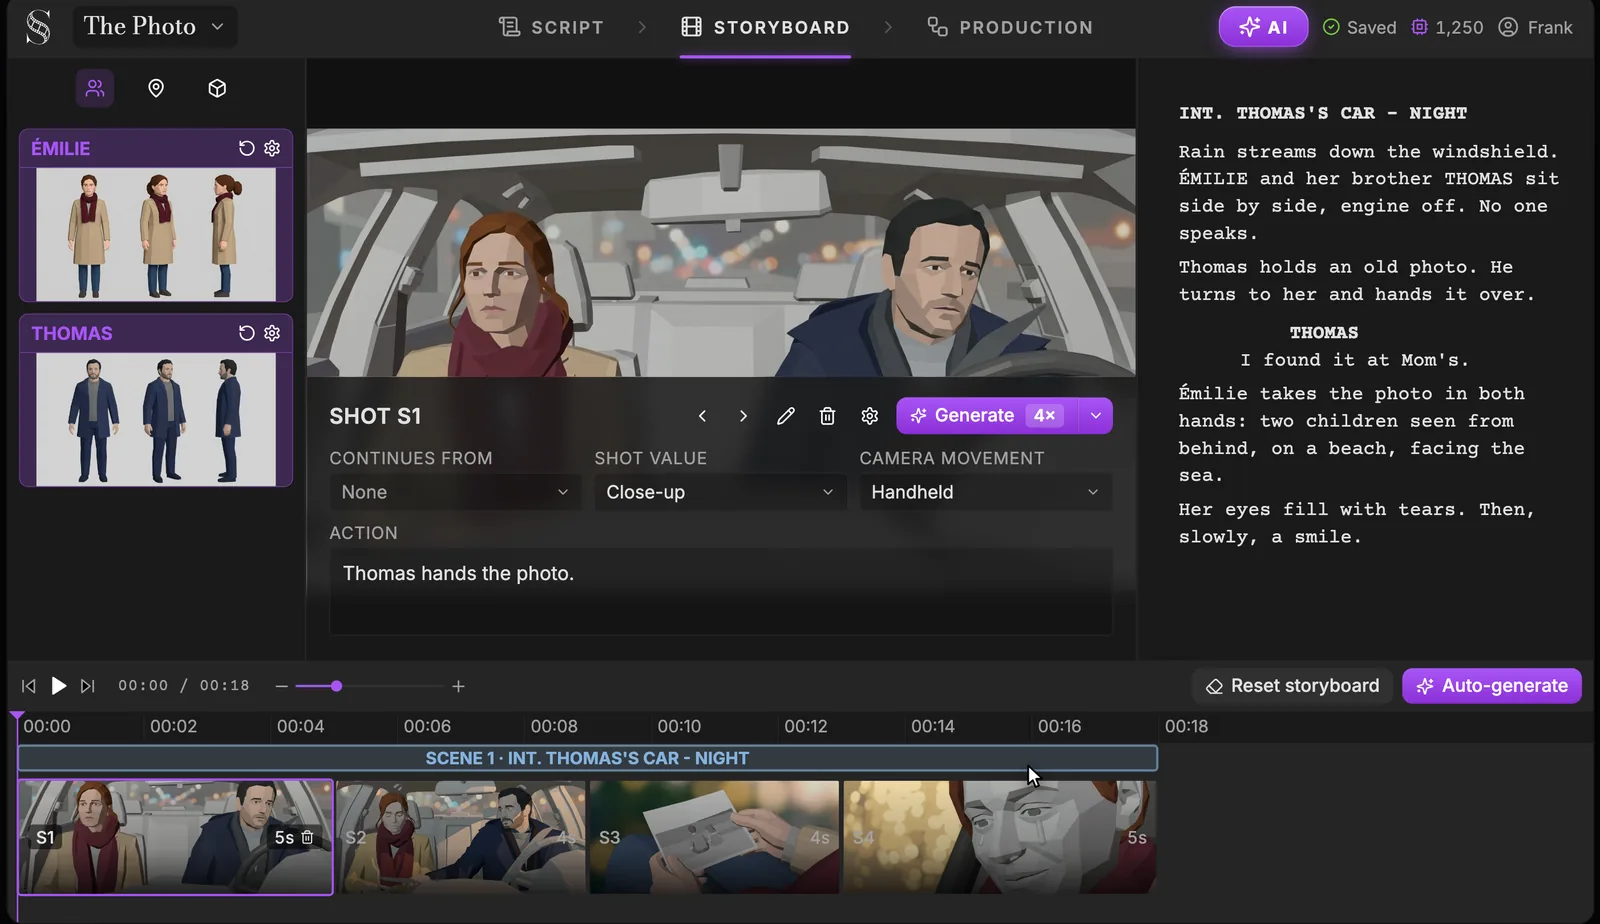
Each shot carries its decisions in plain fields: Continues from, Shot value, Camera movement and Action. The four blocks of the sequencer are the four shots of the scene, and a block's width is its length: 5, 4, 4 and 5 seconds, 18 seconds in all. The animatic is a tool for you, not a deliverable: it has no sound, and the storyboard is not exported as a video or a PDF.
If you would rather not break the scene down by hand, the Auto-generate button at the bottom right of the same screen creates the missing reference sheets, the shot breakdown (how many shots, which shot value, which camera movement) and the panels, in one window. The full walkthrough is in AI previz: a storyboard from your script, and if you come from paper, how to make a storyboard from a screenplay covers the craft side.
So, storyboard or previz? In ScreenWeaver the two meet. Each panel is a previz frame, and the animatic gives you the timing a paper board never had. What it does not give you is the final look, and that is the next stage.
Stage 3, production: the final image, in the film's style
The Production tab opens on a node canvas built from your storyboard, with nothing to wire. At the very top sits the Artistic direction section.
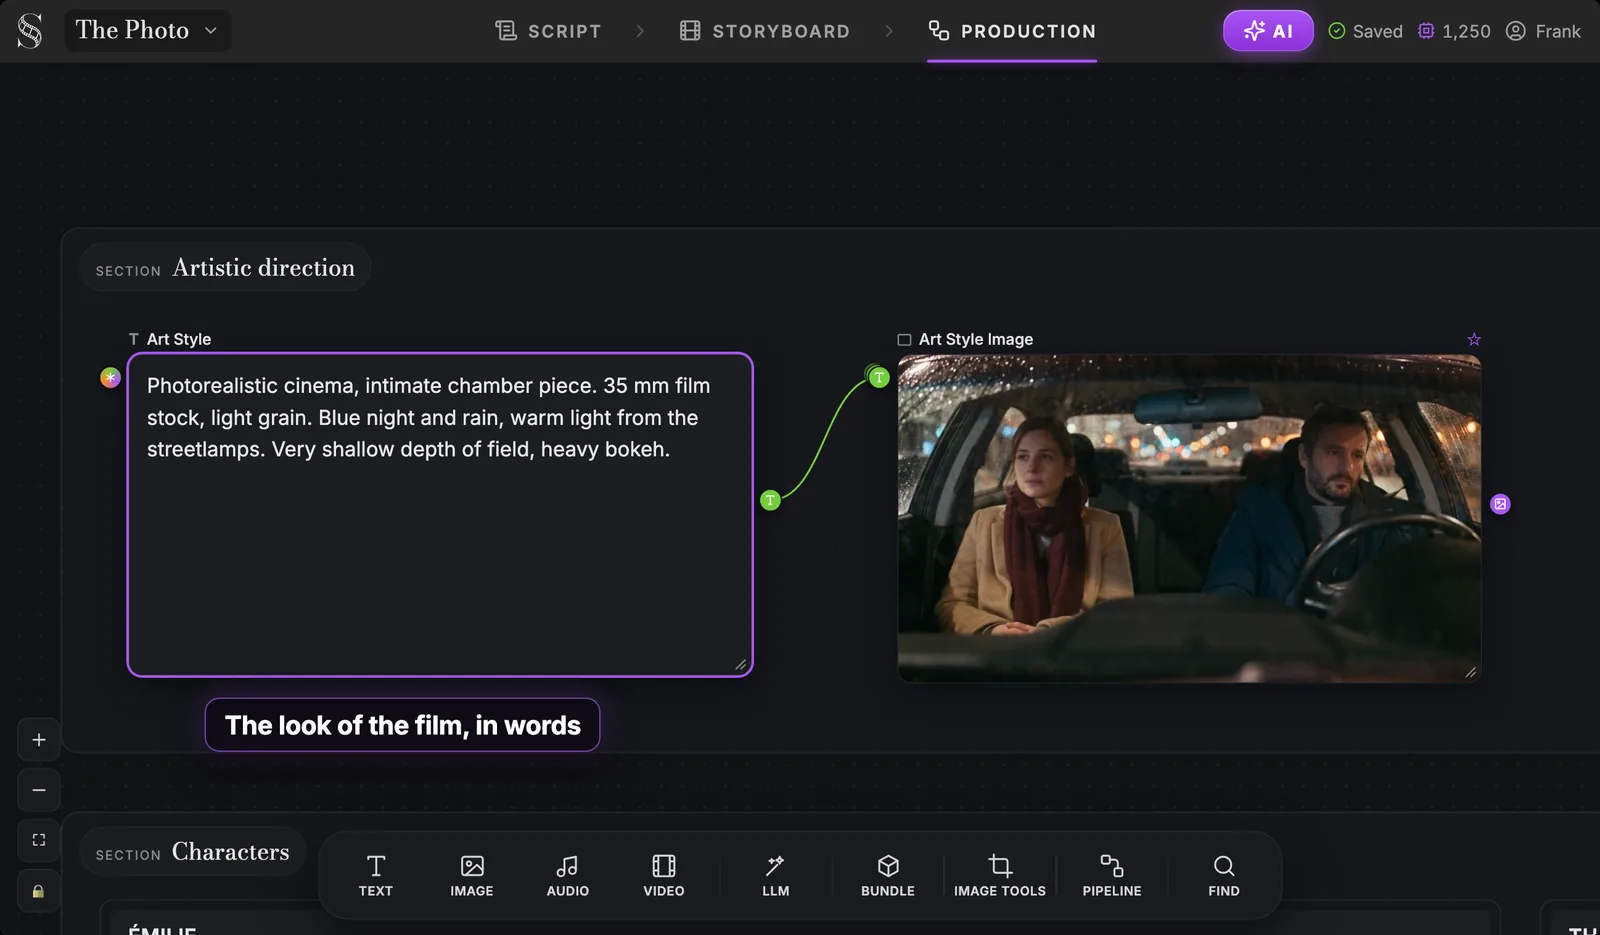
The Art Style text is where the look lives: "Photorealistic cinema, intimate chamber piece. 35 mm film stock, light grain. Blue night and rain, warm light from the streetlamps. Very shallow depth of field, heavy bokeh." Each phrase is a craft decision you could give a cinematographer: a cool blue grade against warm practical lights, and bokeh from a very shallow focus.
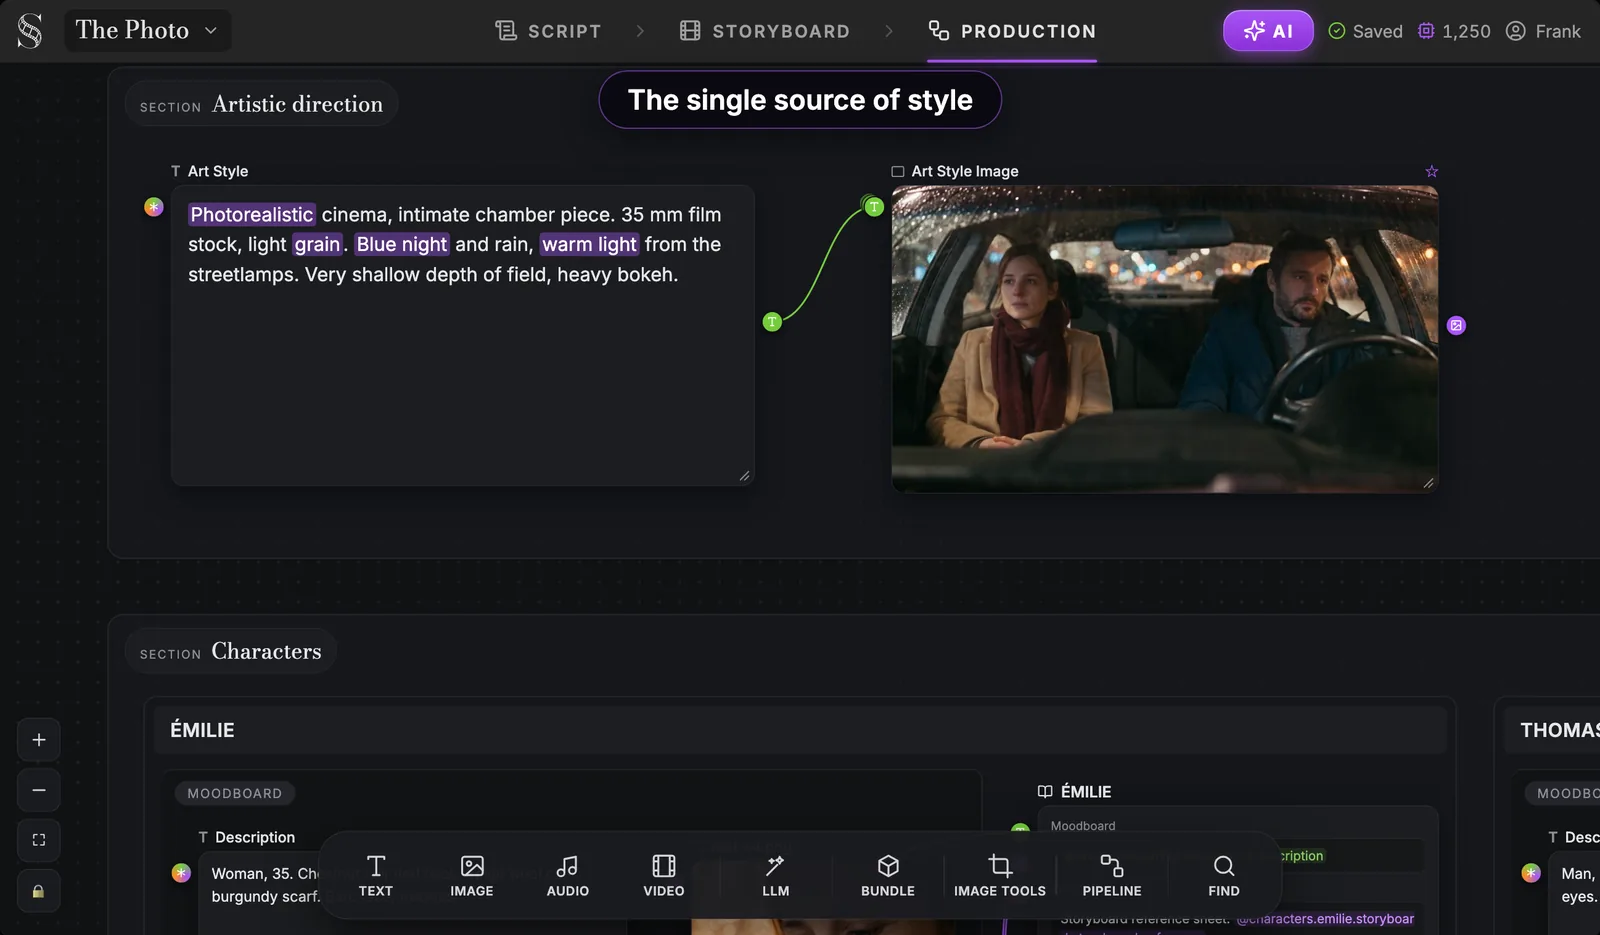
This is the real difference between the moodboard and production. The moodboard describes things: a woman, a coat, a car. The art direction describes the film: the stock, the grain, the colour of the night. Because it is the single source of style, you change it in one place and every shot follows. Keeping one look across many shots is a whole topic of its own, covered in AI video style consistency.
Below the art direction, each character, place and object gets its Production reference sheet: the same element as in the moodboard, re-rendered in the film's final style.
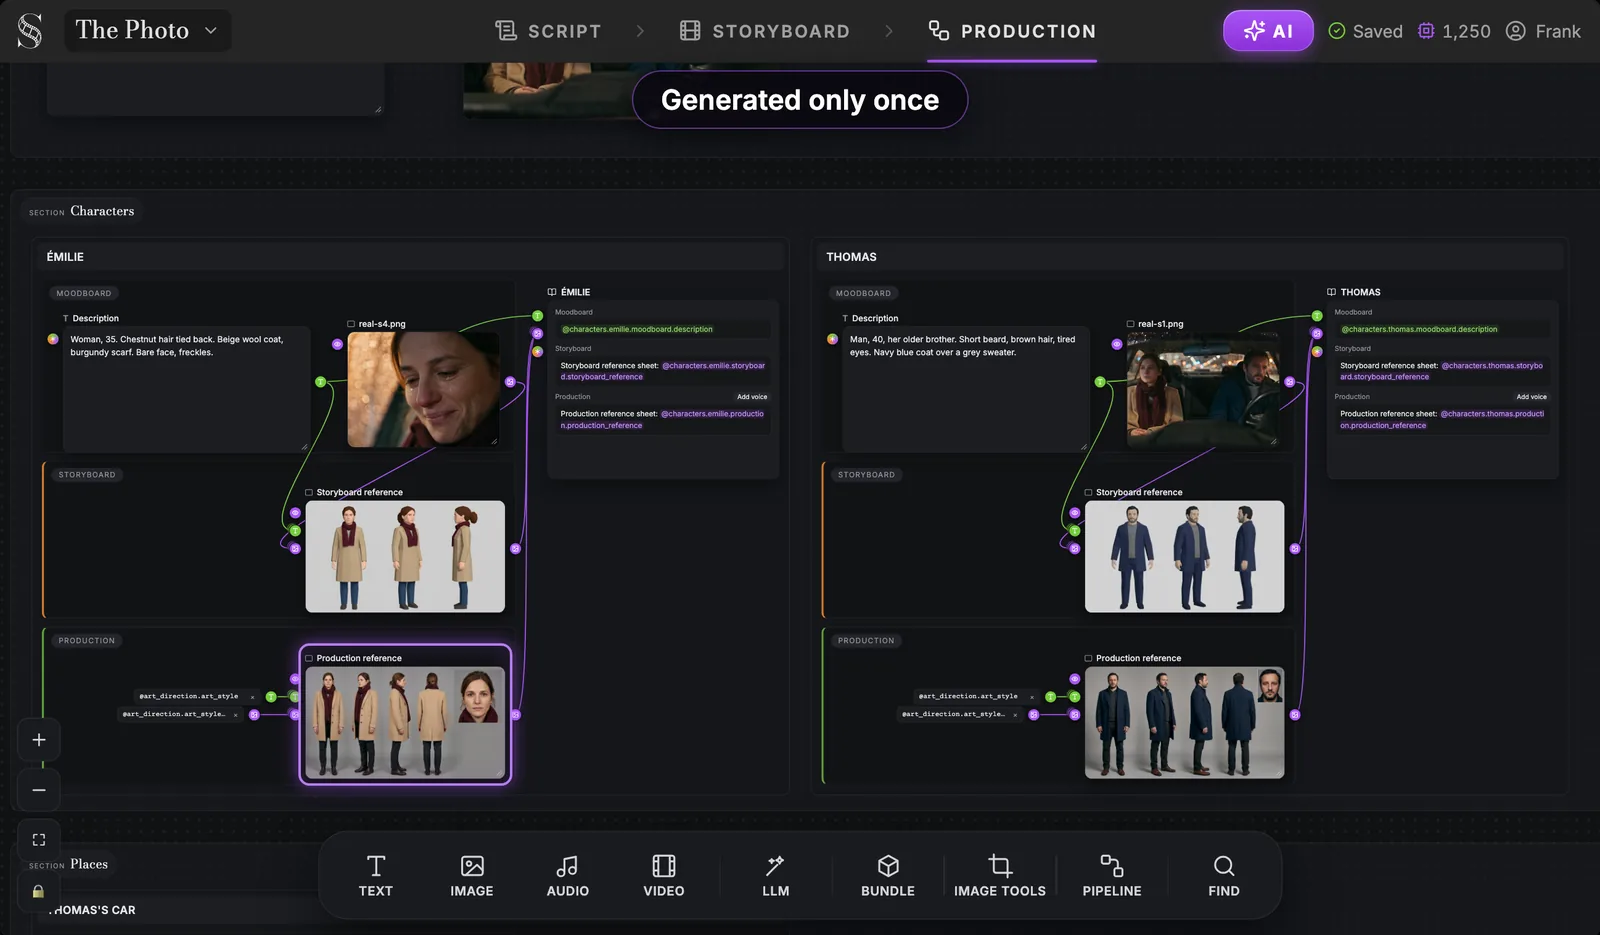
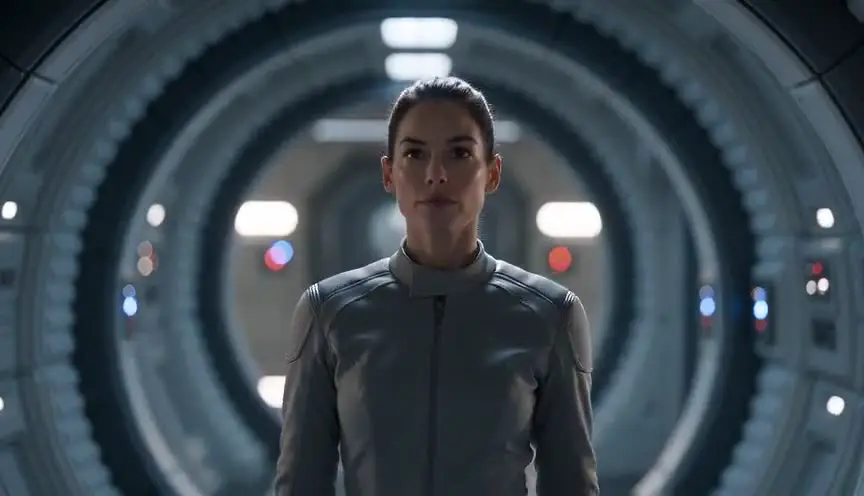
Read one group from top to bottom and you have this whole guide in one picture: the description and the photo (moodboard), the previz sheet (storyboard), the photoreal sheet (production). The same woman, the same beige coat, the same burgundy scarf, three different jobs. The production sheet takes its look from the art direction above it, so you never describe the style again character by character.
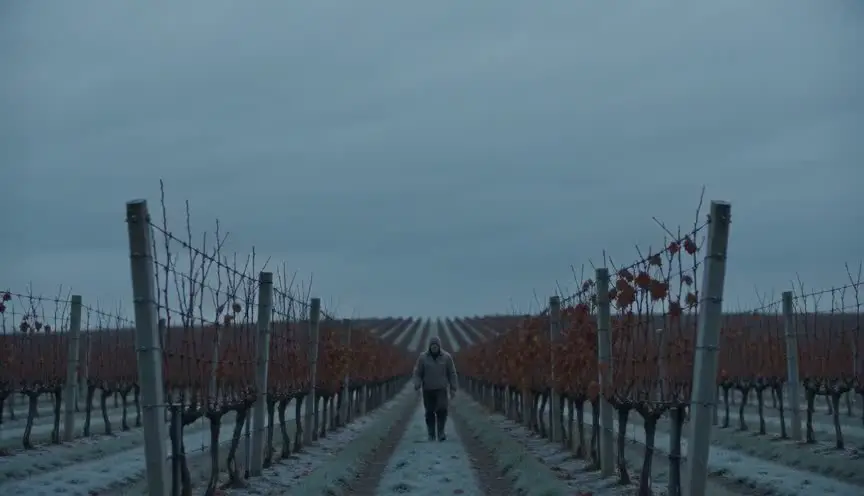
Then comes the moving image. Here, a frame generated in the film's style is wired as the start frame of a Video node.
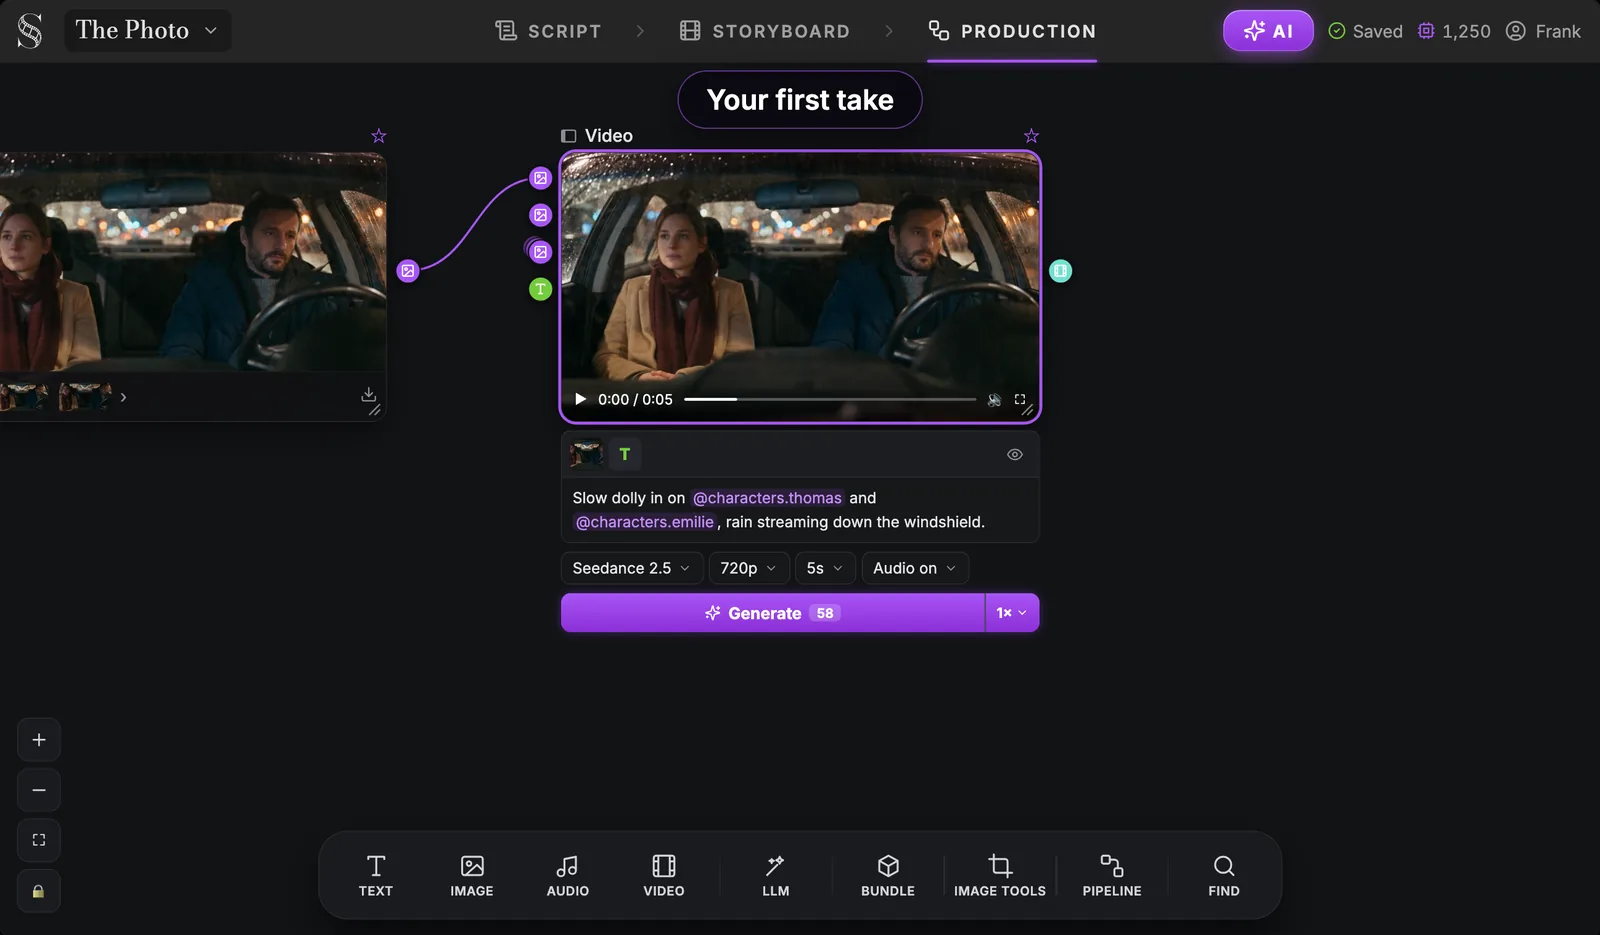
Notice how short the prompt is: "Slow dolly in on @characters.thomas and @characters.emilie, rain streaming down the windshield." The faces come from the references, the look from the art direction, and the dolly in is the camera move chosen for the shot on the board. Seedance 2.5 is the default and recommended model, and other models such as Veo 3.1 and Kling v3.0 are available. Every node keeps its takes, so you compare them and keep the best one.
For a whole scene, you add a pipeline in the scene's Production group. It gathers the shots, the characters, the car and the photo, and a Scene video node shoots the scene as one clip.
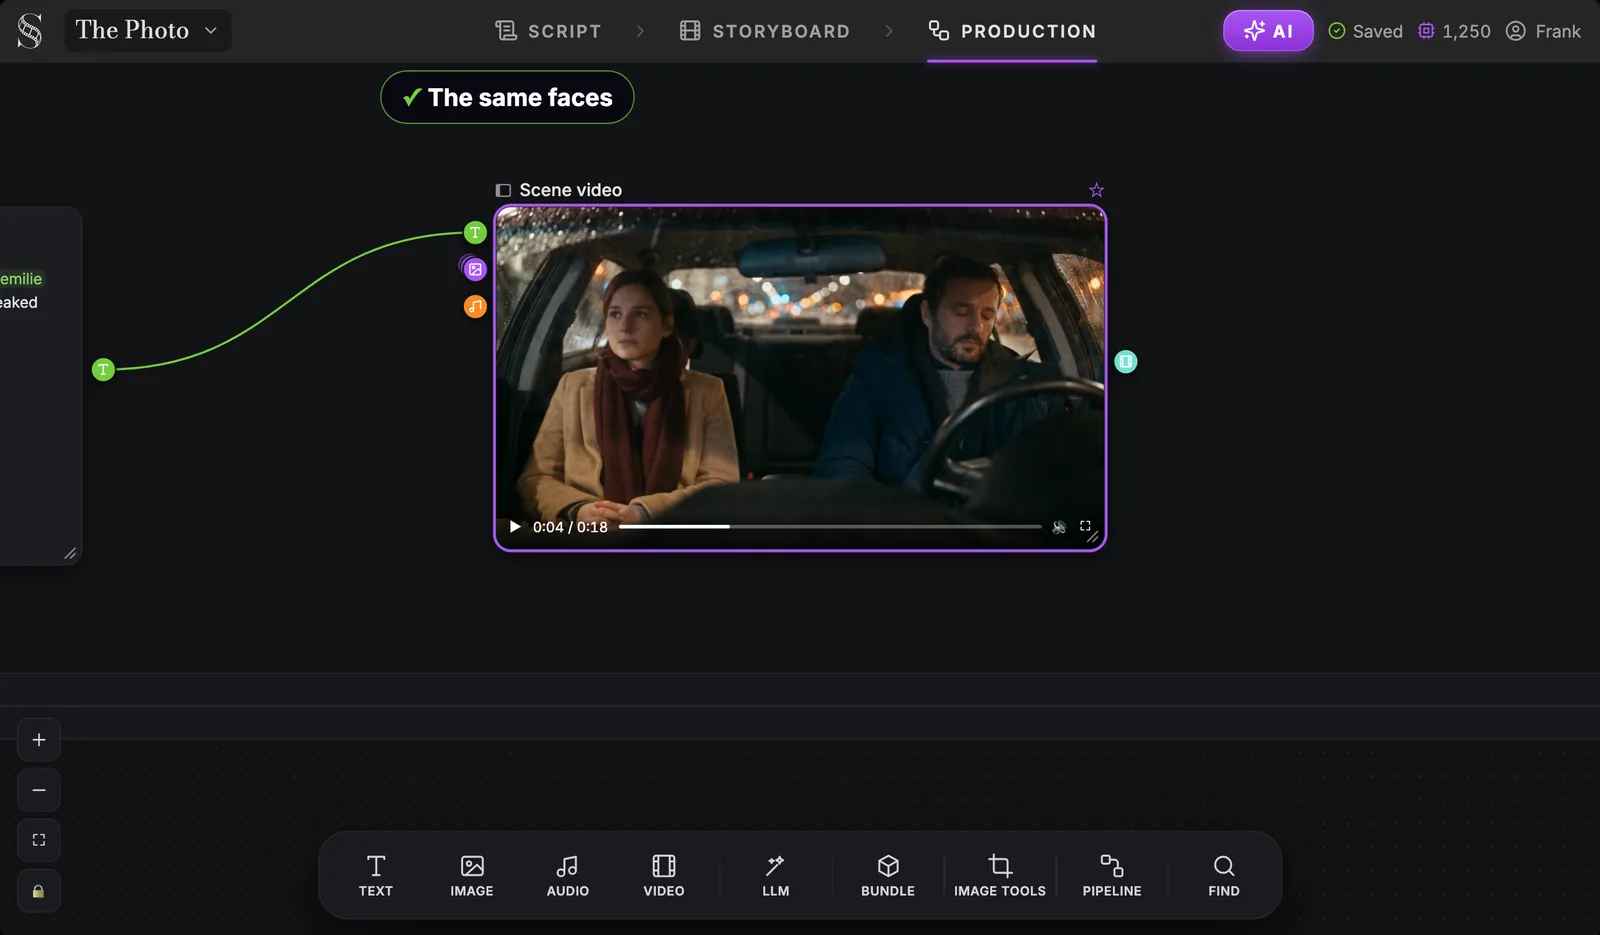
That is the payoff of keeping the stages apart. The moodboard fixed who these people are. The storyboard fixed what happens, from where, and for how long. Production only had to make it look like the film. The two scene pipelines are compared in multi-shot AI video: the scene pipeline.
Try it free
Try Screenweaver for free on your script
It is free. Import your existing project, get a clearer view of your outline, and regain control of your story structure in minutes.
Start FreeThe classic mistakes
1. Chasing the final look in the storyboard. The panels are greybox on purpose. Regenerating them again and again because the faces look flat is fighting the tool: judge a panel on framing, staging, light direction and timing, nothing else. The look arrives in production, from the art direction. A panel that tells the right story with flat faces is a finished panel.
2. Skipping the moodboard description. Without a filmable description, every reference sheet is a guess, and every shot inherits that guess. Two lines are enough: age, build, hair, the clothes she wears in this film, one detail the camera will catch. For a place, what is in it and what light falls on it. For an object, its size, colour and wear.
3. Writing personality instead of appearance. "Melancholic", "secretive", "tense" are acting notes. They belong in the script, in the action lines and the dialogue, where they shape the shots. In the description, they do nothing you can see.
4. Putting style words in the wrong place. "Photorealistic, 35 mm, moody" inside a character description pulls against the art direction and can make one character look out of place next to the others. Describe things in the moodboard, describe the film in the Artistic direction.
5. Fixing a framing problem in production. If the camera is in the wrong place, a new video take will not move it. Go back to the storyboard, change the shot value, the camera movement or the action, then run the shot again in production.
Why the order matters even more with AI
On a film set, people fill the gaps between the three stages: the costume designer knows the moodboard, the camera operator knows the board. A video model knows only what you hand it. If the look, the staging and the timing all have to come from a single prompt, each new shot rolls the dice on all three at once.
Working storyboard first splits the dice. The moodboard settles appearance once, the board settles staging and timing once, and each video take only has to get the motion right. That is the reasoning behind a storyboard-first AI video workflow, and it is why an AI storyboard generator earns its place before the first video credit is spent.
FAQ
What is the difference between a moodboard and a storyboard?
A moodboard shows what things look like: people, places, objects, textures, colours. A storyboard shows the film shot by shot: where the camera is, who is in frame and what happens, in order. The moodboard has no shots and no sequence; the storyboard has no interest in the final texture. You need the first to make the second consistent.
What is a moodboard in film?
It is a collection of references used to agree on the look of a project before production: photos, paintings, fabrics, frames from other films. Directors use it in pitch decks; the art department, costume and camera teams use it to align. In ScreenWeaver, each character, place and object has its own moodboard, with a written description and dropped references.
Is previz the same as a storyboard?
Not quite. A storyboard is a series of still panels; previz rebuilds the scene in rough 3D with timing and camera moves. ScreenWeaver's storyboard sits between the two: each panel is a 3D blocking pass, and Play runs the board as an animatic with each shot's duration.
What is the difference between previz and the final render?
Previz decides framing, staging, light direction and timing with simple shapes and flat shading. The final render is the image the audience sees, in the film's real style. In ScreenWeaver, the storyboard is the previz, and the Production tab makes the final frames and video, driven by the art direction and the production reference sheets.
Do I need a moodboard if I already have a storyboard?
Yes, if you want the same characters from shot to shot. The storyboard decides where people stand, not exactly what they look like. The description and references in the moodboard are what the reference sheets are built from, and those sheets are reused in every shot.
Can I generate images inside a ScreenWeaver moodboard?
No. The moodboard holds your description and anything you drop: images, text, audio. Generated images start with the reference sheets in the Storyboard and Production stages of the same group.
Why does my AI storyboard not look like my final film?
Because it is not meant to. The storyboard panels are a 3D blocking pass that locks framing and staging, not the final style. The look comes from the Artistic direction in the Production tab, which feeds the production reference sheets and every shot.
Start with the moodboard
Write the scene, then give every character, place and object two filmable lines of description. The script editor, the outline and the moodboards are free on the Screenwriter plan; the storyboard and video production come with the paid Auteur plan. Create your free account and start with the moodboard.
Final Step
Build your next script with Screenweaver
Move from ideas to production-ready pages faster with timeline-native writing and AI-assisted story flow.
Try Screenweaver