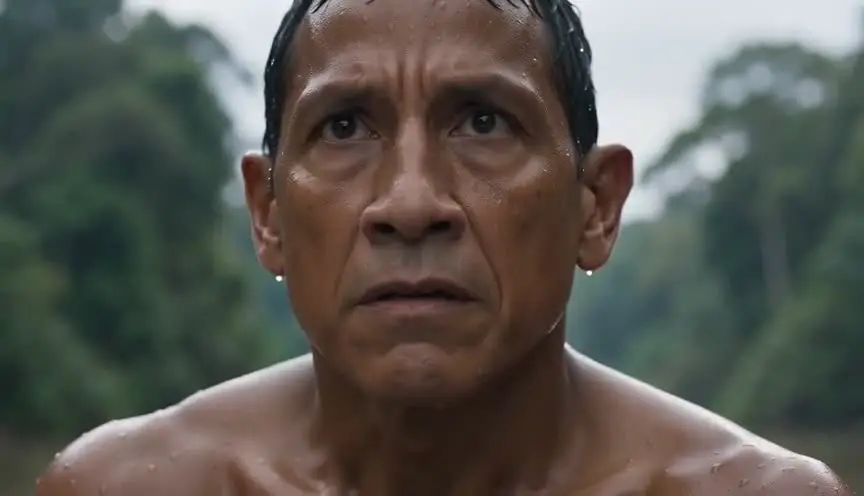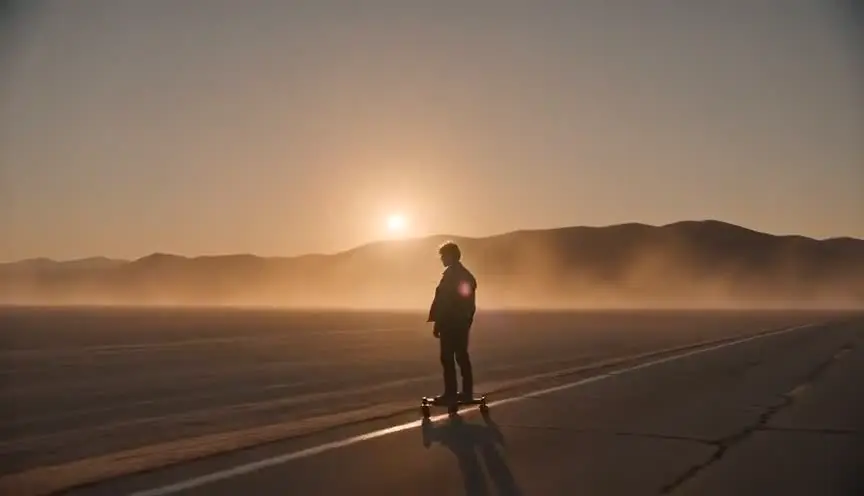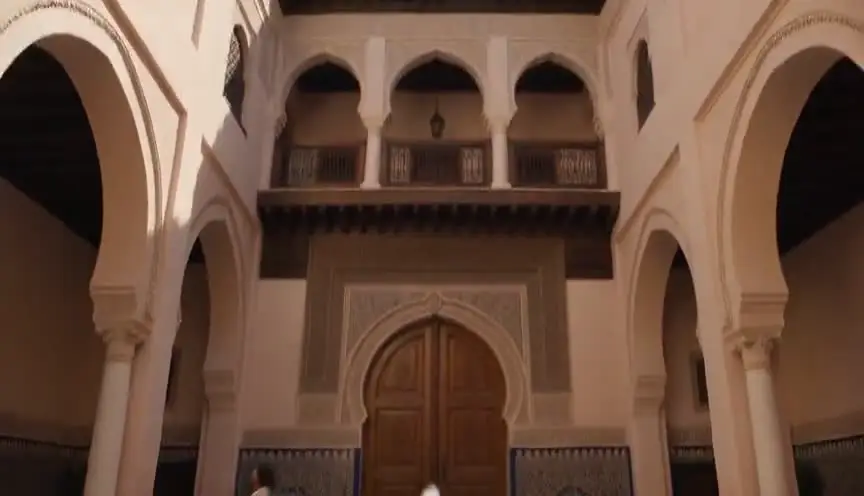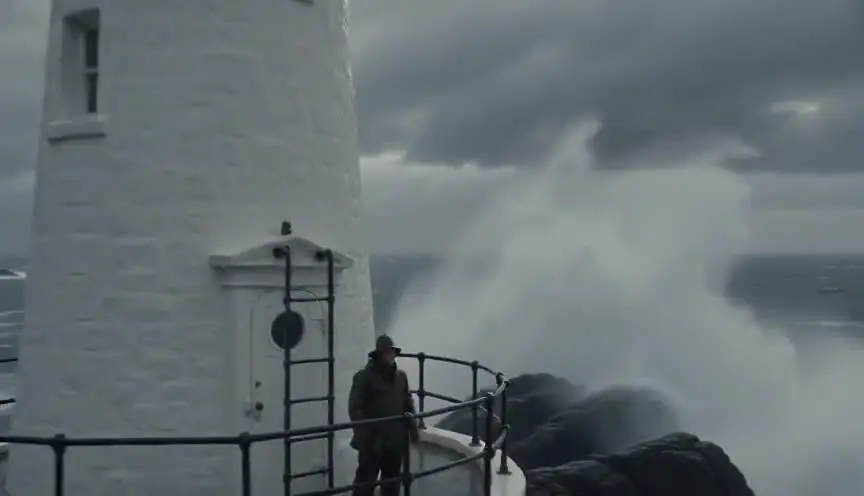

The short answer: AI previz turns each scene of your script into a sequence of rough 3D blocking panels that lock framing, staging, light and timing before you spend anything on final images or video. In ScreenWeaver, the Storyboard tab reads your scenes, breaks them into shots and generates one blocking panel per shot in a single Auto-generate pass. You then direct each shot (shot value, camera movement, action, duration, order) and play the result as an animatic.
This guide walks through the whole Storyboard tab with one small demo project, The Photo: a single scene, INT. THOMAS'S CAR - NIGHT, rain on the windshield. Thomas hands his sister Émilie an old photo of the two of them as children, found at their mother's house. He says "I found it at Mom's." Her eyes fill with tears, then she smiles. Four shots, eighteen seconds. Every screenshot below is the ScreenWeaver interface with that demo project loaded.
If you want the general method for boarding a script with AI (descriptions, shot lists, how to judge a panel), read the full AI storyboard from script walkthrough first. This page has a narrower job: what previz is, why a rough 3D pass is the right look at this stage, and how to direct every shot of it.
What previz is, and why studios bother
Previsualization, previz for short, is a rough moving version of a scene made before the real shoot or the real render. On large productions, a previz team builds simple 3D versions of complex sequences so the director, the director of photography and the effects team can agree on where the camera goes, who stands where and how long each beat lasts. Animation studios do the same thing with story reels: boards timed to the dialogue, watched like a film.
The point is never beauty. The point is decisions. A previz answers four questions that are expensive to answer later:
- Framing. Is this a medium two-shot or a close-up? Where is the horizon, who is on the left?
- Staging. Who sits where, who hands what to whom, where do the eyes go?
- Light. Where does the light come from, and does it stay there from shot to shot?
- Timing. How long does each shot hold, and does the cut land on the beat?
Get those right in a cheap medium and the expensive stages (final images, video generation, the edit) only have to execute.
Why a 3D blocking pass beats a pretty frame at this stage
When people first try script-to-storyboard AI, they want the panels to look like the finished film. That feels like progress, and it works against you.
A finished-looking frame starts a style debate. Is her coat the right beige, is the grain right, is the light too warm? None of that matters yet, and all of it distracts from the question the panel should answer: does this shot tell the story? A finished-looking frame is also expensive to throw away, so you keep it even when the staging is wrong.
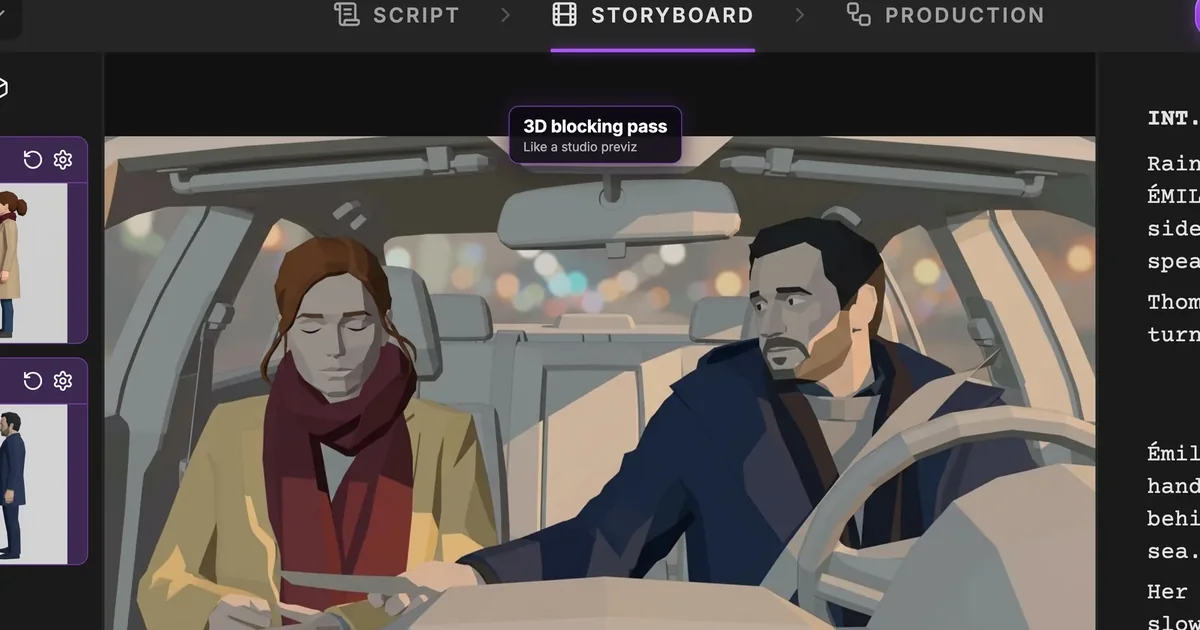
A blocking pass removes that temptation. Each ScreenWeaver panel is drawn as a 3D blocking pass, a flat-shaded previz look close to what a studio previz team produces. It shows bodies, positions, eyelines, the shape of the set and the direction of the light, and nothing else. Redoing it costs little, so you redo it freely. The final look comes later, in the Production tab, where the film's Artistic direction drives every image.
If you come from animation, this is the same logic as moving from boards to blocking, covered in depth in our 3D animation storyboard guide.
Before you start: a script and its story elements
The Storyboard tab works from what is already in your project. You need a written scene and, ideally, the characters, places and objects of that scene created as story elements, each with a short visual description. For The Photo, that means Émilie, Thomas, Thomas's car and the photo.
You do not have to generate their reference sheets by hand first: Auto-generate does it for you, as you will see below. But the descriptions matter. Write what a camera can film (age, hair, coat, scarf color), not personality traits: "She is melancholic" draws nothing, "beige wool coat, burgundy scarf" draws the same woman in every panel.
Step 1: Pick the project aspect ratio
The first time you open the Storyboard tab, ScreenWeaver asks you to choose the project aspect ratio. This is a framing decision, so it belongs at the very start of previz.
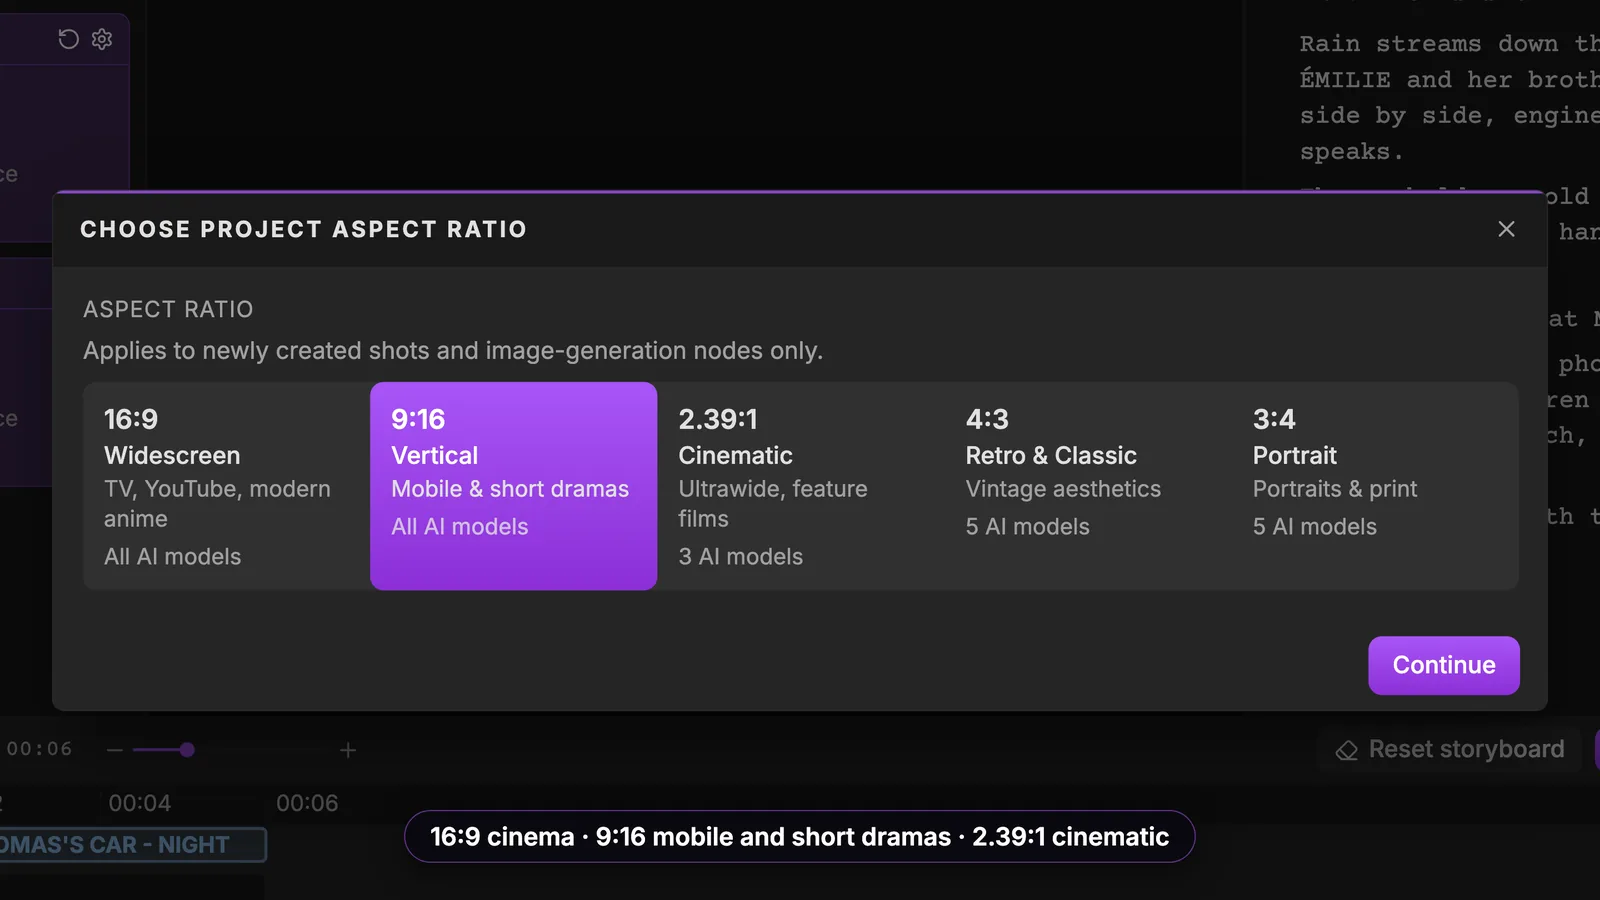
The five options are 16:9 Widescreen, 9:16 Vertical, 2.39:1 Cinematic, 4:3 Retro & Classic and 3:4 Portrait. Each card says which use it suits and how many AI models support it. As the modal says, the choice applies to newly created shots and image nodes, so pick it before you generate anything. A vertical short drama staged in 16:9 and cropped later loses half of every composition.
Step 2: Read the four areas of the Storyboard tab
The Storyboard tab is split into four areas, and each one has a single job.
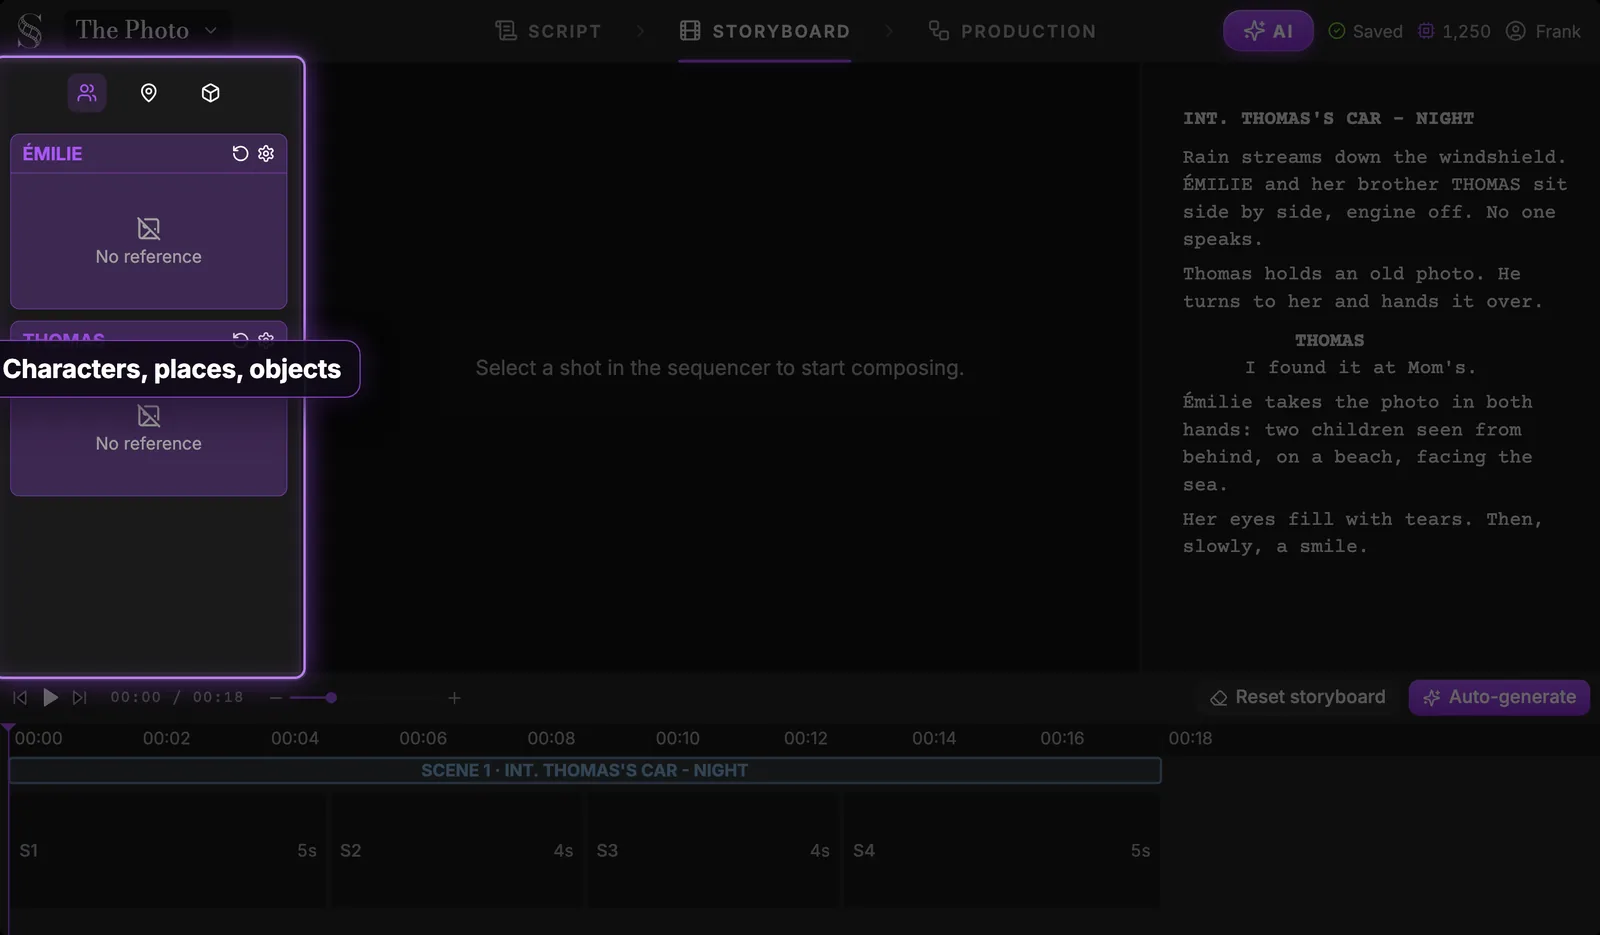
- Left: characters, places and objects. Three small icons switch between them. Each card holds the entity's reference sheet once it exists. Here Émilie and Thomas still say "No reference".
- Center: the selected shot. Empty until you pick a shot ("Select a shot in the sequencer to start composing").
- Right: the script, which stays in sync with playback. You always see the lines the current shot comes from.
- Bottom: the sequencer.
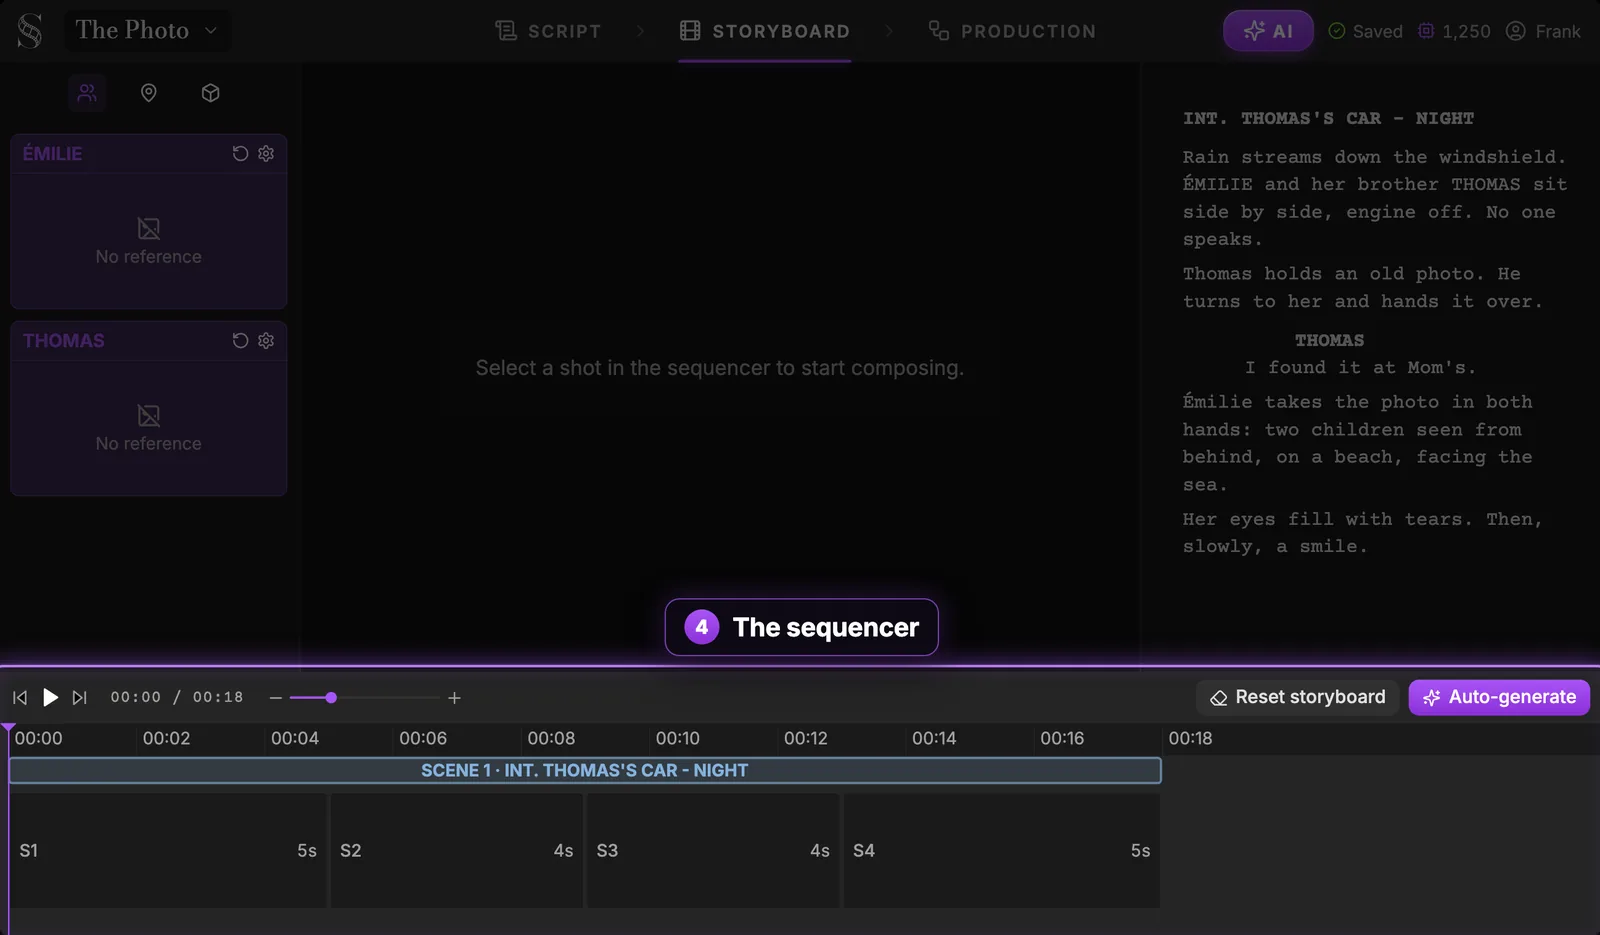
The sequencer lays out your film scene by scene, then shot by shot, against a time ruler. The width of each block is its duration: S1 lasts 5 seconds, S2 and S3 4 seconds each, S4 5 seconds, eighteen seconds in all. Its toolbar holds the play controls on the left and the Auto-generate button on the right.
Step 3: Generate the whole board with Auto-generate
Click Auto-generate in the sequencer toolbar. It opens one window that lists everything the board still needs, in the order it needs it. This is the AI storyboard generator at work on your own script.
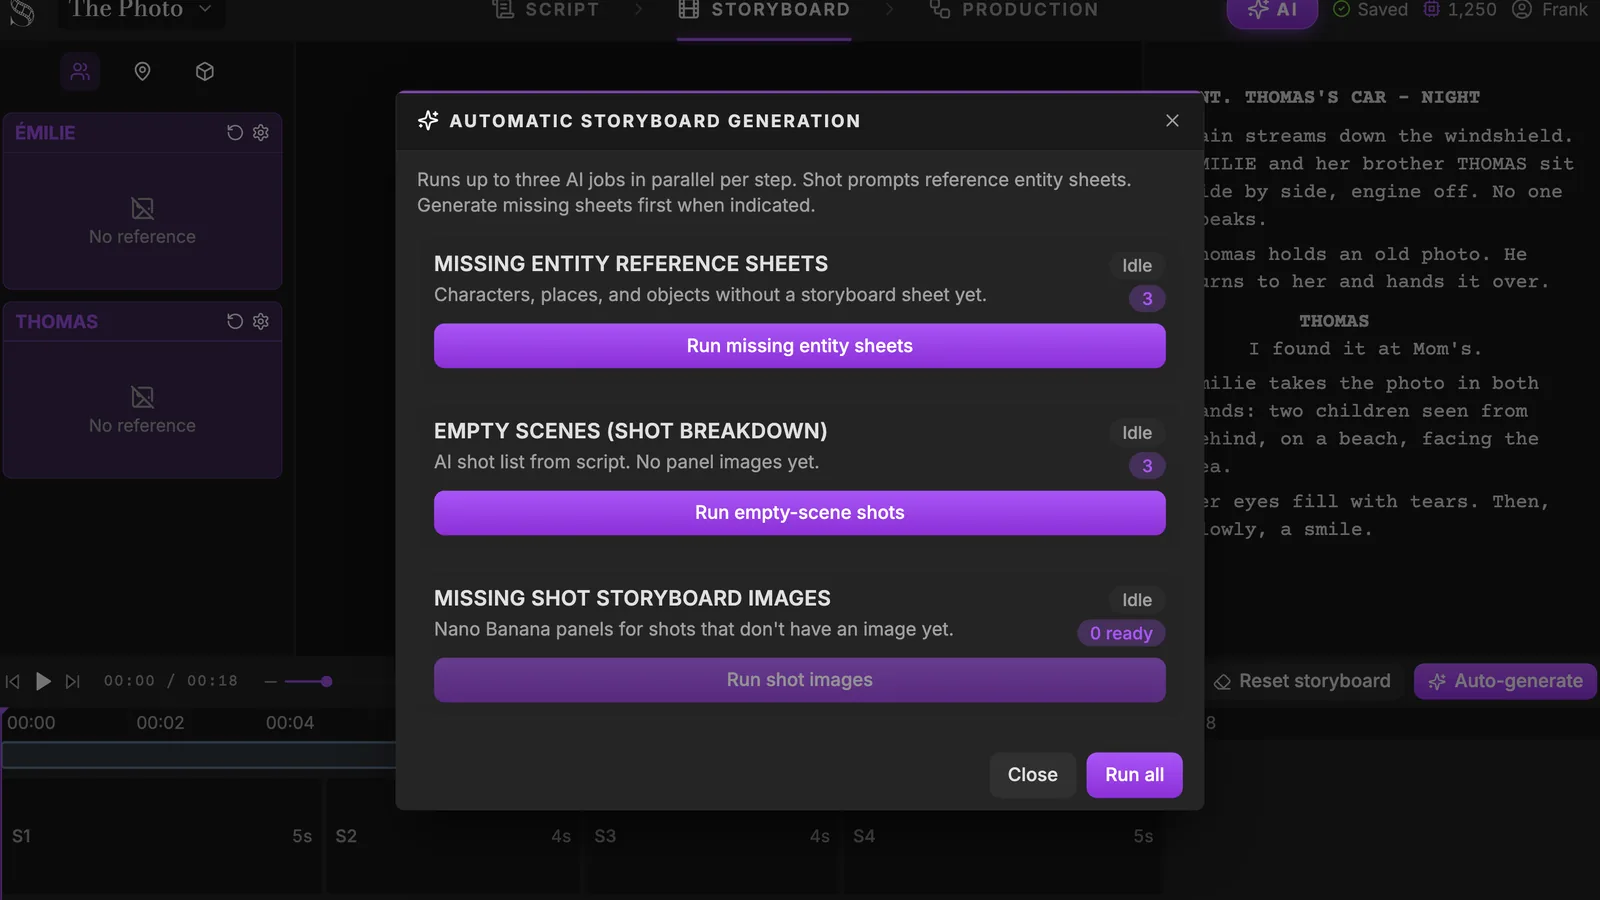
The three steps are:
- Missing entity reference sheets. Every character, place and object without a storyboard sheet gets one. Shots reference these sheets, which is how Émilie keeps the same face, coat and scarf in every panel.
- Empty scenes (shot breakdown). The AI reads each scene that has no shots yet and decides how many shots it needs, with a shot value and a camera movement for each. No images at this stage.
- Missing shot storyboard images. One panel for every shot that does not have an image yet.
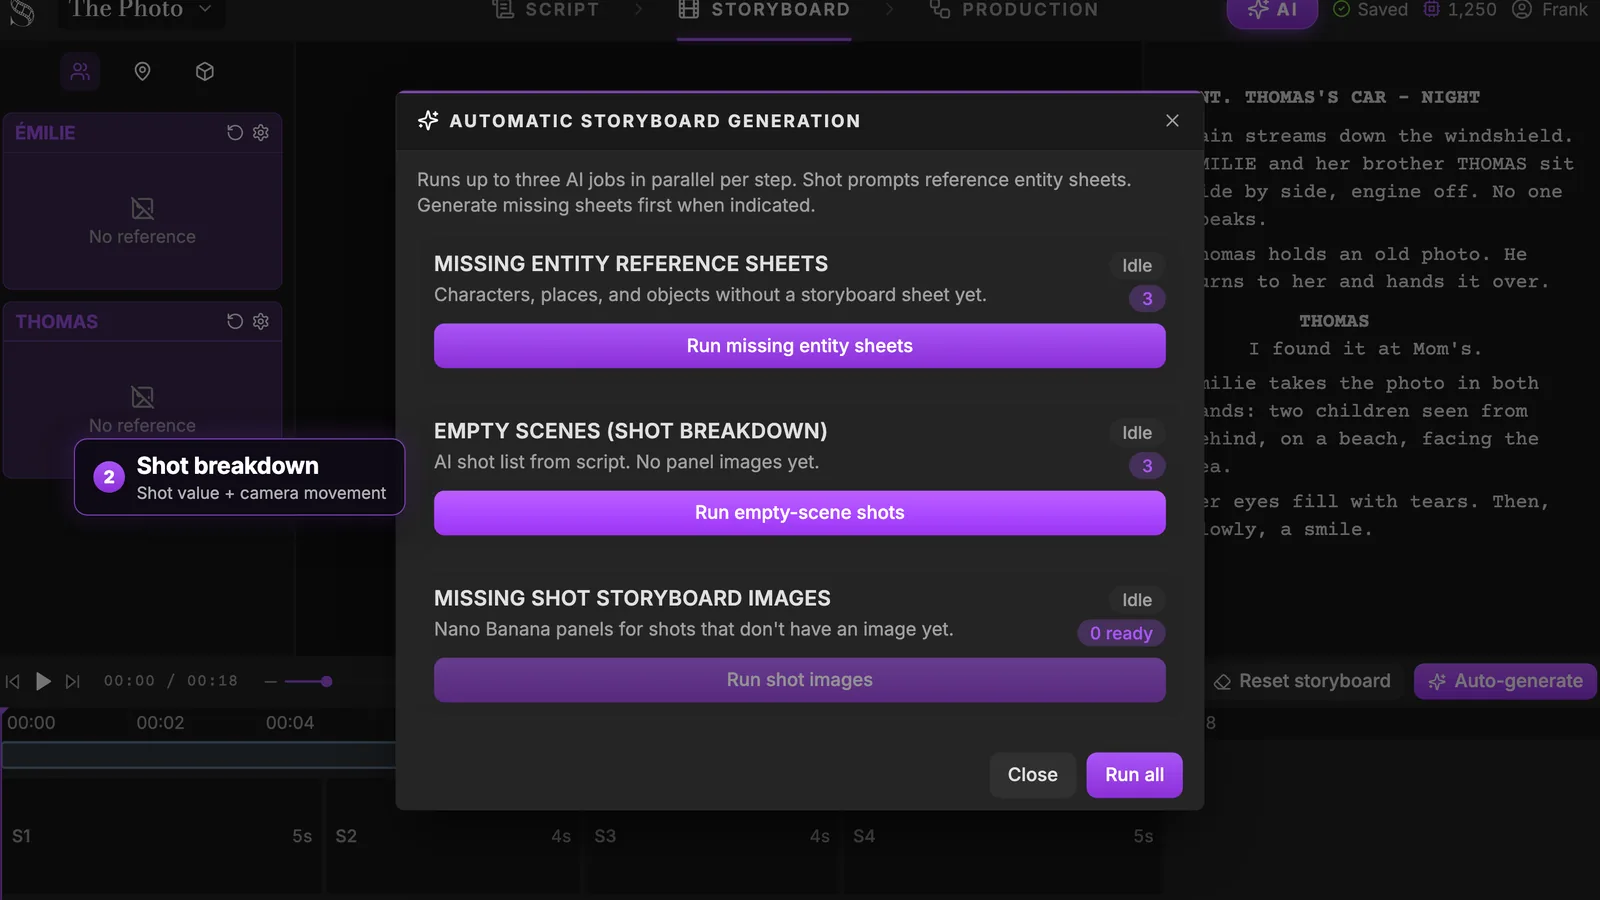
You can run each step on its own, or click Run all to chain them. Step 2 is the heart of previz: it is the AI doing a first coverage pass from your scene, the way an assistant director would propose a shot list. Treat it as a proposal, not a verdict. You will change it shot by shot in Step 6.
The window runs up to three AI jobs in parallel per step, and the credit cost is shown before each action, so you know what a pass will cost before you launch it.
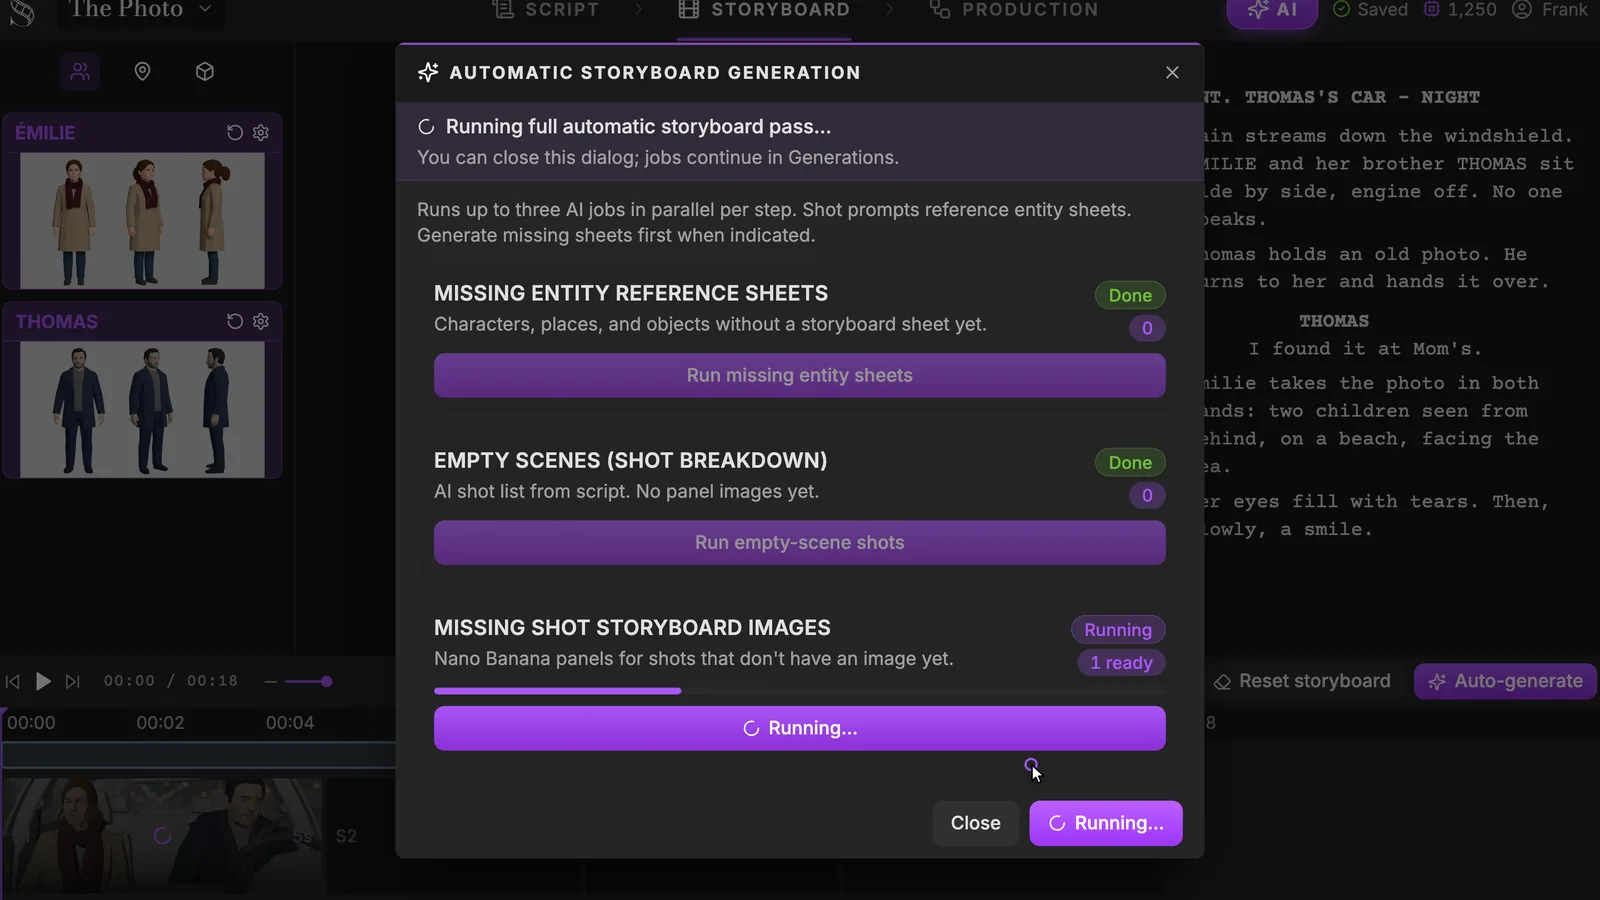
You do not have to watch it. As the banner says, you can close the window: the jobs continue and show up in the Generations list of the AI Center. Notice the left column: Émilie and Thomas now have their full-body reference sheets, and the first panels are already landing in the sequencer.
Step 4: Read the result like a director
When the pass finishes, click a shot to open its panel.
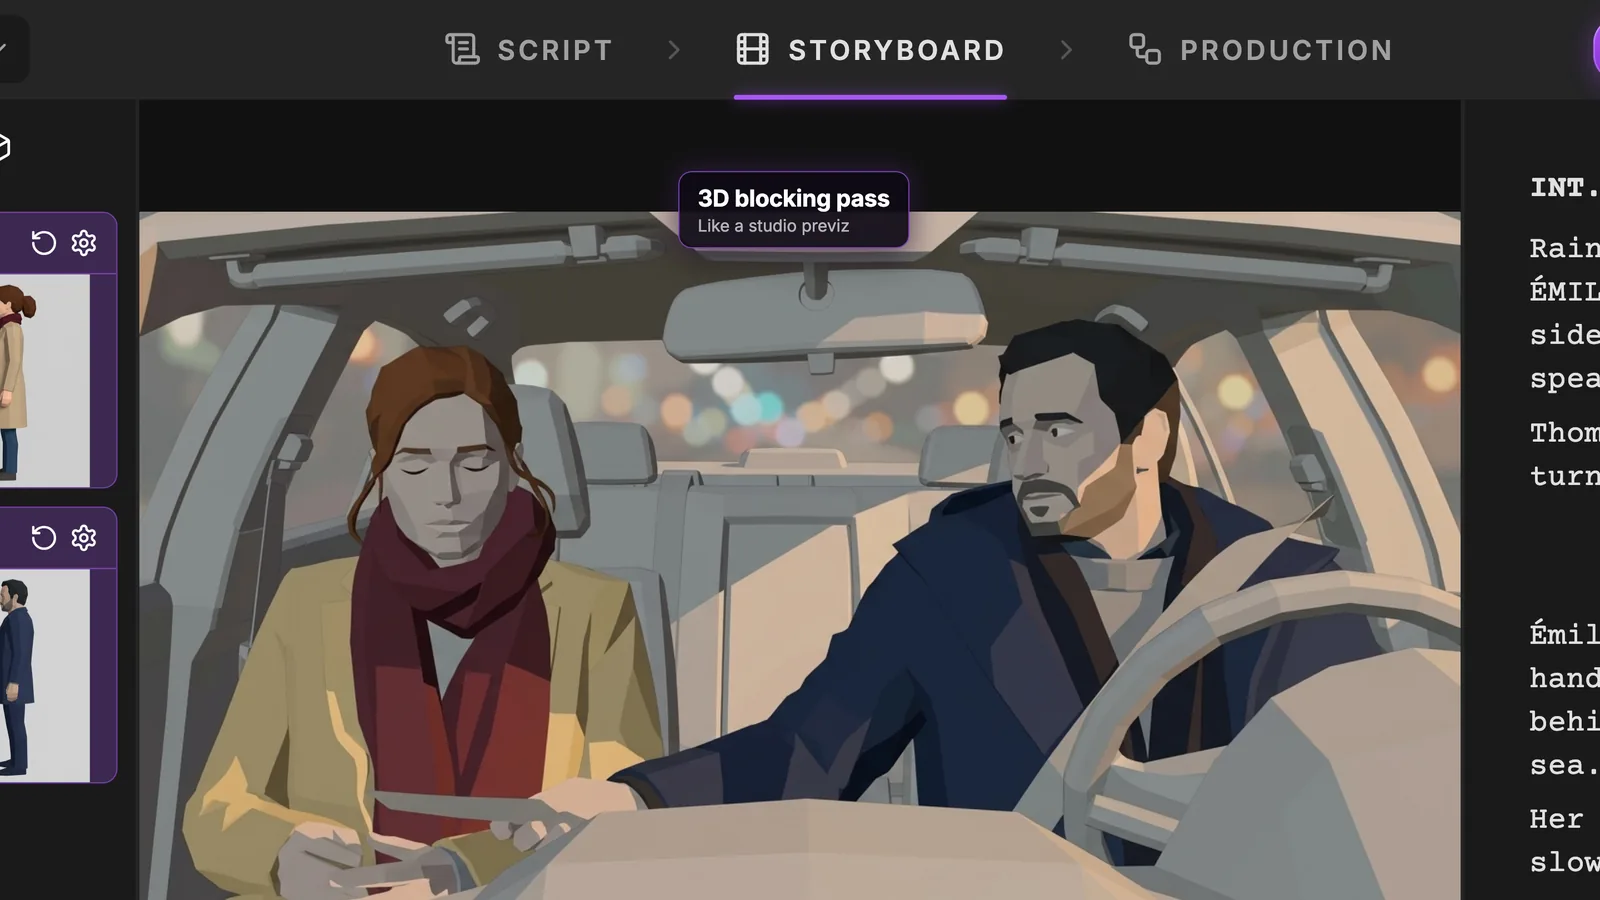
This is what a 3D blocking pass looks like. Émilie in her beige coat and burgundy scarf, Thomas in his navy coat at the wheel, the car interior, night bokeh through the rear window. Simple shapes, flat shading, clear light.
Do not judge it on beauty. Judge it on the four previz questions:
- Framing: is the shot value right for this beat?
- Staging: are the characters where the scene needs them, and are the eyelines readable?
- Light: does it come from the same side as in the shot before and after?
- Timing: you will check that in the next step, with the animatic.
If a panel answers those, keep it even if it is plain. The style will be decided once, for the whole film, in Production.
Try it free
Try Screenweaver for free on your script
It is free. Import your existing project, get a clearer view of your outline, and regain control of your story structure in minutes.
Start FreeStep 5: Play the board as an animatic
Press Play in the sequencer. The storyboard runs as an animatic: each panel holds for its duration, the playhead moves along the ruler, and the script on the right follows the shot being played.
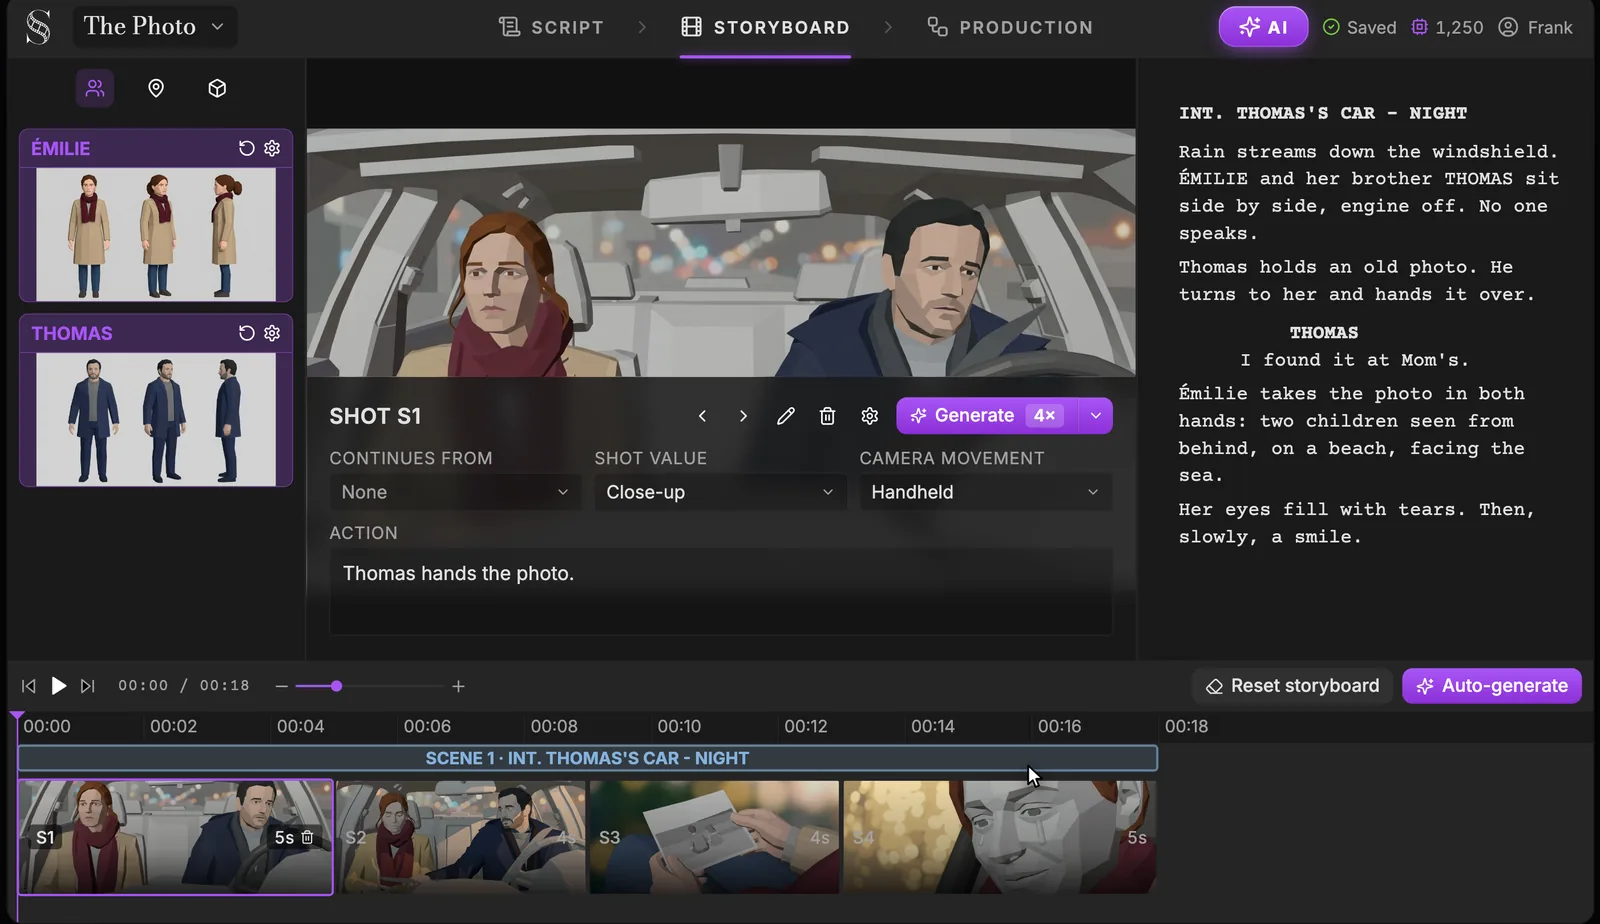
This is where timing problems show up. A 4-second insert on the photo may feel short once you watch it. A close-up that lands before the line is spoken kills the beat. For a sense of how many panels a minute usually needs, see how many storyboard frames per minute of film.
Two limits to know: the animatic has no audio, and it is not exported as a video. It is a review tool inside the app.
Step 6: Direct each shot
The breakdown gave you a starting point. Now you direct. Every shot has the same fields, at the top of the center area.
Shot value and camera movement
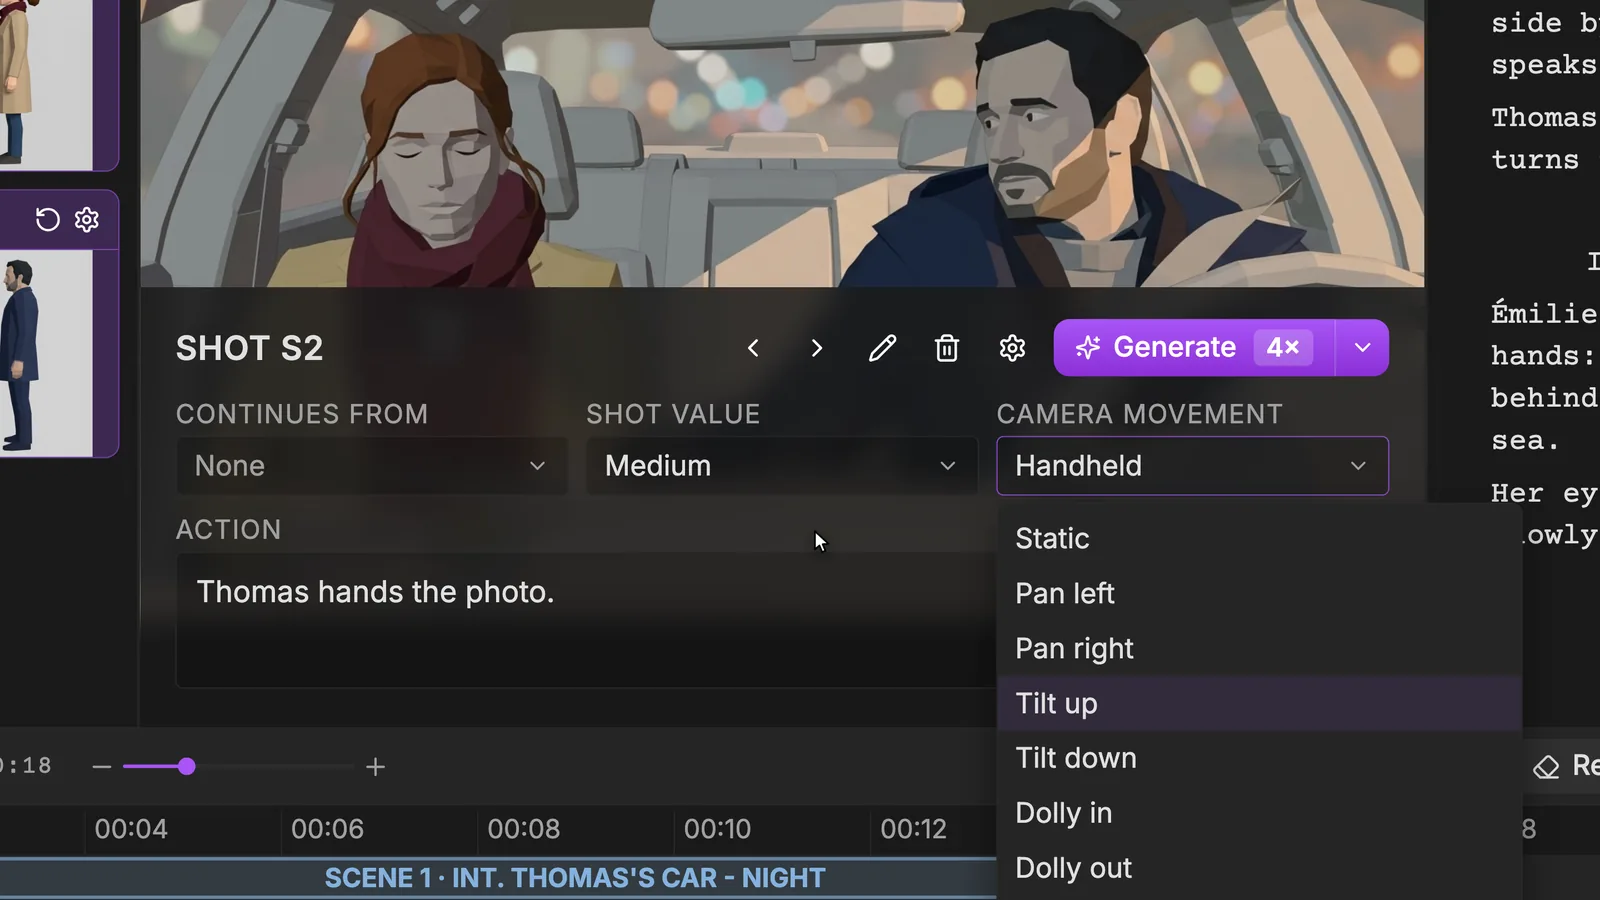
Shot value offers Extreme close-up, Close-up, Medium close-up, Medium, Medium long, Long/Wide, Extreme long/Establishing, Over-the-shoulder, POV and Insert. If the terms are new to you, our storyboard shot types reference shows where each one cuts the frame, and the medium shot page details the value chosen for S2 in the demo.
Camera movement covers Static, Pan, Tilt, Dolly in and out, Truck, Pedestal, Crane, Handheld, Steadicam, Whip pan and Zoom. In the demo, the breakdown proposed Handheld for S2. A handheld camera adds tension and nervous energy, which is the wrong note for a quiet moment between siblings. So S2 goes to Static.
Write the action with @ mentions
The Action field is the instruction for the panel. Type @ to reference a character, place or object, and its reference sheet goes into the generation.
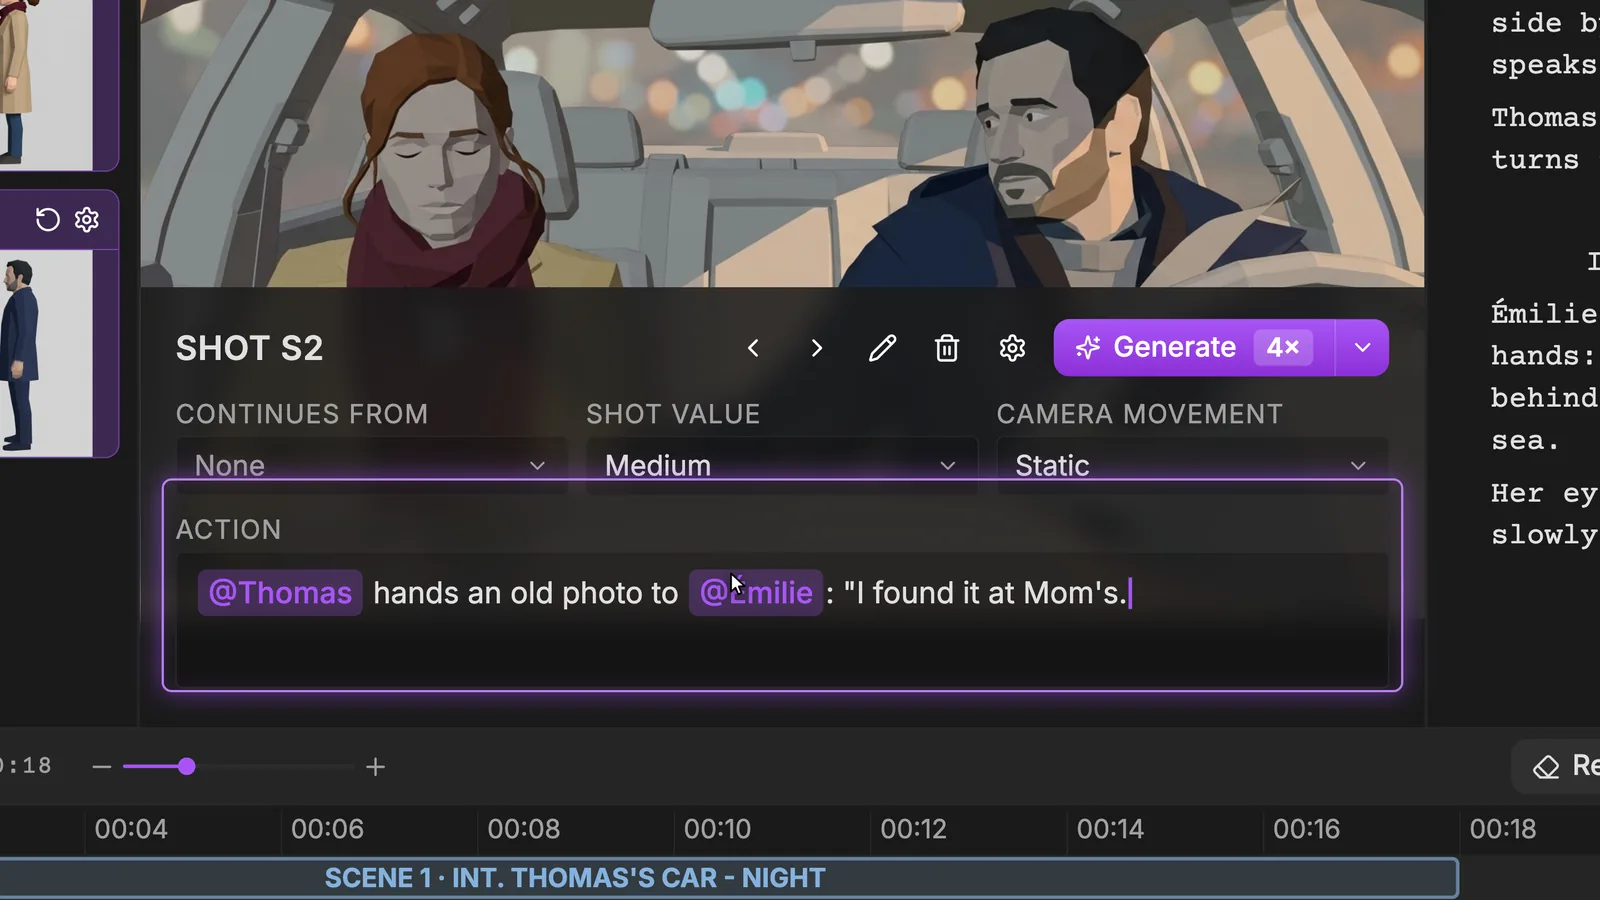
Write what is in the frame: who does what, to whom. "Thomas hands the photo" becomes "@Thomas hands an old photo to @Émilie", with the line of dialogue after it. Mention an entity when it is visible in the shot, not when it is only talked about.
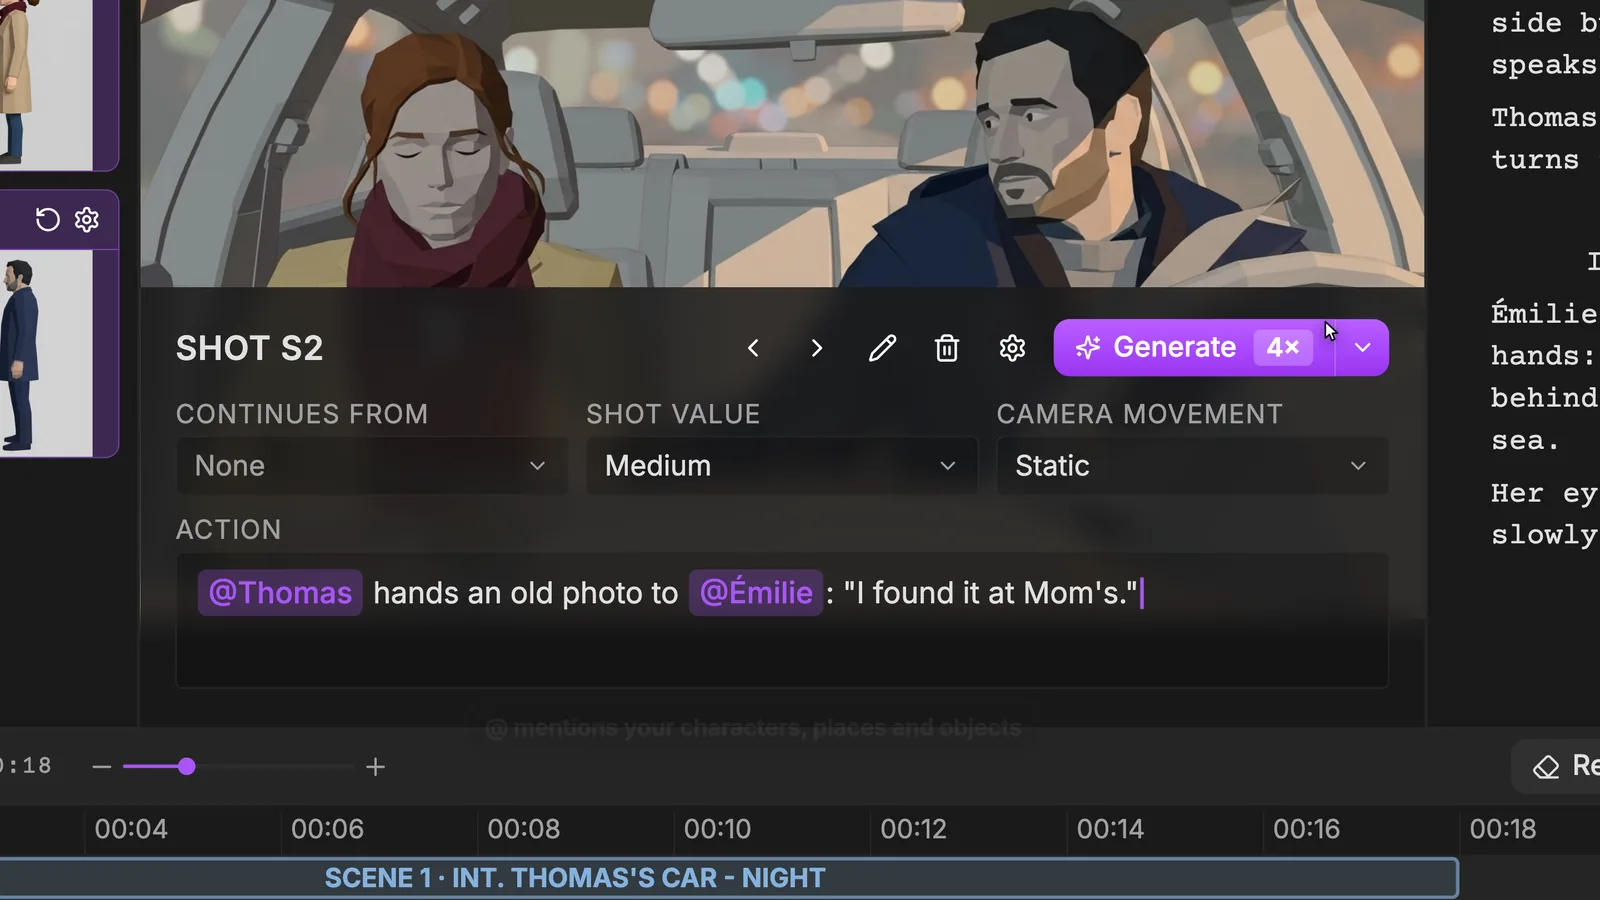
Then click Generate on that shot. Only this panel is redrawn; the rest of the board stays as it is. The arrows next to the shot name let you step back through earlier versions if the new one is worse. That is the whole previz loop: change one decision, redraw one panel, play the sequence again.
Change a shot's duration by dragging
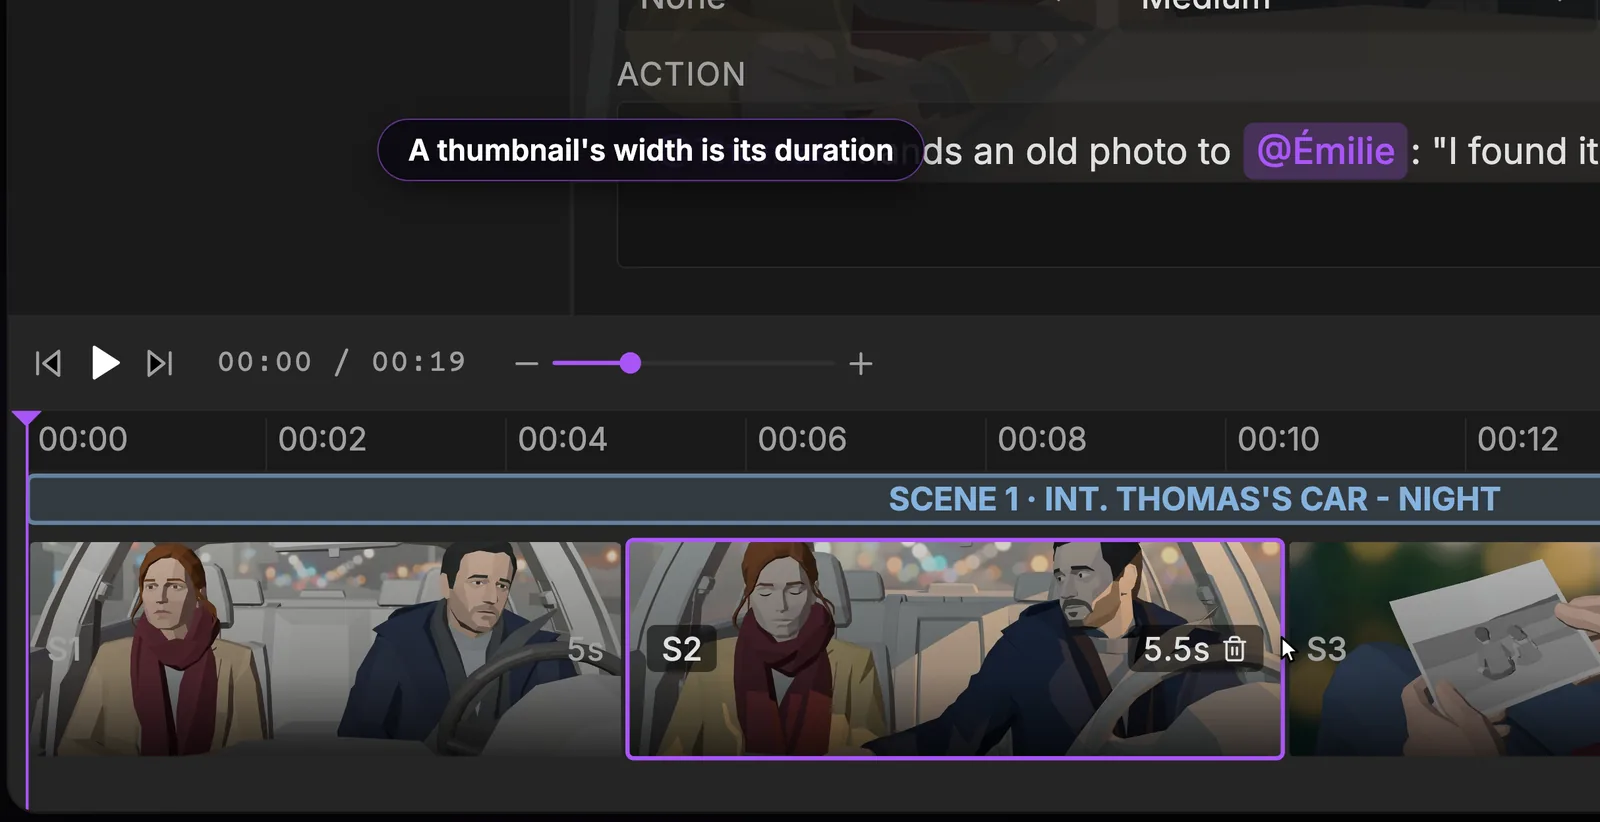
In the sequencer, a block's width is its duration. Drag its edge to make the shot longer or shorter. Here S2 goes from 4 to 5.5 seconds to give Thomas's line room to land, and the scene now runs 19 seconds. Play the animatic again to feel the difference.
Reorder shots with drag and drop
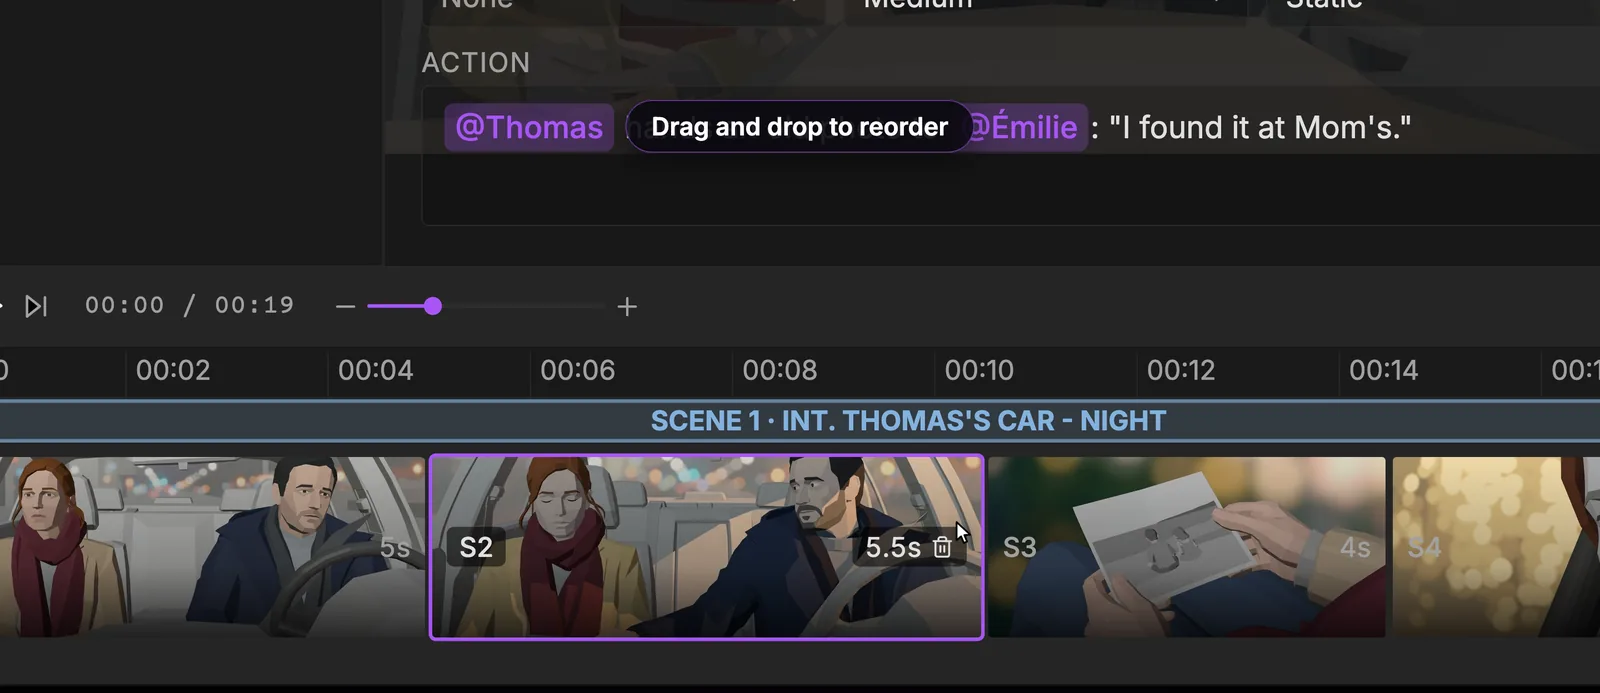
Drag a block to move it. Trying the insert on the photo before the medium two-shot, or after it, is a two-second experiment here and a costly reshoot later. That is exactly the kind of question previz exists to settle.
Keep continuity with Continues from
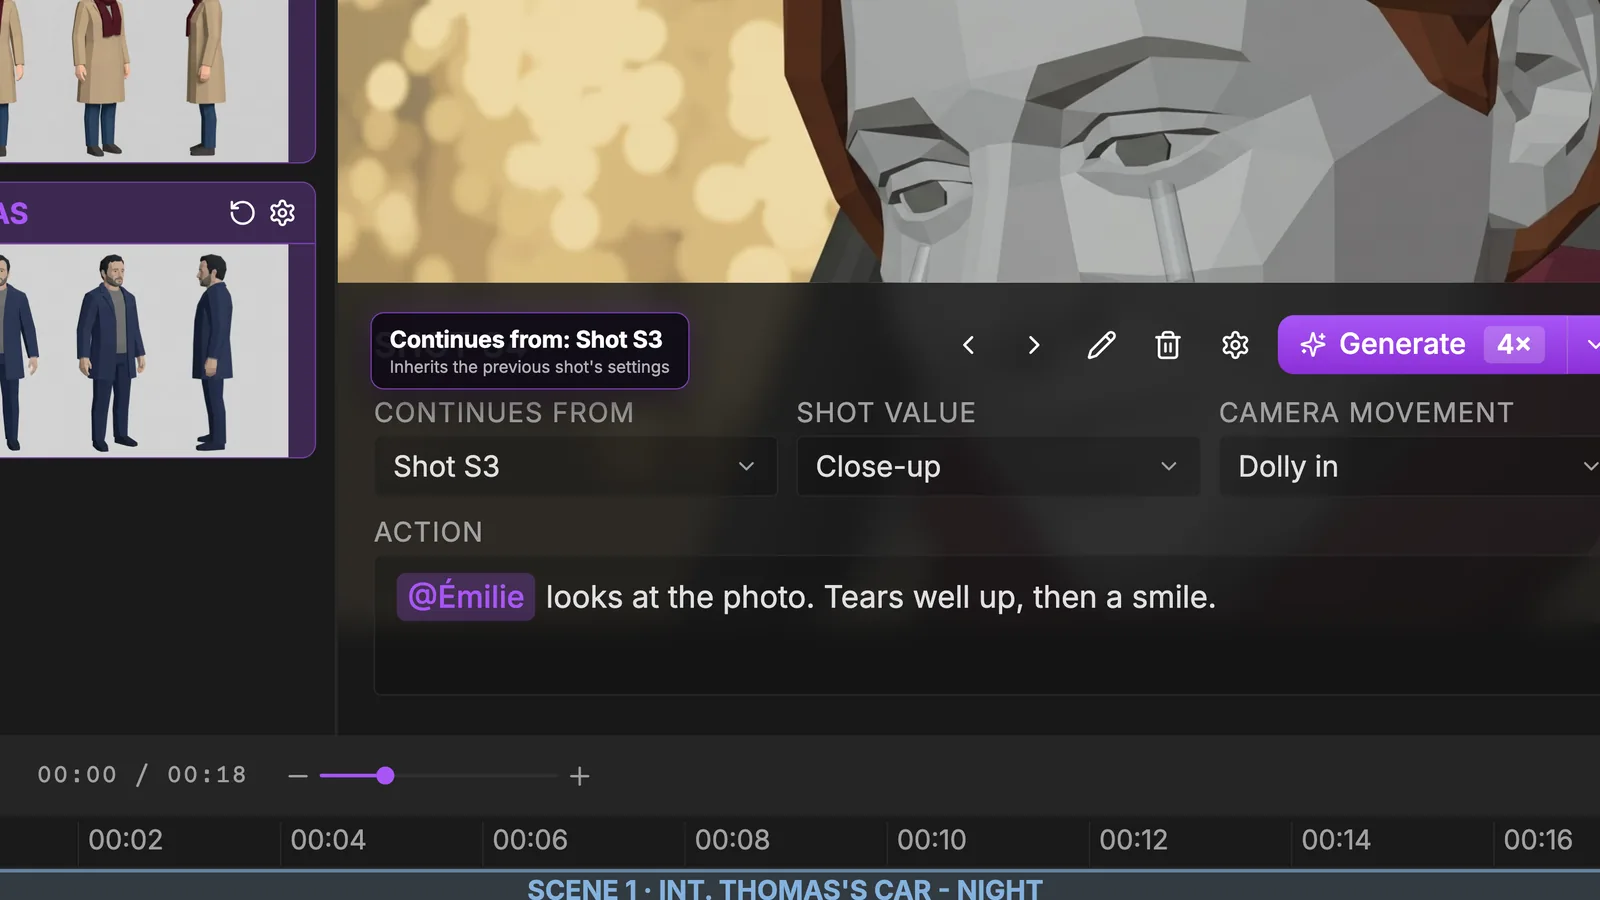
Continues from links a shot to the previous one. The shot inherits that shot's settings and keeps continuity with it, which is what you want when the camera stays on the same action across a cut. In the demo, S4 continues from S3: a close-up on Émilie with a slow dolly in as her eyes fill with tears and she smiles. The push-in is the camera leaning in with the audience at the emotional peak of the scene.
What the Storyboard tab does not do
Be clear about the limits, so you plan around them:
- No PDF export of the board. The storyboard lives in the app. If you need paper for a shoot day or a pitch meeting, our free storyboard template generator gives you printable blank pages in your aspect ratio.
- No audio in the animatic, and no video export of it. Play is for review. Voices, music and the final edit happen in other tools.
- Not the final style. The blocking look is deliberate. The film's look is set once in Production, through the Artistic direction, and applied to every shot.
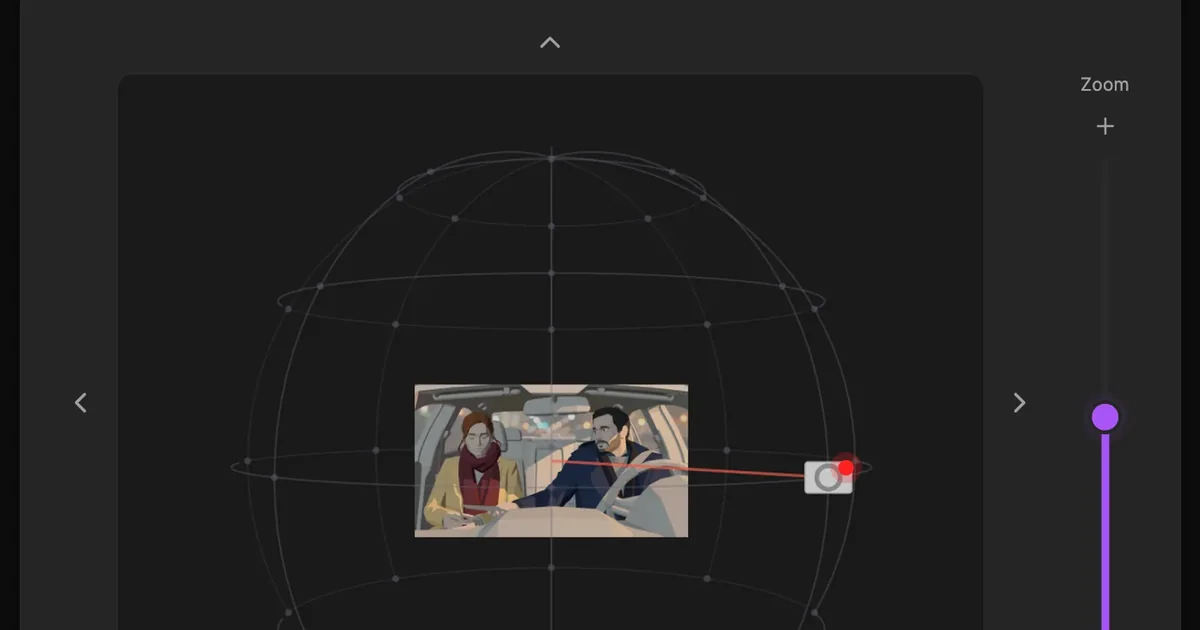
- Not a 3D scene you can walk through. Panels are generated images in a 3D blocking style. To move the camera on an existing panel without redoing the shot, use the Angle tab of the image editor, explained in how to change the camera angle of an AI image.
From previz to production
Each tab feeds the next. When the board plays the way you want, open the Production tab: every shot you directed here arrives there with its shot value, camera movement, duration, action and references already in place, and the panels themselves can guide video generation shot by shot. Nothing you decided in previz is lost.
FAQ
What is AI previz?
AI previz is previsualization where the rough version of each shot is generated from your script instead of built by hand. In ScreenWeaver, the AI breaks each scene into shots and draws one 3D blocking panel per shot, which you then direct and play as an animatic. It locks framing, staging, light and timing before the expensive work starts.
Can AI make a storyboard from a script?
Yes. In the Storyboard tab, Auto-generate creates the missing reference sheets, breaks each empty scene into shots with a shot value and camera movement, then draws a panel for every shot. You keep full control afterwards: every field of every shot can be changed and every panel regenerated on its own.
What is the difference between previz and a storyboard?
A classic storyboard is a set of still drawings. Previz adds time: shots have durations and play in order, so you can judge rhythm as well as composition. ScreenWeaver's board does both, since each panel sits in a sequencer and the whole board plays as an animatic.
Is the 3D storyboard a real 3D scene?
No. The panels are generated images drawn in a 3D blocking style, like studio previz. You cannot orbit freely inside them, but the image editor's Angle tab can change the camera angle of a panel without redoing the shot.
Can I export the storyboard or the animatic?
Not at the moment. There is no PDF export of the board and no video export of the animatic, which also has no audio. The board stays live in your project and feeds the Production tab directly.
Do I need to know 3D software to do previz with AI?
No. You need a script and a sense of what each shot should show. Shot values and camera movements are chosen from lists, and the action is plain text with @ mentions for your characters, places and objects.
How much does AI previz cost in ScreenWeaver?
Writing the script is free on the Screenwriter plan. The storyboard is part of the Auteur plan ($39.99 a month, 6,000 credits) and the Studio plan ($149.99 a month, 25,000 credits). The cost of each Auto-generate step is shown before you run it.
Start your previz
Write or import one scene, open the Storyboard tab and run Auto-generate. You will be directing shots instead of describing them: create your free ScreenWeaver account.
Final Step
Build your next script with Screenweaver
Move from ideas to production-ready pages faster with timeline-native writing and AI-assisted story flow.
Try Screenweaver