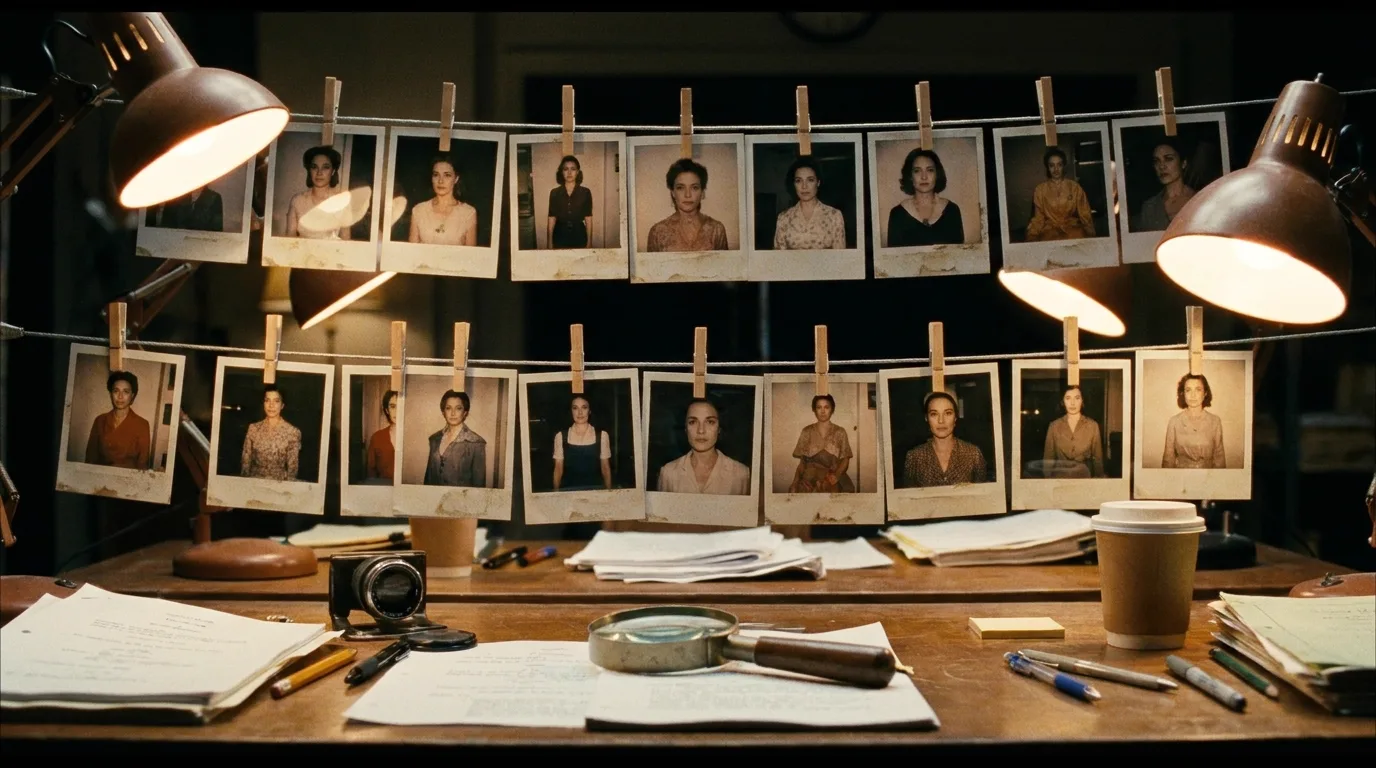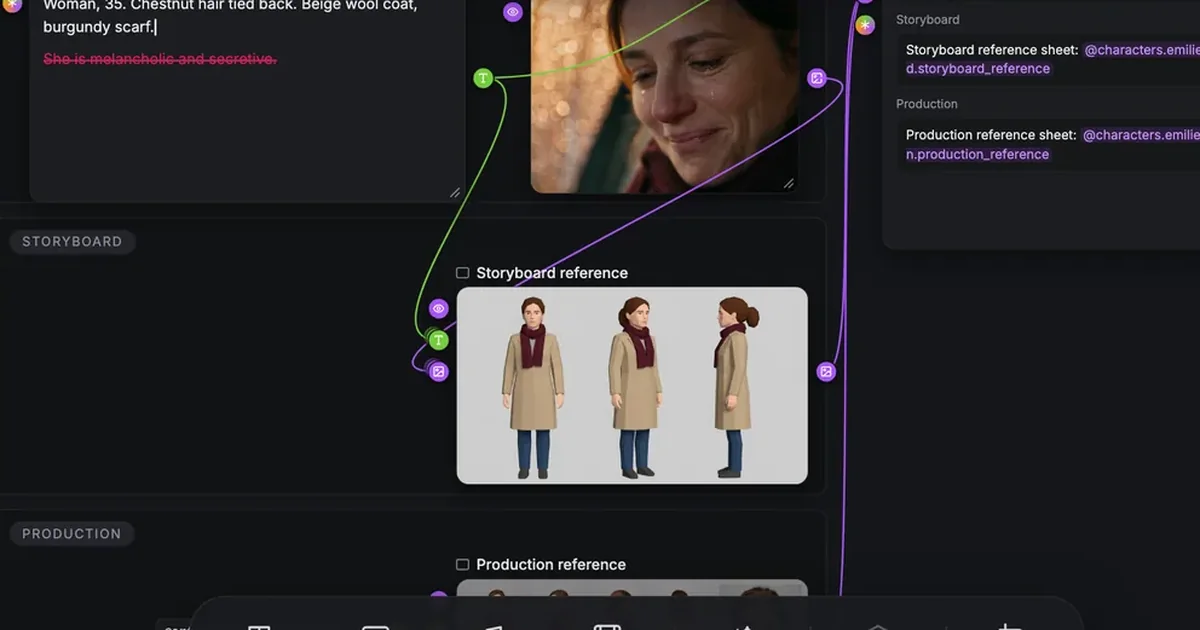

The short answer: an AI character sheet keeps a face consistent only if every shot uses the same one. Write a description a camera can film, generate one clean sheet (front, three-quarter, profile and back views, a face close-up, plain background), then reference that sheet in every storyboard panel and every video shot. In ScreenWeaver, that chain runs from the script to the final video by itself.
Most "AI character sheet generators" stop at a nice picture. A film needs more: the sheet has to travel with the character into every shot, from the first wide two-shot to the last close-up. When it does not, you get the classic failure of AI video, the character who changes face between cuts. We cover that problem in depth in why characters drift in AI video.
This guide follows one character, Émilie, through the demo project The Photo: one scene in a parked car at night, in the rain. Thomas, 40, hands his sister Émilie, 35, an old photo of the two of them as children on a beach. He says "I found it at Mom's." Her eyes fill with tears, then she smiles. Four shots. All screenshots show the ScreenWeaver interface with this demo project.
What a character sheet is for in a film
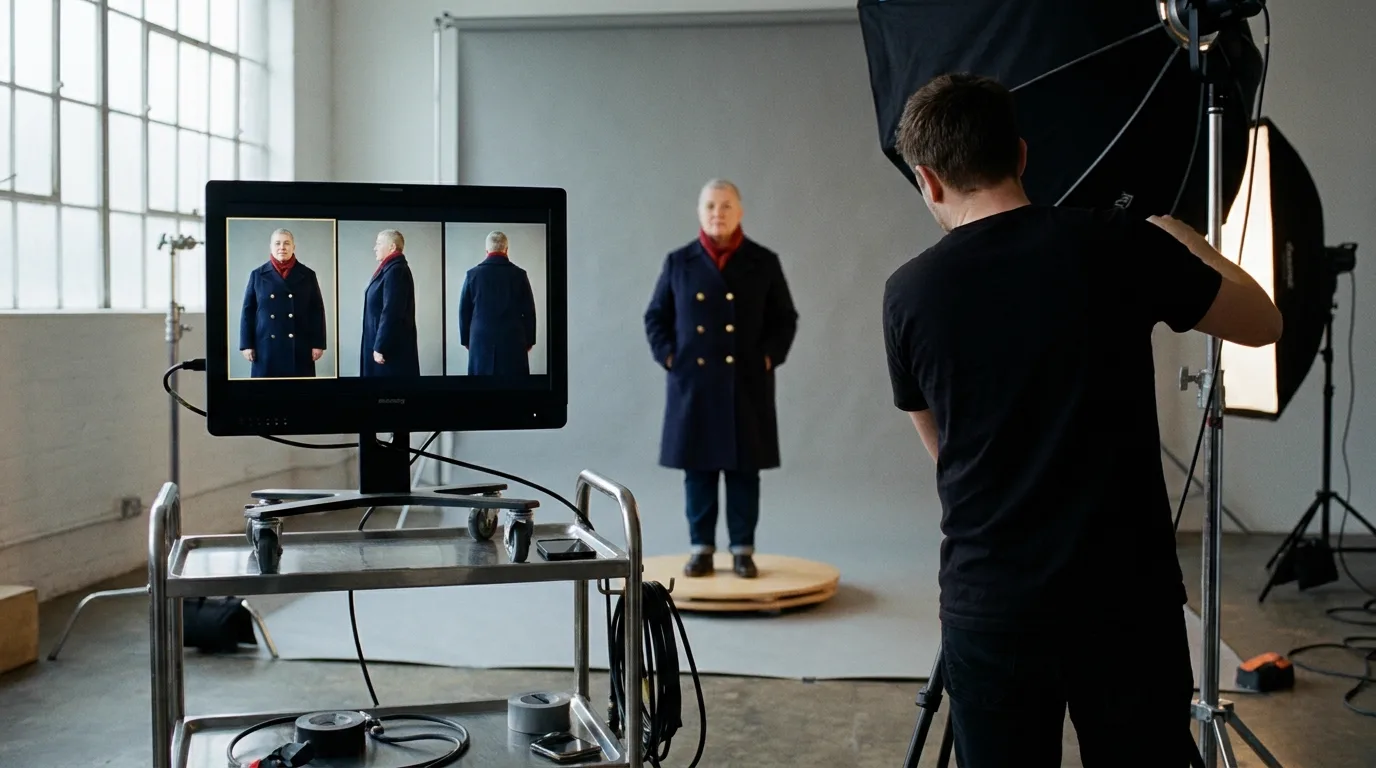
In animation, a model sheet is the drawing every artist checks before drawing the character again. For AI video, the sheet plays the same role for the model: it is the picture the model looks at each time it has to draw Émilie. A video model has no memory between generations. If you describe Émilie in words in ten prompts, you get ten slightly different women. If you give it the same sheet ten times, you get one.
That is why the sheet alone is not enough. What keeps the face is the chain: one description, one sheet, and a reference to that sheet in every shot. The rest of this guide shows that chain step by step: script, storyboard, production.
What a good AI character sheet contains
A sheet that holds a whole film has a few precise ingredients:
- Four full-body views: front, three-quarter, side profile and back. Your shots will show the character from all these sides, so the model needs to have seen them.
- A face close-up: the face is what the audience checks first, and what drifts first.
- A plain background: nothing in the image except the character, so the model cannot confuse a wall or a tree with part of the costume.
- One costume, one hairstyle: the ones the character wears in the scene. A new outfit is a new sheet.
- The right style for the stage: a simple previz style for the storyboard, where you lock framing and staging, and the final style of the film for production.
What it does not contain: there is no expression sheet in ScreenWeaver, and no animated turnaround. The emotion of a shot comes from what you write in that shot (we show it below), not from a grid of faces.
Step 1: the character is born in the script
In ScreenWeaver, you do not create Émilie in a separate tool. You create her where she first appears: in the screenplay. Right-click her name in the Script tab and the menu offers to make her a character, a place or an object.
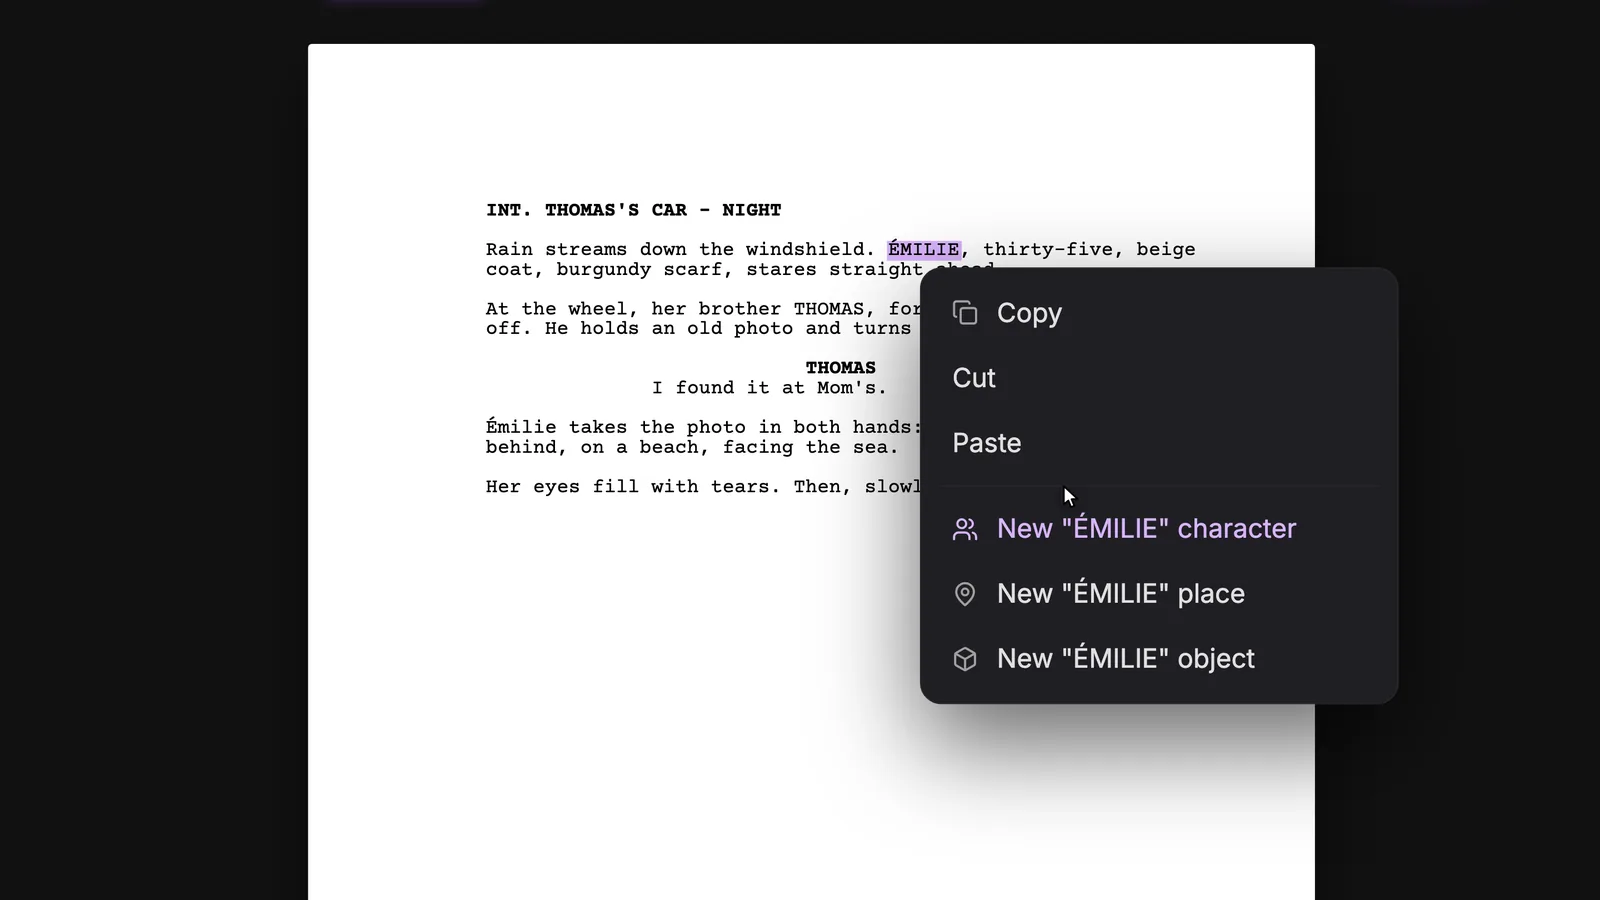
Choose New "ÉMILIE" character. You can also create entities through autocomplete while you type, and when you import a PDF or Final Draft script, characters are created from the character cues and places from the scene headings. Objects, like the photo, are always added by hand.
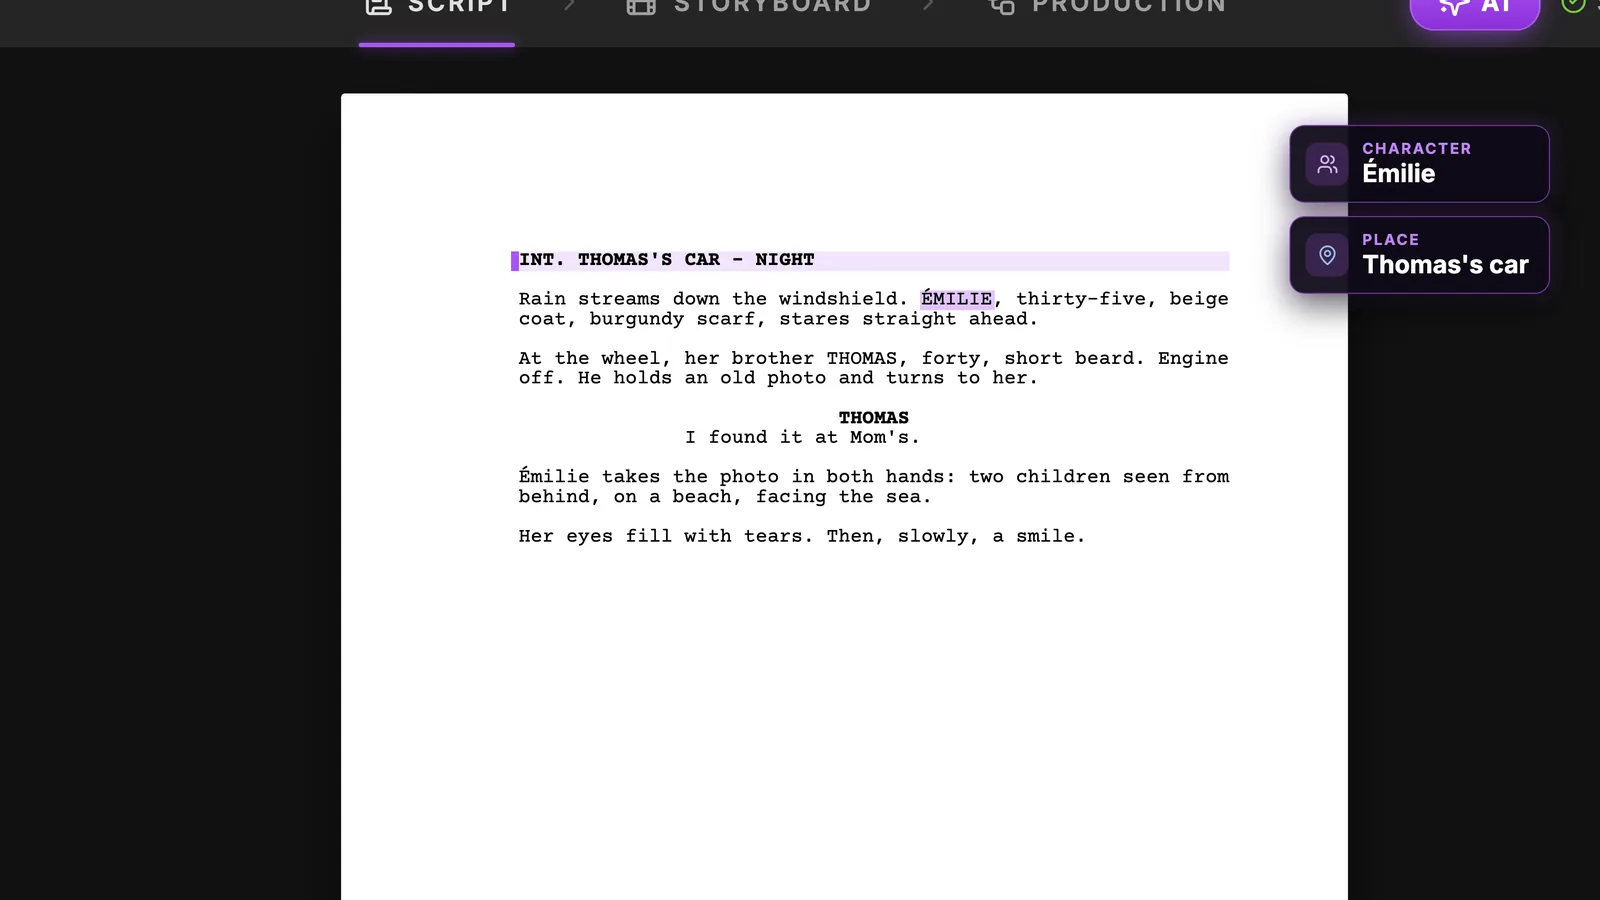
The chips confirm what you just created. Émilie is now a story element of the project, and everything that follows hangs off her.
Step 2: write a description a camera can film
Each story element opens as a group on the Story elements canvas, and its first stage is the Moodboard, with a pinned Description text. This description is the most important line in the whole chain: the sheet is drawn from it.
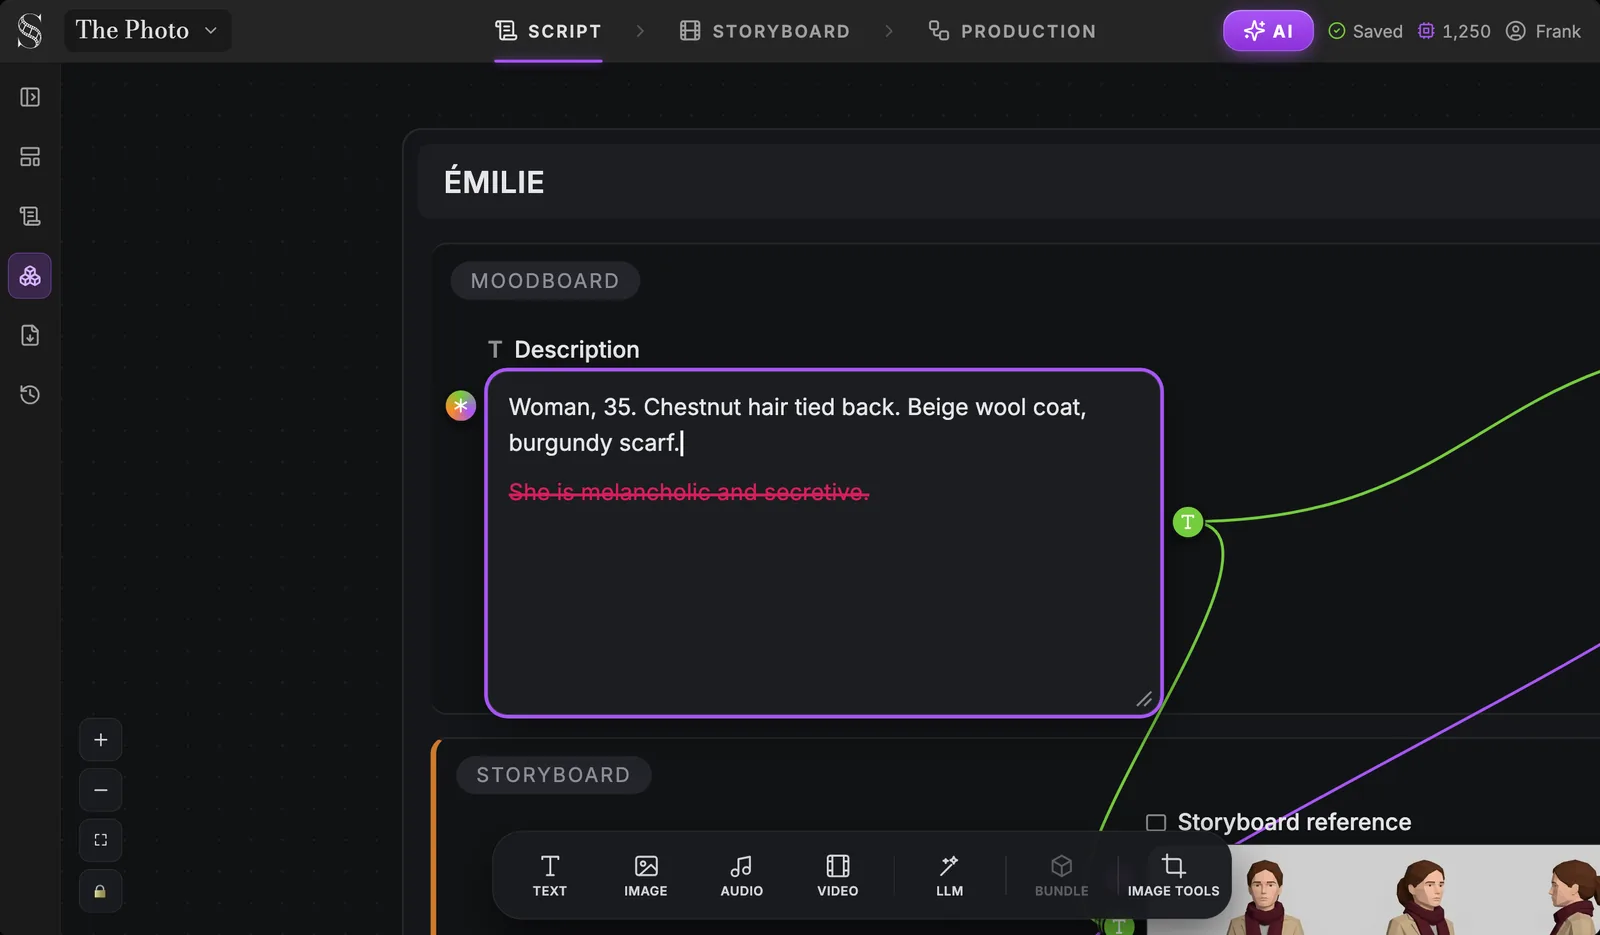
Look at the struck-through line. "She is melancholic and secretive" is a fine note for an actor, but a camera cannot film it, and neither can a model. What renders is what you can see: age, hair, clothes, colours. Write it like a costume and casting note:
- Good: "Woman, 35. Chestnut hair tied back. Beige wool coat, burgundy scarf. Bare face, freckles."
- Good: "Man, 40, her older brother. Short beard, brown hair, tired eyes. Navy blue coat over a grey sweater."
- Useless for the sheet: "Shy but brave." "Haunted by her past." "Charismatic."
Keep the personality in the script, where the actions show it. If you want help turning a character into a reusable block of visual facts, the AI character consistency sheet tool builds one field by field.
Step 3: add a reference image and meet the Story element node
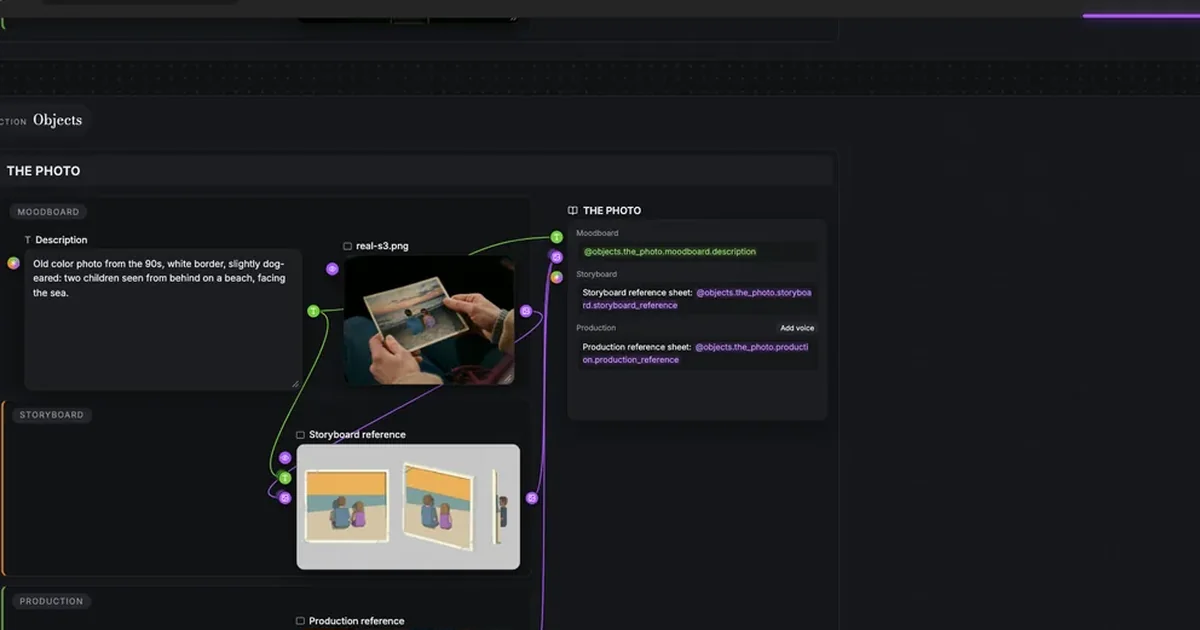
The moodboard also takes anything you drop on it: images, text, audio. A reference photo is useful when you have a precise face or look in mind. You cannot generate images inside the moodboard; you bring them in.
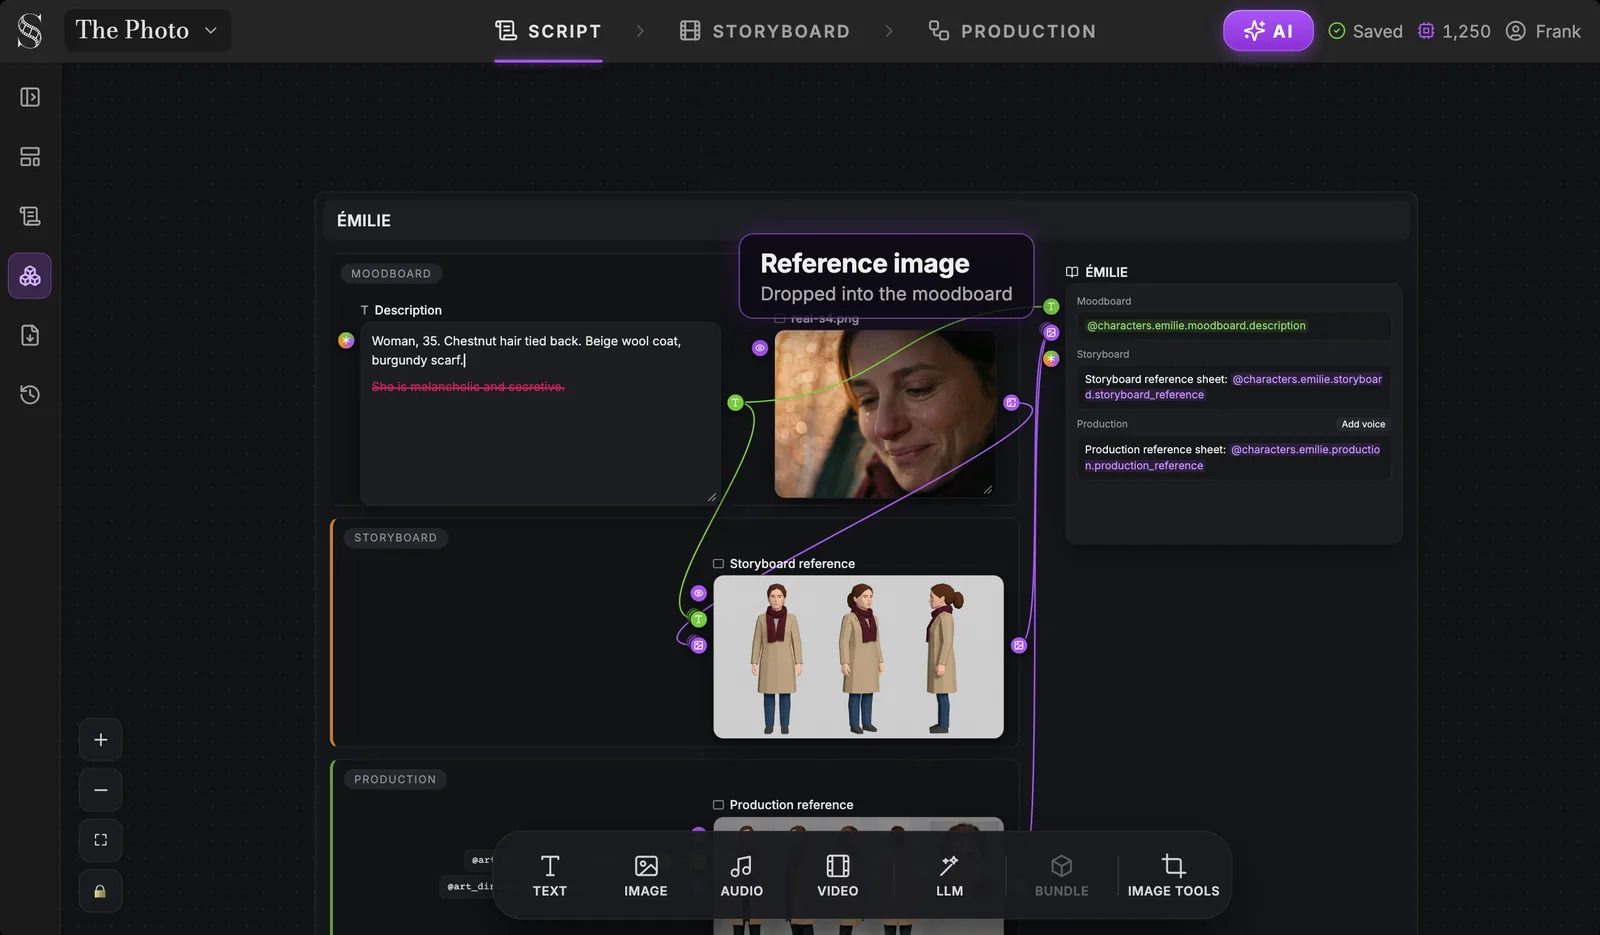
This screenshot shows the whole group. On the left, the three stages: Moodboard (description and reference photo), Storyboard (the Storyboard reference sheet, already generated here) and Production (the Production reference, starting at the bottom). On the right, the Story element node gathers the three as references (Moodboard, Storyboard, Production). Add voice attaches an audio reference to the character; it is not a text-to-speech feature.
Step 4: generate the storyboard sheets in one pass
Open the Storyboard tab and click Auto-generate. One window lists three steps: missing entity reference sheets, the shot breakdown of empty scenes, and missing shot images.
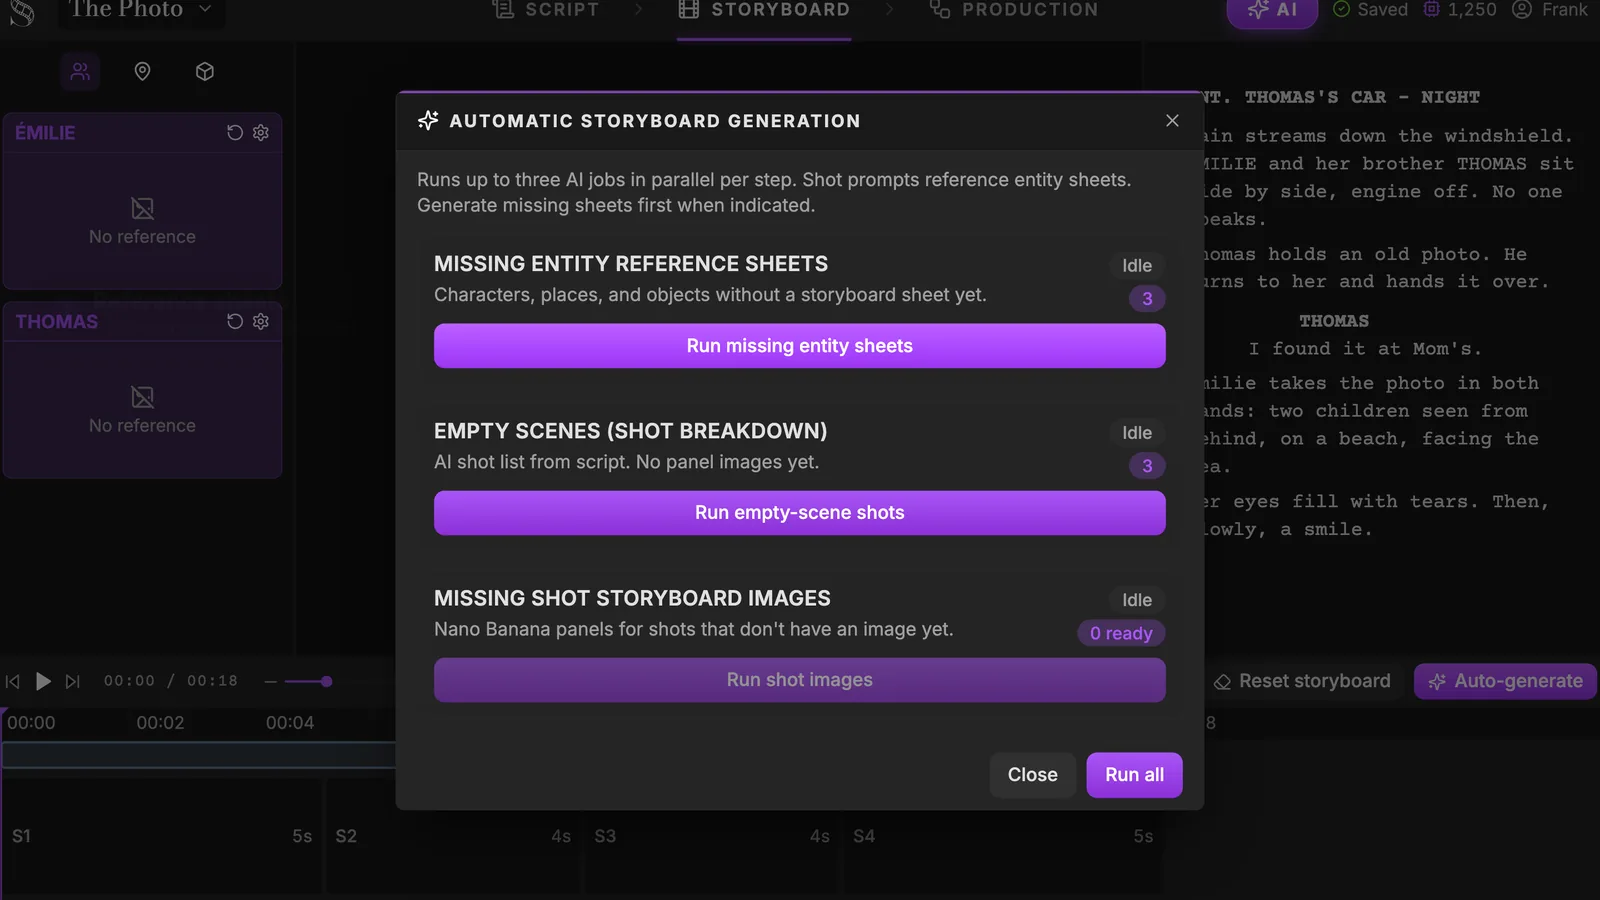
The order matters, and the window says why: shot prompts reference entity sheets, so the sheets come first. Click Run all to chain the three steps, or run the sheets alone. Up to three jobs run in parallel, and the credit cost is shown before each action.
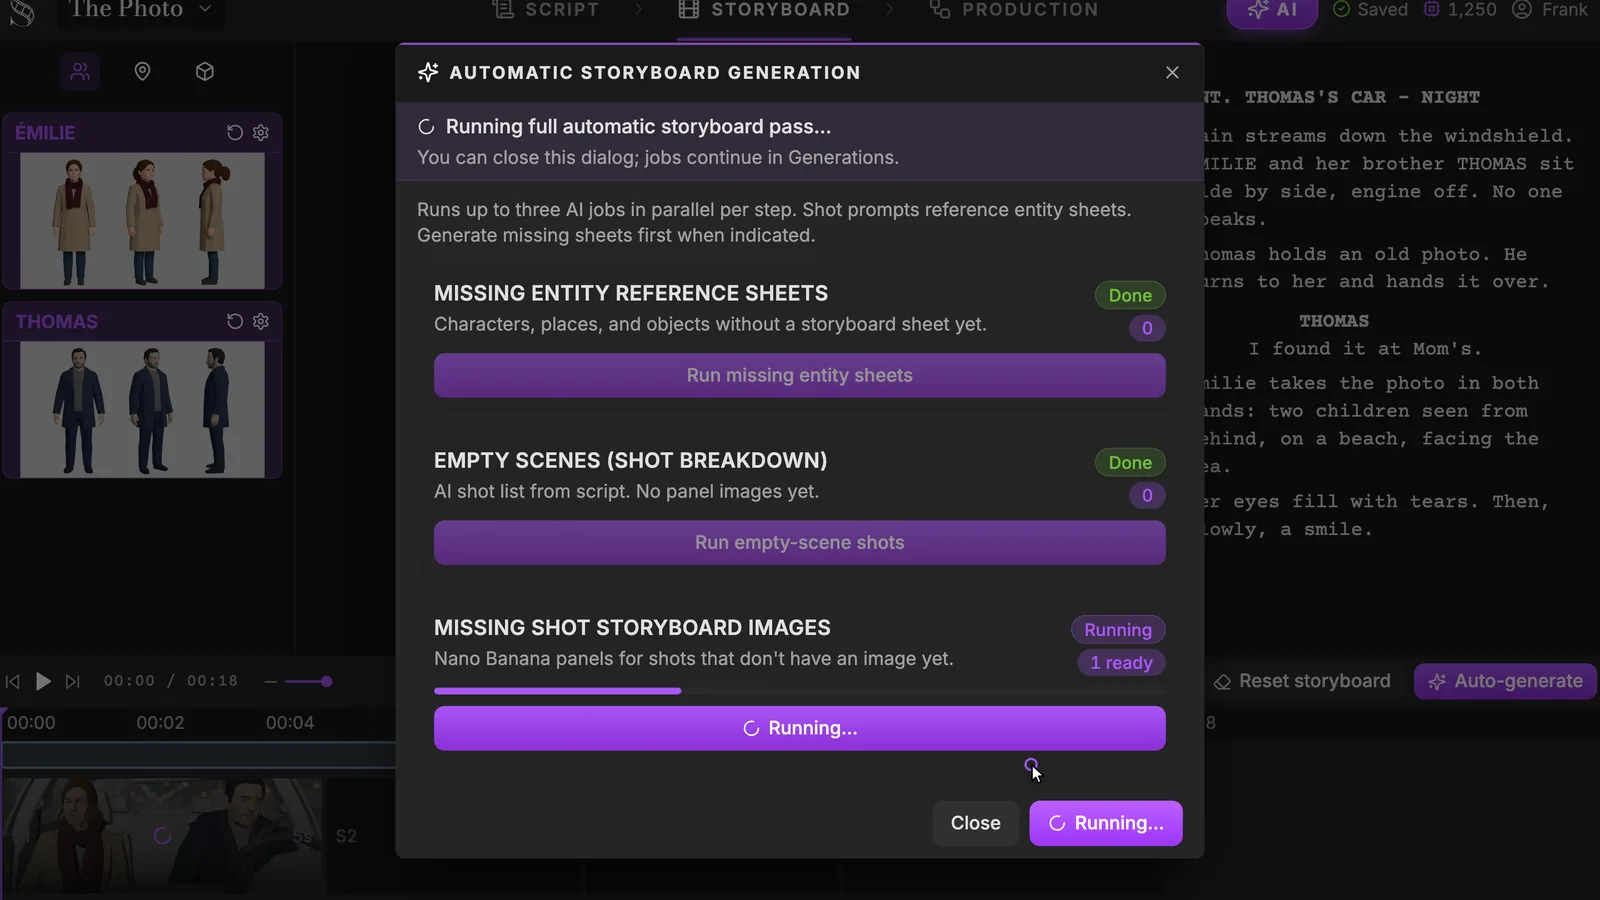
You can close the window: the jobs continue in the AI Center. When the sheets are done, they sit in the left column of the Storyboard tab, one card per character.
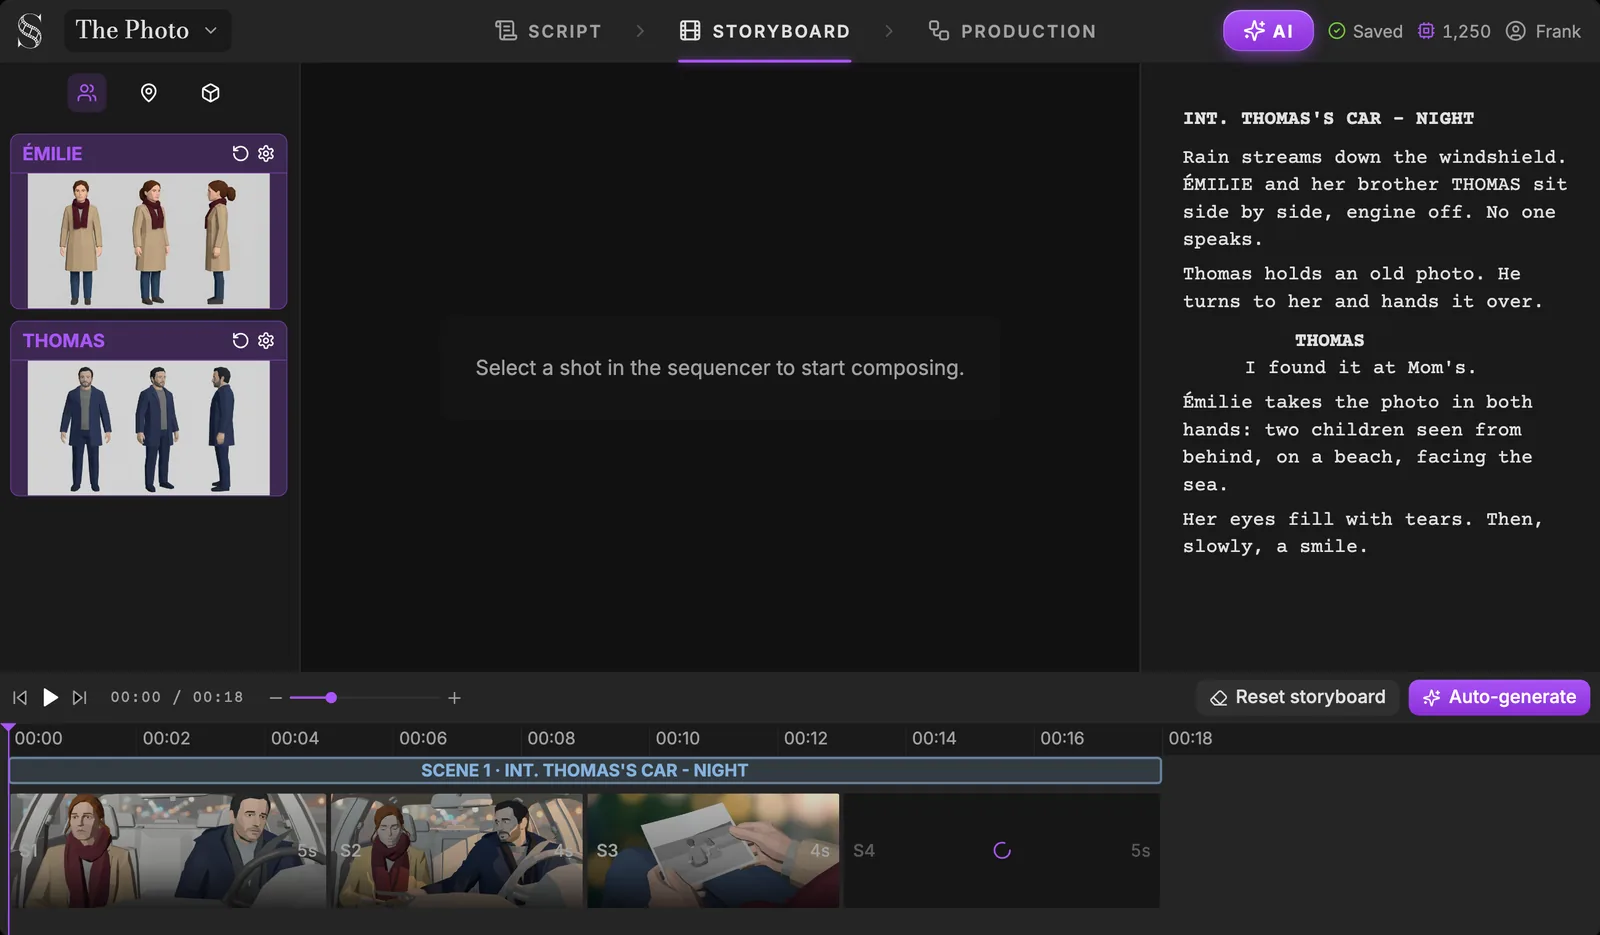
Here you can see what a storyboard sheet is: a clean full-body model sheet in a previz style, on a plain light background. It is generated once. Every panel in the sequencer below is drawn from it, which is why Émilie wears the same coat and the same scarf in S1, S2 and S3.
Step 5: the sheet lives in every storyboard panel
In each shot, the Action field describes what happens. Type @ and pick the character: the mention links the shot to the character's sheet. (For the whole storyboard method, see the AI storyboard generator page.)
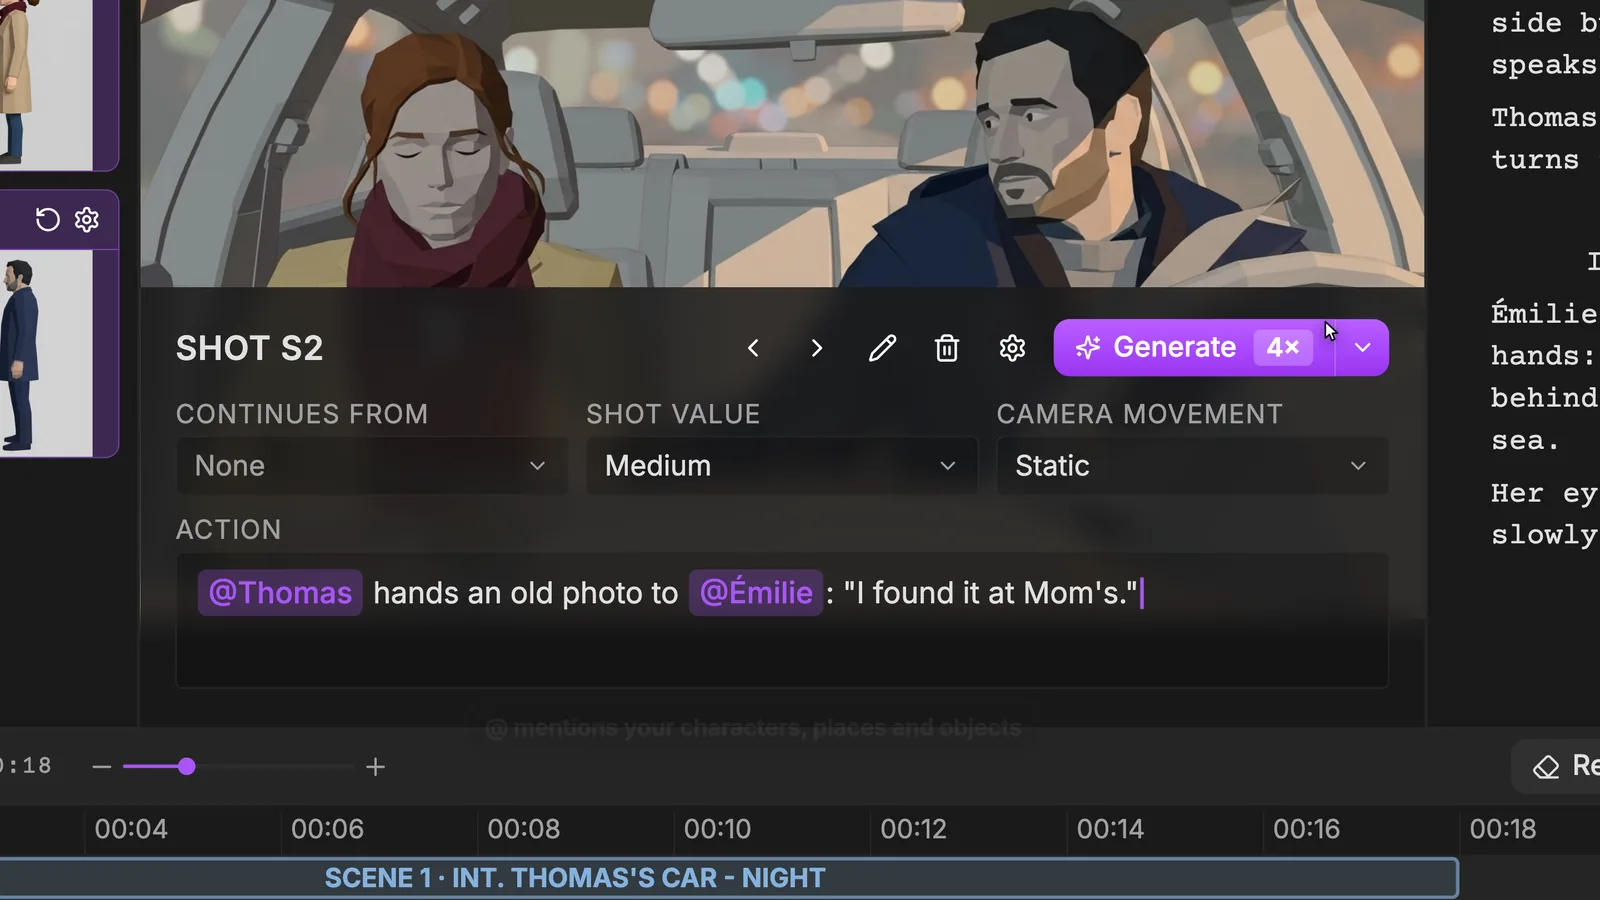
The panel above is a 3D blocking pass: it locks framing, staging and light, not the final look. Note that Émilie's eyes are closed and Thomas leans toward her: the pose comes from the action, the face and the costume come from the sheet.
This is also where the missing expression sheet stops being a problem. The emotion goes in the action of the shot that needs it:
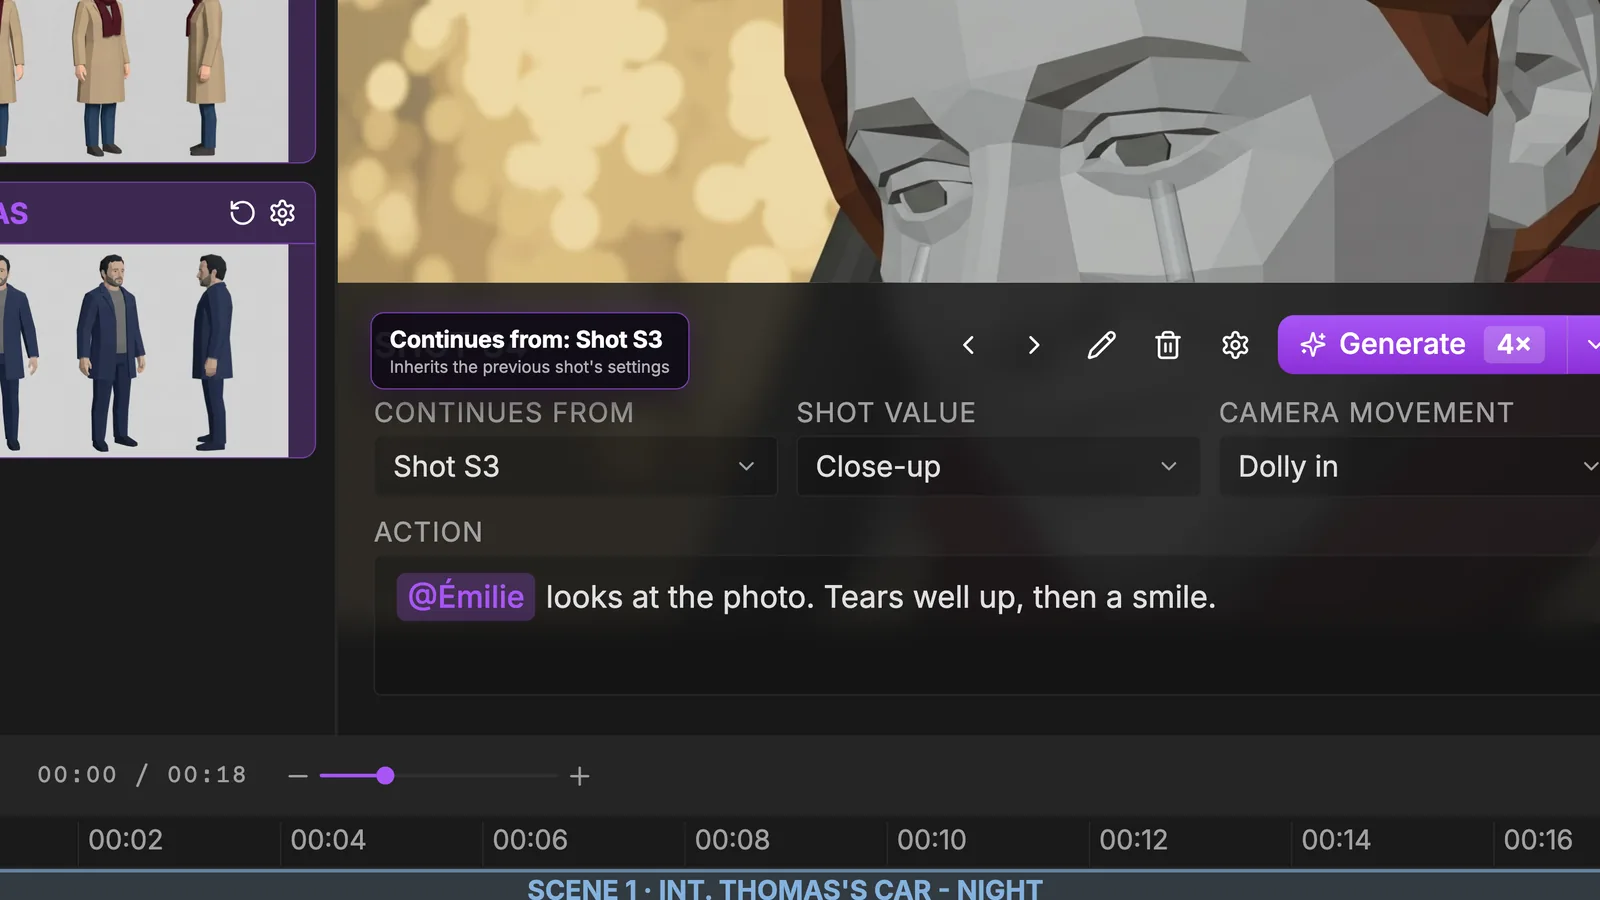
S4 is a close-up with a dolly in. Continues from: Shot S3 links it to the previous shot so it inherits its settings and keeps continuity. The action carries the emotion: "Tears well up, then a smile." Same sheet, new feeling.
Two sheets, one character: storyboard reference vs production reference
Open the Production tab. In the Characters section, Émilie's group is already there, with the same three stages as before. The Production reference is the same character re-rendered in the final style of the film.
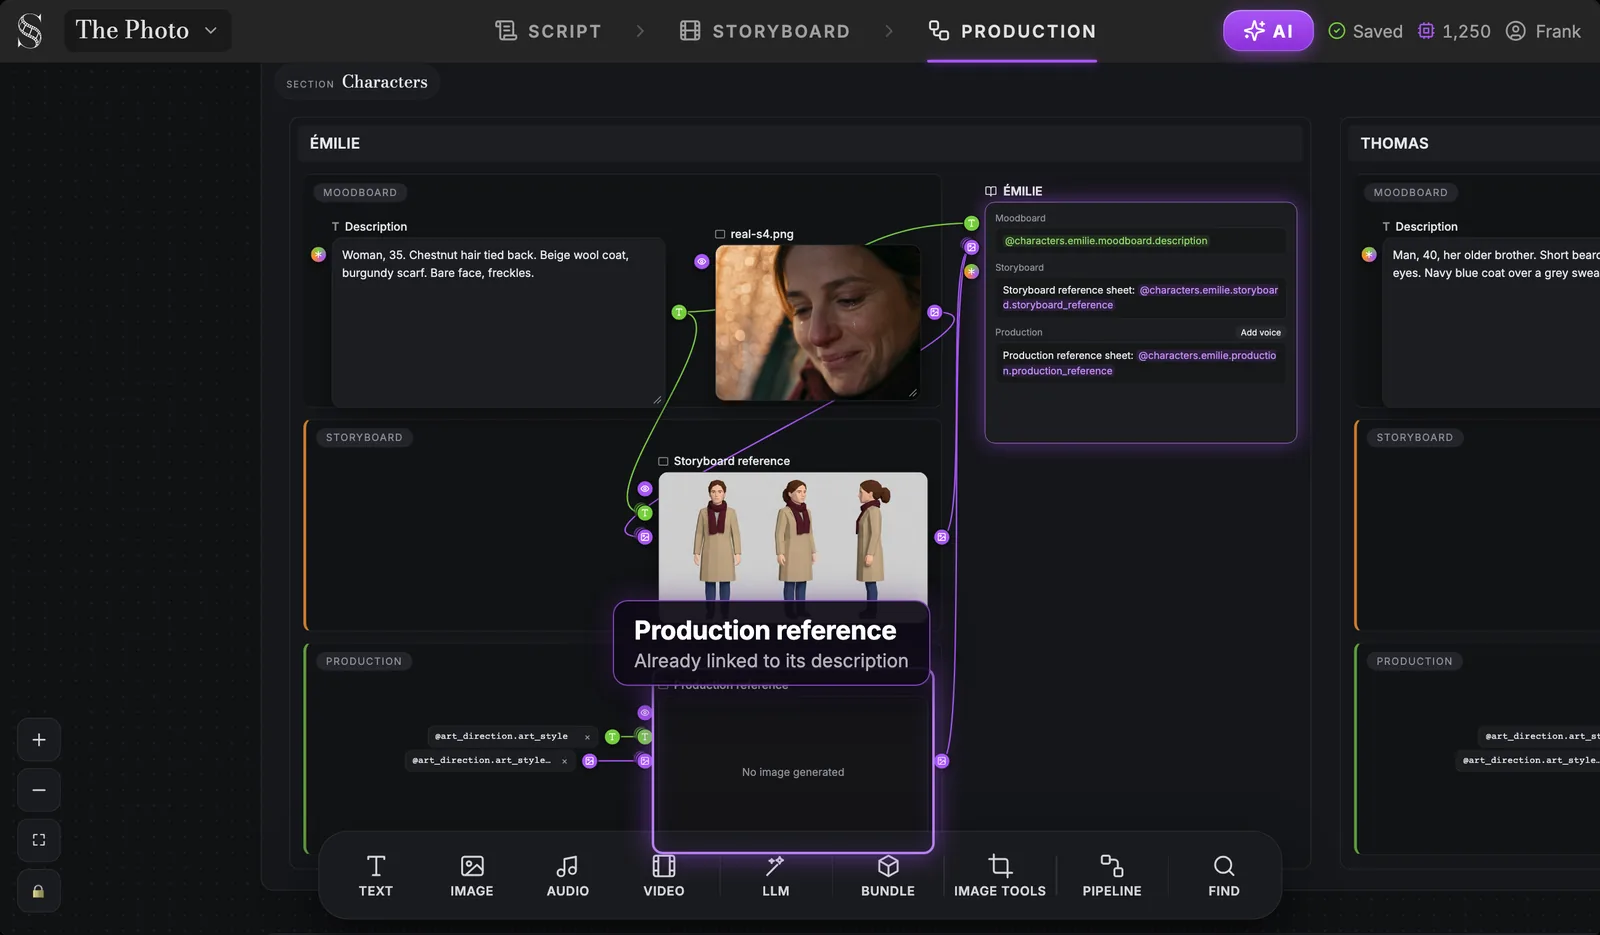
Nothing to wire: the Production reference is already linked to Émilie's description. What decides its style is the Artistic direction of the project, plugged into it as two references.
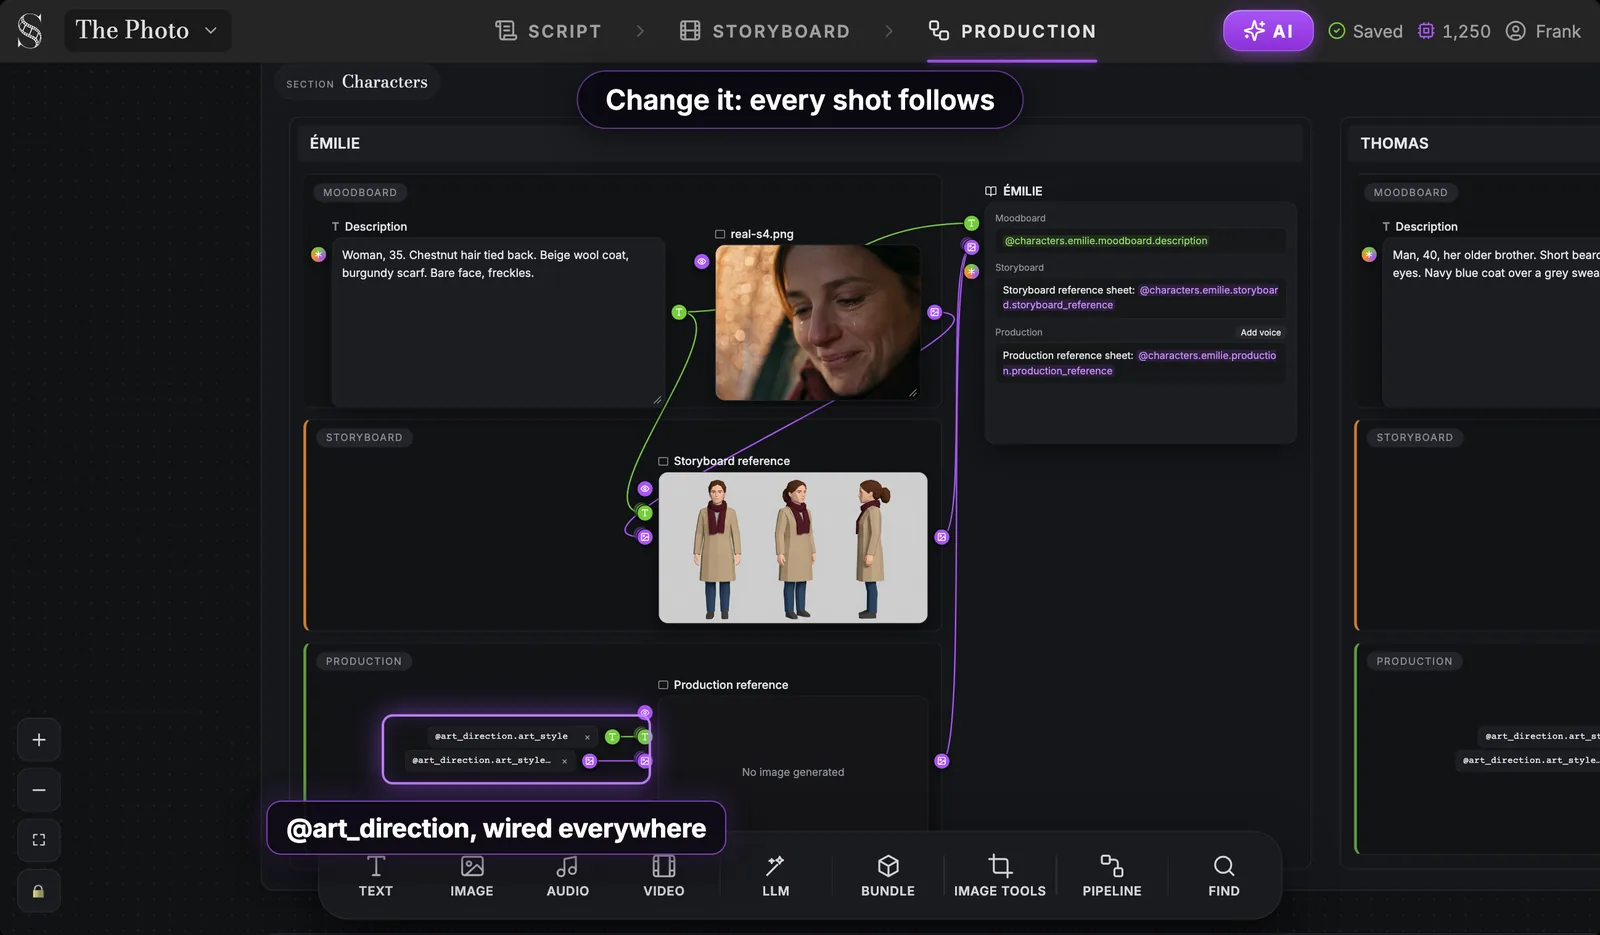
Because every Production reference reads the same art direction, Émilie and Thomas come out in the same style, with the same light. Change the art direction and every shot follows.
| Storyboard reference | Production reference | |
|---|---|---|
| Used in | Storyboard tab, every panel | Production tab, every video shot |
| Style | Previz, plain light background | The film's final style |
| Driven by | The description | The description plus the Artistic direction |
| Job | Lock framing, staging, continuity | Lock the final face, costume and look |
| Generated | Once | Once |
Here are both Production references after generation:
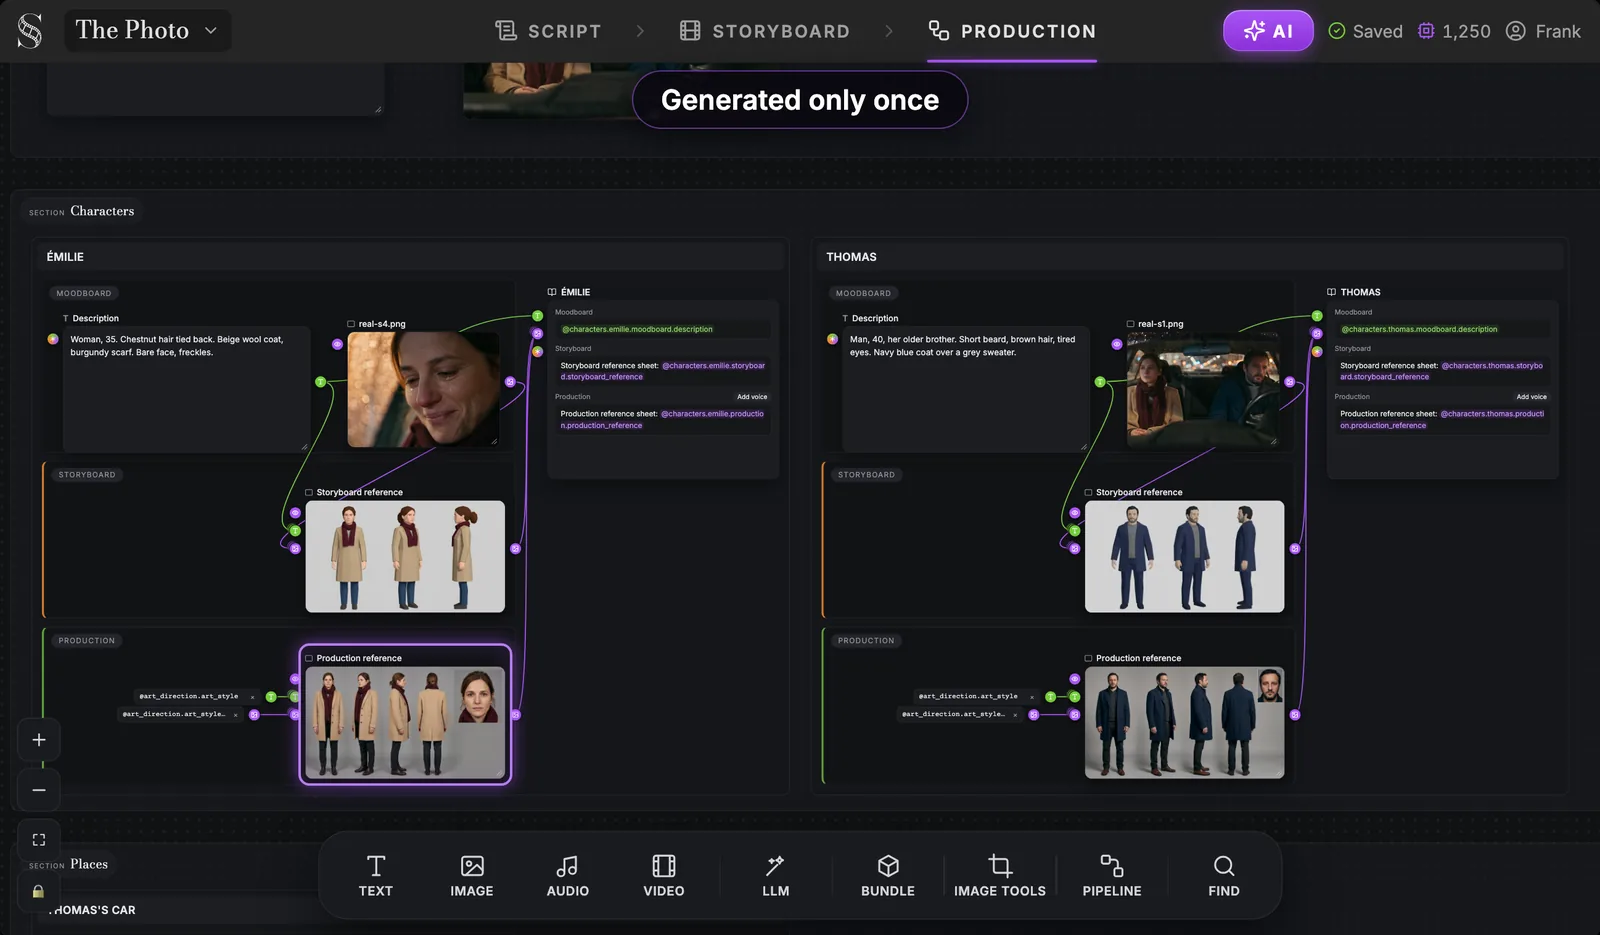
Each one shows the full-body views and a face close-up, in the photoreal style of The Photo. You generate them once, at the start of production, not shot by shot.
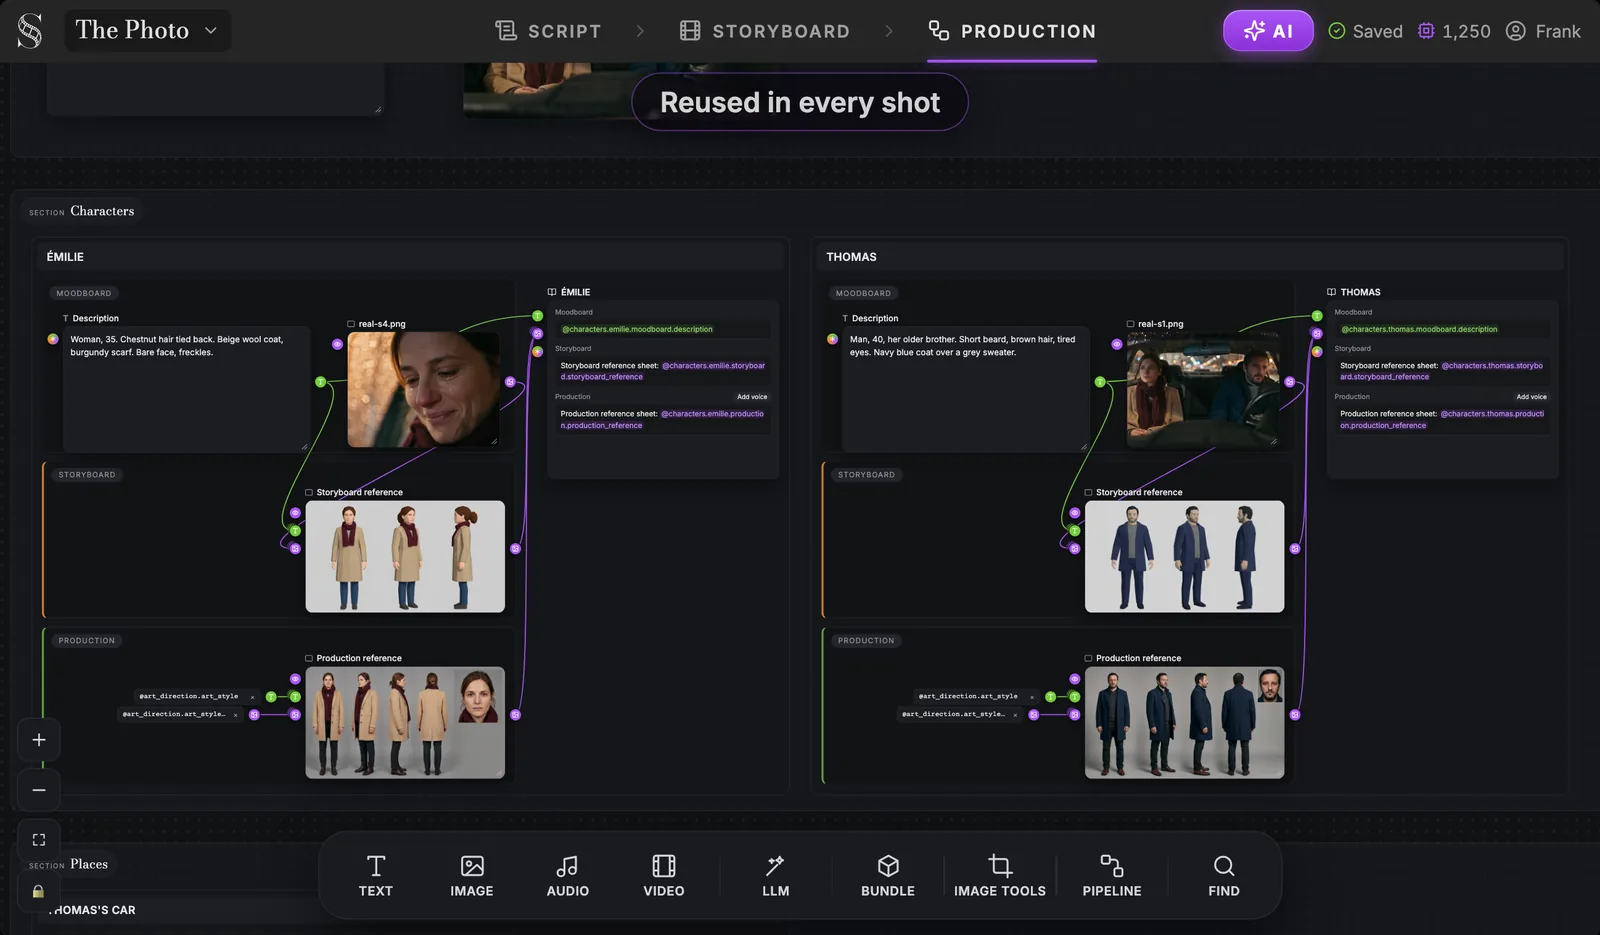
The same canvas, seen for what comes next: these two images are the ones every shot of the scene will use.
Try it free
Try Screenweaver for free on your script
It is free. Import your existing project, get a clearer view of your outline, and regain control of your story structure in minutes.
Start FreeStep 6: the sheets follow the shots into production
Scroll down to Shot production. Each shot keeps its storyboard group, and its characters are already plugged in.
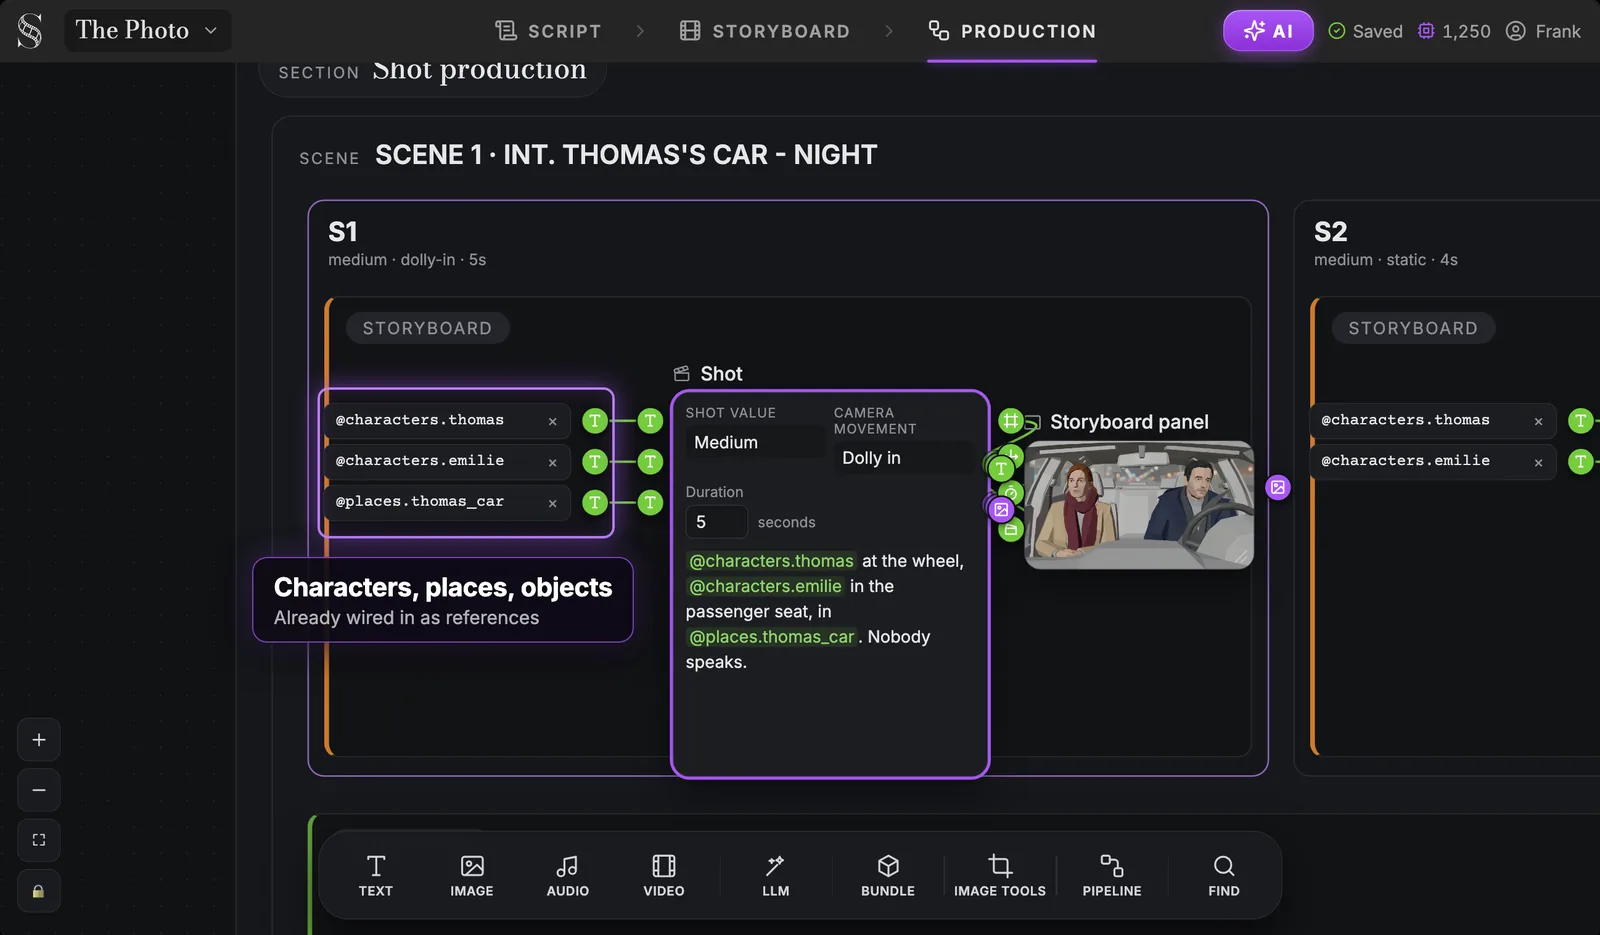
The @ mentions you typed in the storyboard became wires: @characters.thomas, @characters.emilie and @places.thomas_car feed the Shot node of S1. Places and objects follow exactly the same logic, with their own sheets.
To shoot the scene, the Reference to video pipeline gathers the context for you.
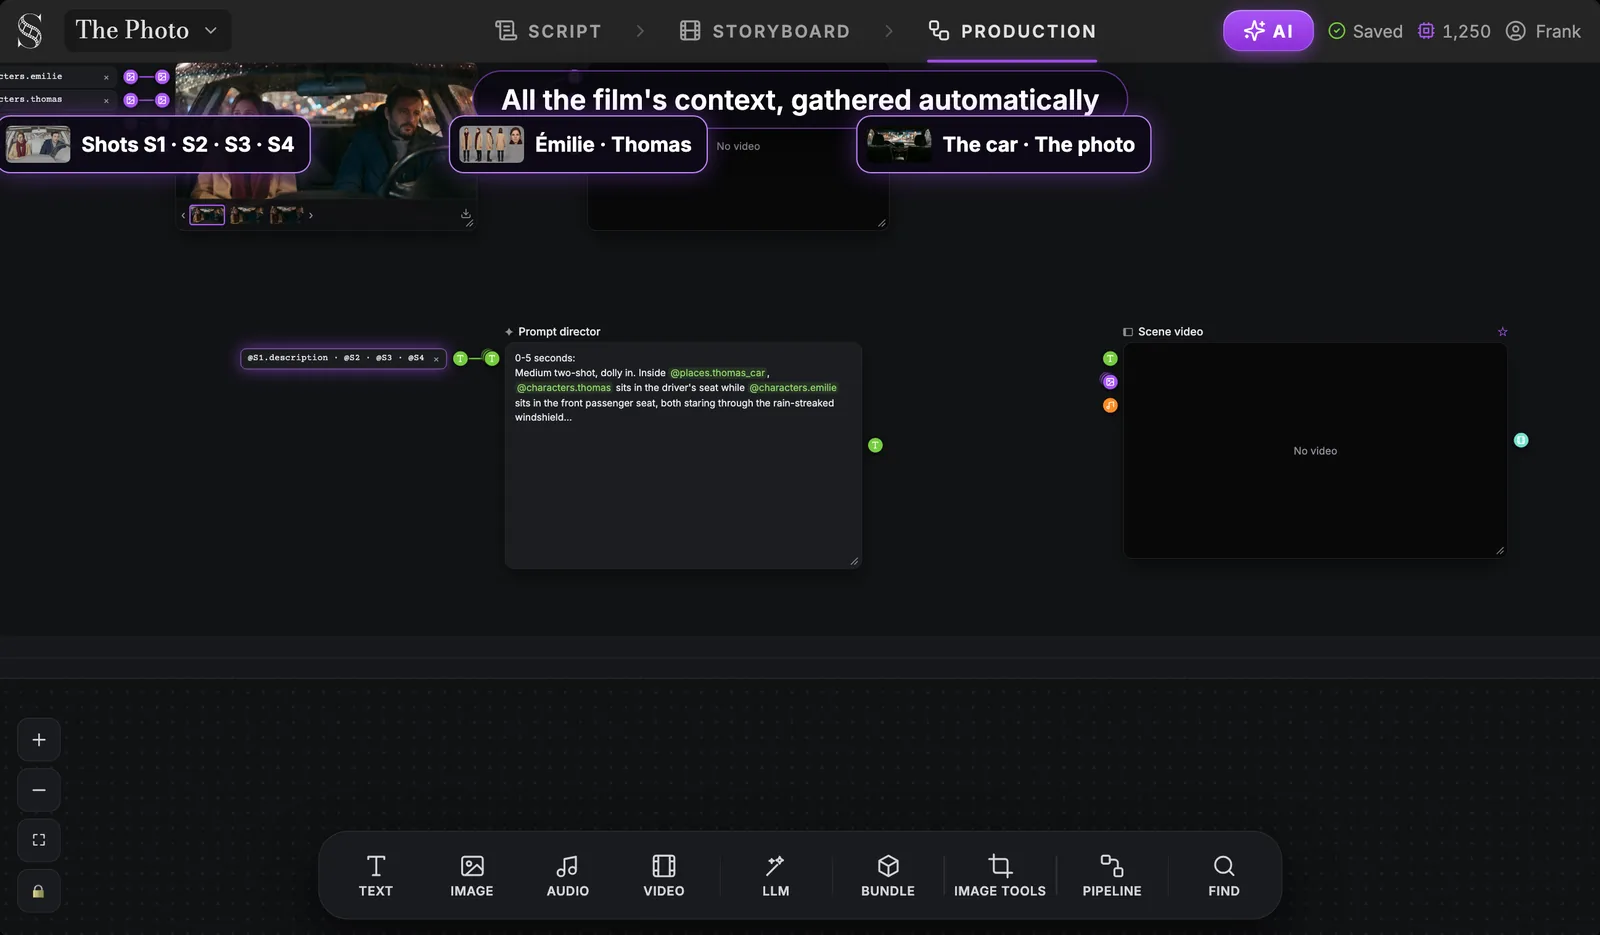
A Prompt director writes the full staging from the action of each selected shot, and the characters, places and objects you cited become references bound at the video node. A single Scene video node then shoots the whole scene as one clip. The full walkthrough is in multi-shot AI video with the scene pipeline.
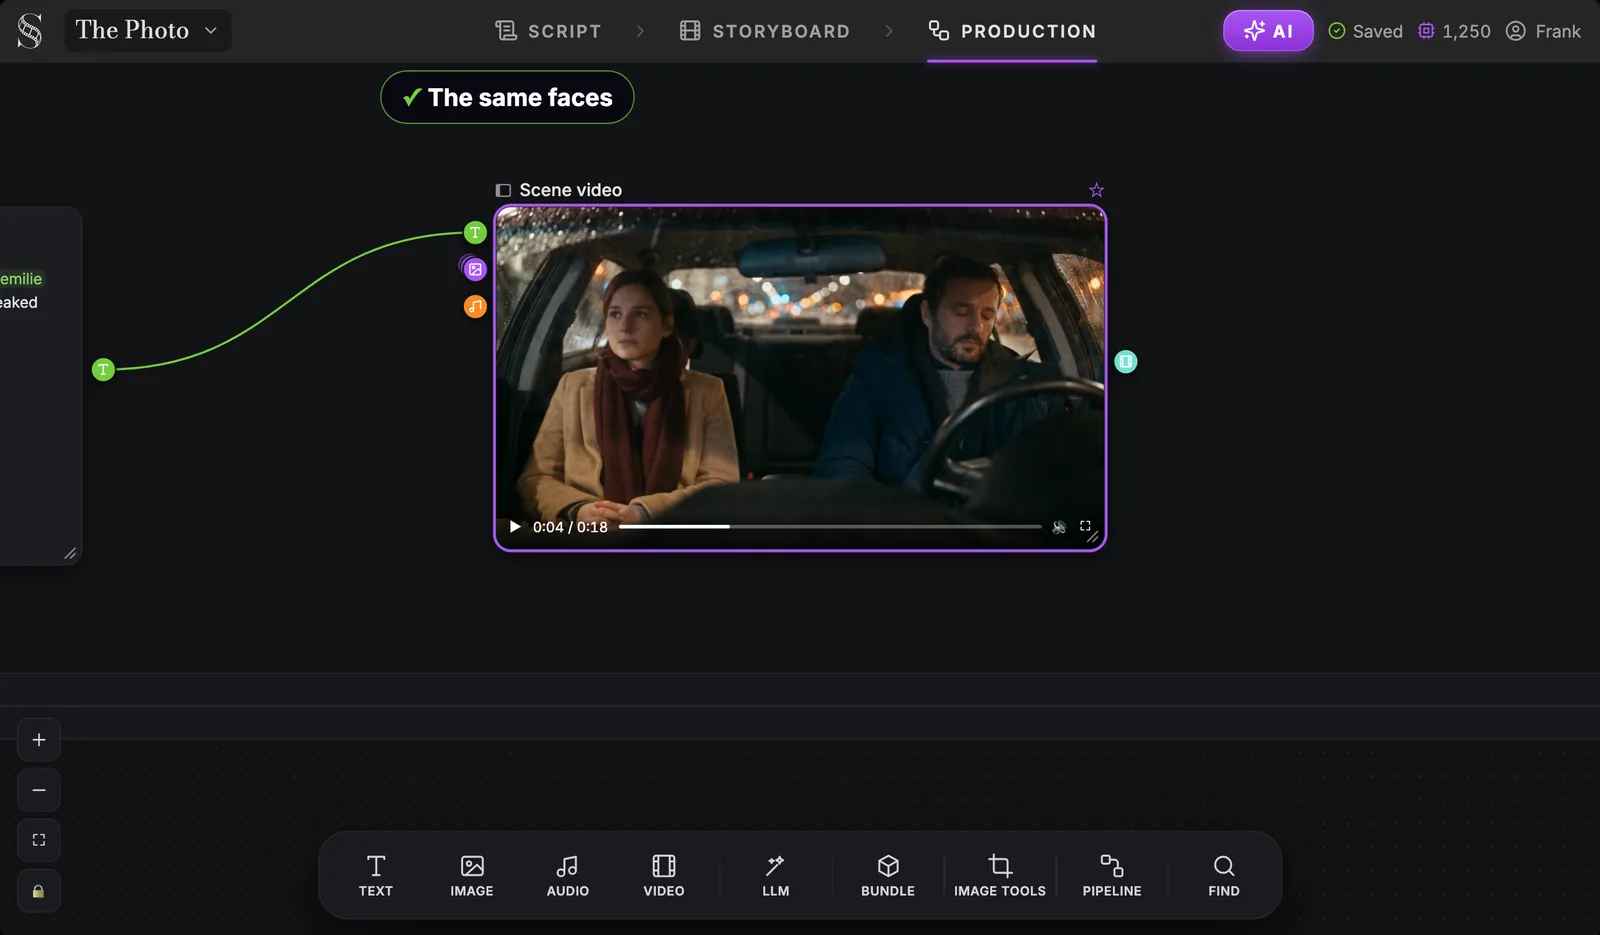
This is the result of the chain: Émilie keeps her chestnut hair, her beige coat and her burgundy scarf from the first second of the scene to the last, and Thomas keeps his beard and his navy coat.
Why the chain holds, in one paragraph
The description fixes what the character looks like. The storyboard sheet turns it into an image once. The @ mention ties that image to every panel. The Production reference re-renders the same character once, in the final style, under one art direction. The production shots receive those references already wired. At no point does the model have to guess Émilie's face again. That is the whole trick, and the reason consistent AI characters for film are a pipeline problem before they are a prompt problem.
It scales, too. Lost Garden, a dark fantasy anime series made by one person in ScreenWeaver, runs 17 minutes 12 seconds for its first episode; its creator tells the whole making-of in How I Made a Japanese-Style Anime With AI.
Common mistakes
1. Personality traits in the description. "Melancholic", "secretive", "brave": the model cannot draw them, so it invents a face to match the mood, and a different one each time. Fix: age, hair, clothes, colours, distinctive marks. Nothing a camera cannot see.
2. A different sheet for every shot. Generating a fresh character picture per shot is the fastest way to get five Émilies. Fix: one sheet per character, referenced with @ in every shot, wide shots included.
3. A busy background. A character standing in a street, in a forest or in a room teaches the model that the street is part of her. Fix: plain background for the sheet. If you drop a reference photo into the moodboard, choose one where the person is easy to read.
4. Regenerating the sheet in the middle of the film. Shots made before and after will not match. Fix: lock the description and the sheet before you generate shots. If the look really has to change, change the description, regenerate the sheet, and re-run every shot that uses it.
5. Expecting an expression sheet. There is none, and you do not need one. Fix: write the emotion in the action of the shot ("Tears well up, then a smile"), and use the close-up to show it.
FAQ
What is an AI character sheet?
It is a reference image of one character, usually several full-body views and a face close-up on a plain background, that an AI model uses to draw the same person again. In a film, it only works if every shot references the same sheet. In ScreenWeaver, each character has a storyboard sheet and a production sheet, both generated once.
How do I keep the same character across AI video shots?
Use one description, one sheet, and reference that sheet in every shot instead of describing the character again. ScreenWeaver does this through @ mentions: a shot that names @Émilie receives her sheet as a reference, in the storyboard and in production. For series, see keeping a series consistent across episodes.
What views should a character reference sheet include?
Front, three-quarter, side profile and back, full body, plus a close-up of the face. These cover the angles your shots will use. Keep a plain background and the costume the character wears in the scene.
Can I make a character turnaround sheet with AI?
Yes, as a still: ScreenWeaver asks the image model for the front, three-quarter, side and back views, which is what a turnaround sheet is for. The model does not always return all four (Émilie's storyboard sheet in this demo kept three, her production sheet has four plus the face), so check the sheet before you move on. It does not make an animated turnaround.
Does ScreenWeaver make expression sheets?
No. Emotion is written per shot, in the Action field ("Tears well up, then a smile"), and the shot keeps the face from the sheet while the expression changes.
Is there a free AI character sheet generator?
On ScreenWeaver's free Screenwriter plan you can write the script, create your characters and write their descriptions and moodboards. Generating the sheets, the storyboard and the video uses credits, included in the Auteur plan ($39.99 a month, 6,000 credits) and the Studio plan ($149.99 a month, 25,000 credits).
Can I use my own photo or drawing as a reference?
Yes. Drop it into the character's moodboard, next to the description. Keep the description accurate too: the description is what drives the sheet.
Build your first character
Write one scene, right-click your lead's name, and describe them in one line a camera can film. The script editor is free: create your free account. For the difference between the three stages you just used, read moodboard vs storyboard vs production.
Final Step
Build your next script with Screenweaver
Move from ideas to production-ready pages faster with timeline-native writing and AI-assisted story flow.
Try Screenweaver