
To animate a webtoon with AI you do four things in order: break the episode into scenes and shots, build character and style references from the panels themselves, generate a 16:9 storyboard that uses those references, then turn each board frame into a short video clip and cut them together. The panels are the input. A screenplay is optional.
This is the practical walkthrough. For the bigger picture, including how studios do it and whether you should even try, start with how to turn a webtoon into an anime. Direct webtoon import, where you drop the panels in and get shots back, is coming to ScreenWeaver: see convert webtoon to anime.
What you are actually converting
A webtoon episode is a vertical strip of 60 to 90 panels. An animated episode is a sequence of shots with durations. Animating each panel in turn is the wrong mental model. The conversion is a set of decisions the artist never had to make:
| The webtoon has | The animation needs | Who decides |
|---|---|---|
| Panels | Shots (one panel can be two shots, three panels can be one) | You |
| Reading order | Cut order, usually the same, sometimes not | You |
| Gutters (the space between panels) | Duration, and what moves during it | You |
| Speech bubbles | Dialogue with a speaker, a duration and a performance | You, then a voice |
| A vertical 800px-wide canvas | A 16:9 frame, which means reframing every panel | You, with help |
| Characters drawn on-model 400 times | A locked set of references so generation stays on-model | The tool, from your panels |
| A palette and a line style | A style reference applied to every frame | The tool, from your panels |
The two rows marked "the tool" are the ones AI genuinely solved in the last year. The rest is directing and it still takes a person.
Step 1: Break the episode into scenes and shots
Read the chapter and mark every change of location or time. Webtoons rarely write "INT. CLASSROOM, DAY", so you infer it from the backgrounds. Most chapters have two to five scenes.
Inside each scene, decide the shots. The default is one panel, one shot. Break that default when:
- A panel holds an action with a before and an after. A punch drawn at the moment of impact is at least two shots: the wind-up and the hit.
- Several panels are the same framing with different dialogue. Three talking-head panels of the same character are one shot with three lines.
- A tall panel is a camera move. A full-height panel of a tower is a tilt up, not a static frame.
- A wide panel has two focal points. The artist wanted your eye to travel. That is a pan, or two shots.
Write it as a shot list before you touch any generation tool: scene, shot number, source panel numbers, shot size, what moves, dialogue. The shot size guide gives you the vocabulary if you have never written one. Done properly, a 75-panel chapter comes out at 50 to 70 shots, and that number decides your budget more than anything else.
If you would rather work from a screenplay, this shot list is exactly what you paste into the script side of ScreenWeaver: scene headings, action lines for what moves, and the bubble text as dialogue. The screenplay gives you a page count, a runtime estimate and an outline for free. Skipping it is fine for a pilot. Skipping it for a twelve-episode season is how you lose track.
Step 2: Build the references from the panels
This is the step people skip and then wonder why the character has a different face in every shot.
For each recurring character, cut from the actual webtoon:
| Reference | Where to find it in the panels | Why it matters |
|---|---|---|
| Front face, neutral | Any dialogue close-up | The anchor. Generation matches this first |
| Three-quarter face | Almost every reaction panel | The angle most shots will actually use |
| Profile | Rarer. Look for walking panels or two-shots | Without it, the model invents a nose |
| Full body, default outfit | Establishing panels, chapter openers | Costume, proportions, height relative to others |
| Two or three key expressions | Wherever the artist went big | Keeps the emotional range on-model |
| Any alternate outfit or form | Where the story introduces it | Otherwise the model reverts to the default |
Do the same for the two or three recurring locations and for the series' style: one page with the line weight, the colour palette, the way shadows are drawn, the way backgrounds are simplified. The character consistency sheet formats all of this into the layout generation models respond to best.
In ScreenWeaver these live as story elements: characters, places and objects, each with a reference sheet. You can generate the sheet from a description, or drop your own panel crops onto the entity and build the sheet from those. For a webtoon, always do the second. The artist already drew the definitive reference, and a generated approximation of it is a downgrade.
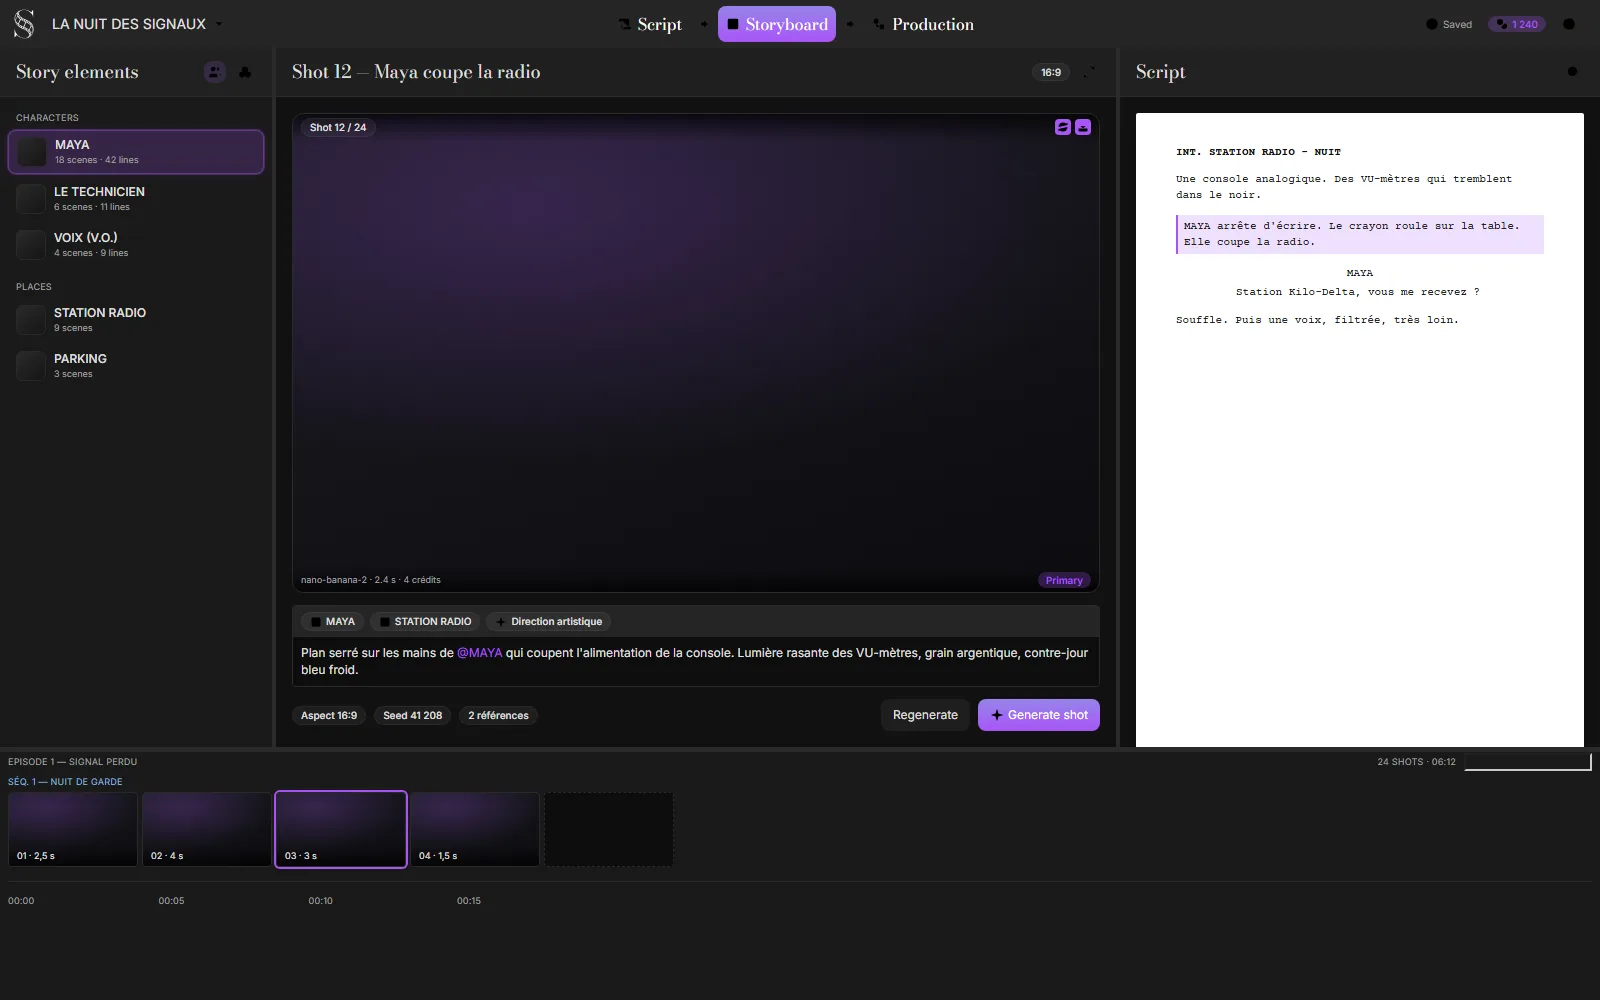
Interface reconstruction of the Storyboard tab, from ScreenWeaver's design kit. Characters and places sit on the left, each shot prompt references them by name, and the sequencer at the bottom holds the durations.
Step 3: Generate the storyboard in 16:9
Now each shot from your list gets a frame. The prompt for a webtoon shot has a fixed shape:
[shot size], [character reference by name], [action from the gutter],
[location reference], [style reference], 16:9
The order is deliberate. Shot size first because it is the thing the model most often ignores. Character references by name so the tool attaches the sheet. The action written as what is happening, not what the panel shows, because the panel shows a frozen instant and you want the frame that reads as motion.
Reframing is the part specific to webtoons. A vertical panel does not fit a widescreen frame, so for every shot you choose one of four moves:
| Reframe | When | What it costs |
|---|---|---|
| Crop to the face or the action | Close-ups and reactions. Most dialogue shots | Nothing. The panel already composed it |
| Extend the sides | Wide shots where the location matters | The model paints new background. Check it matches the location reference |
| Turn the height into a move | Tall panels: buildings, falls, reveals | One frame becomes a tilt in production. Board the start and end frames |
| Split into two shots | Panels with two focal points or an action with a before and after | An extra shot, so an extra clip and budget |
The webtoon to storyboard guide goes through all four with panel-by-panel examples. Batch generation exists for the shots where the default crop is obviously right, which is most of the dialogue. Do the action shots one at a time.
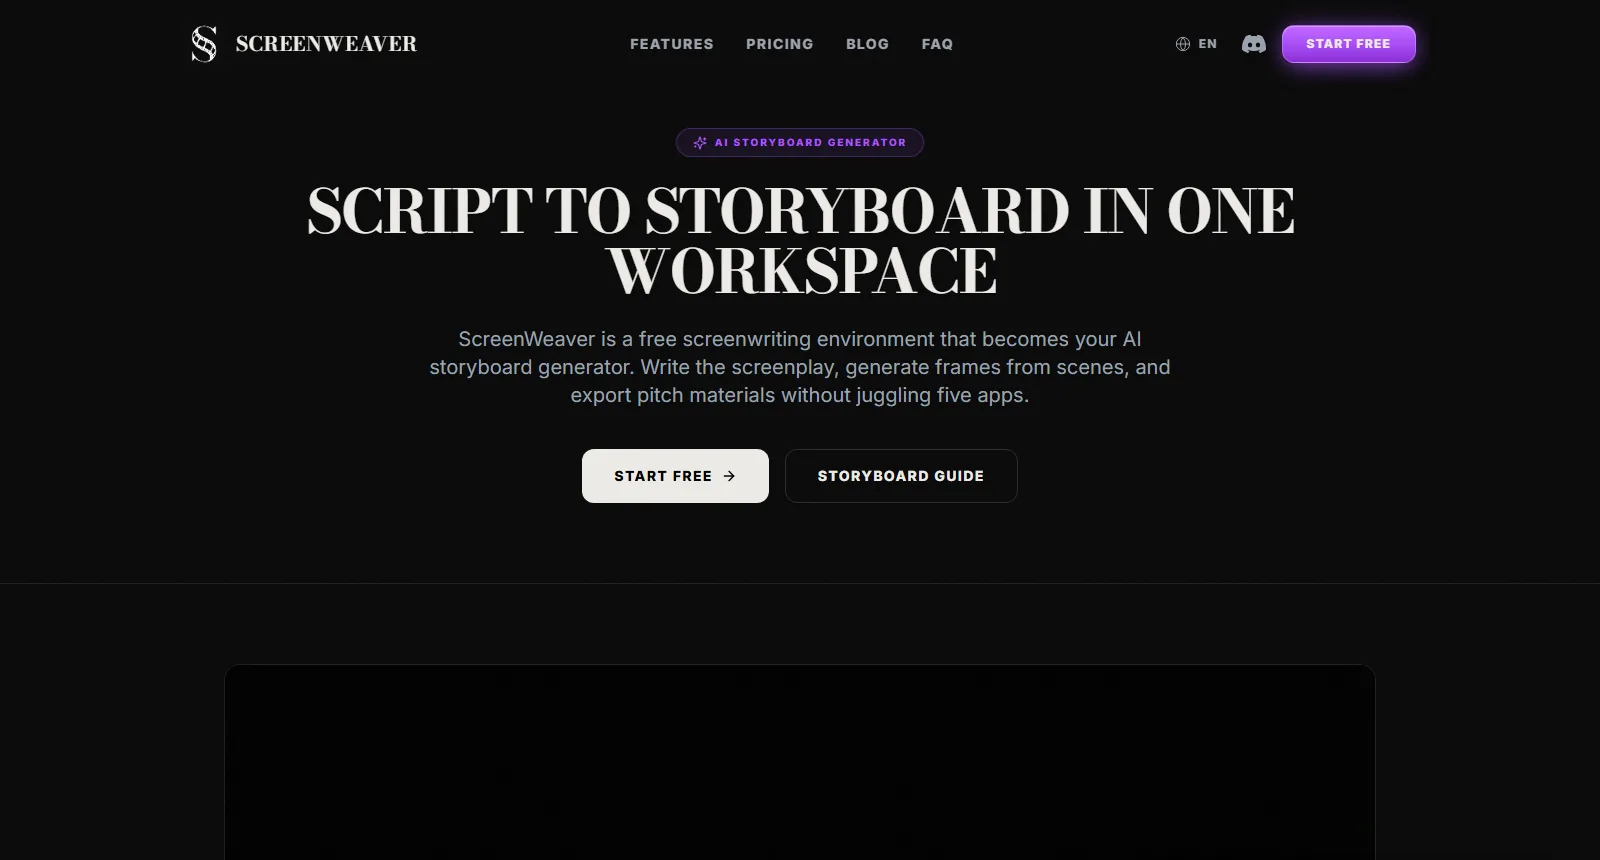
The AI storyboard generator page on screenweaver.ai, captured 3 September 2026. Storyboard generation is open to every account with a starter pack of free credits; the webtoon import that takes an episode instead of a screenplay is the next step in this pipeline.
Try it free
Try Screenweaver for free on your script
It is free. Import your existing project, get a clearer view of your outline, and regain control of your story structure in minutes.
Start FreeStep 4: Motion, shot by shot
Each board frame becomes a clip through image-to-video generation. The frame is the first image, the prompt describes what moves, the model returns three to ten seconds.
Rules that hold across every current model:
- One movement per clip. "She turns and the door opens behind her" is two clips, or a coin flip.
- Small camera moves only. A slow push, a drift, a gentle tilt. Whip pans and orbits come back wrong.
- Faces closer than mid-shot hold better than wide shots. Wides drift off-model faster because the face is fewer pixels.
- Dialogue clips are short. Generate four to five seconds of the character speaking, cut to the listener, come back. That is how anime does it too, and it hides the model's weakest area, which is a long held performance.
- Fights are boarded frame by frame. A five-panel fight is eight to twelve clips of one movement each, and the cut does the choreography.
One thing the models get wrong by default is the frame rate. Anime holds each drawing for two or three frames, so a generated clip running smooth at 24 fps reads as rotoscope until you step it down. The AI anime production pipeline guide covers where to set it per cut.
Models differ in how much they respect a reference and how long they can hold. Rather than list versions that will be stale by winter, use the AI video model picker, which is kept current against the public model pages. ScreenWeaver's Production tab routes to several of them from the same storyboard, so a shot that fails on one model can be retried on another without rebuilding the prompt.
Budget three generations per shot on average. The cost breakdown shows why that multiplier decides the bill.
In ScreenWeaver
Turn a panel into an anime shot
Your own panel goes in as a reference, an Image node redraws it as a widescreen anime frame, and a Video node animates it. Click the nodes to see how they are set.
Click a node to see its settings, drag it to move it.


Step 5: Voice, sound and the cut
Speech bubbles become lines. Each line gets a voice, a duration and a performance note, and that duration goes back into the storyboard, because a bubble that reads in one second might take three to say. This is the loop the studio path spends months on: the timing sheet.
Practical order:
- Record or generate the voice lines first, before the video clips, so you know the durations.
- Set each dialogue shot's duration to the line length plus a beat.
- Generate the clips to those durations.
- Cut, then add music and sound. Sound effects are where the webtoon's onomatopoeia goes; the comic book adaptation guide covers how they translate.
A 60-second pilot is roughly 15 to 20 shots, 40 to 60 generations, a dozen voice lines and one afternoon of editing. The storyboard-first workflow for AI video is the general version of this process if you want to see it without the webtoon specifics.
Where this breaks
- Crowds and background characters. They are unreferenced, so they drift. Keep them out of focus or out of frame.
- Hands holding objects. Still the weakest area of every model. Board around it.
- Long continuous action. Anything over eight seconds in one clip will drift. Cut more.
- Text in frame. Signs, phone screens, letters. Generate them blank and add the text in the edit.
- The artist's exact line. The output will be in the style, not by the hand. A reader who knows the series will see it. Whether that matters depends on whether the alternative was no animation at all.
Not every webtoon wants to become anime, either. A gag strip or a slice-of-life comedy with round, simple designs often reads better as a Western-style cartoon, flat colour and squash and stretch, than as cel-shaded drama. The AI cartoon method covers that look, built on a single model sheet that holds the character from the first shot to the last.
If the target is a vertical serialized release rather than a 16:9 pilot, the short drama pipeline covers the 9:16 episode format, the paywall episode and the cliffhanger grid.
FAQ
Can AI convert a webtoon to animation automatically?
Not end to end, and anything that claims to is producing a slideshow with camera drift. What AI does well is the two expensive parts: keeping characters and style on-model from your own panels, and generating motion from a storyboard frame. The shot breakdown, the timing and the edit are still yours.
Do I need a script to animate my webtoon?
For a pilot, no. A shot list built from the panels is enough: scene, shot, source panels, shot size, what moves, dialogue. For a full season a screenplay is worth the extra day, because it gives you runtime estimates and an outline you can search. ScreenWeaver accepts either; the direct webtoon import, where the episode replaces the screenplay entirely, is in development.
How do I keep my characters consistent across AI generated shots?
Build the references from the webtoon itself: front, three-quarter and profile faces, full body in the default outfit, and the key expressions, all cropped from panels. Attach them to a named character and reference that name in every shot prompt. Keep shots at mid or closer where consistency matters most.
What aspect ratio should a webtoon animation be?
16:9 for anything going to YouTube or a streamer, which means reframing every vertical panel. 9:16 is legitimate for shorts and for platforms where your readers already are, and it needs far less reframing. Many creators board in 16:9 and cut a 9:16 version from the same shots.
How long does it take to animate one webtoon chapter with AI?
A 60-second pilot from one chapter's best scene: two to five days, most of it retries and editing. A full chapter at 50 to 70 shots: one to three weeks for one person, depending on how many action shots it has. Dialogue scenes go fast; fights do not.
Will the animation look exactly like my art style?
It will be in your style, not by your hand. With good style references the palette, line weight and shading approach hold well. The exact line quality of the artist does not survive, and motion shifts the look a little. Readers who know the series will notice; new viewers will not.
Final Step
Build your next script with Screenweaver
Move from ideas to production-ready pages faster with timeline-native writing and AI-assisted story flow.
Try Screenweaver