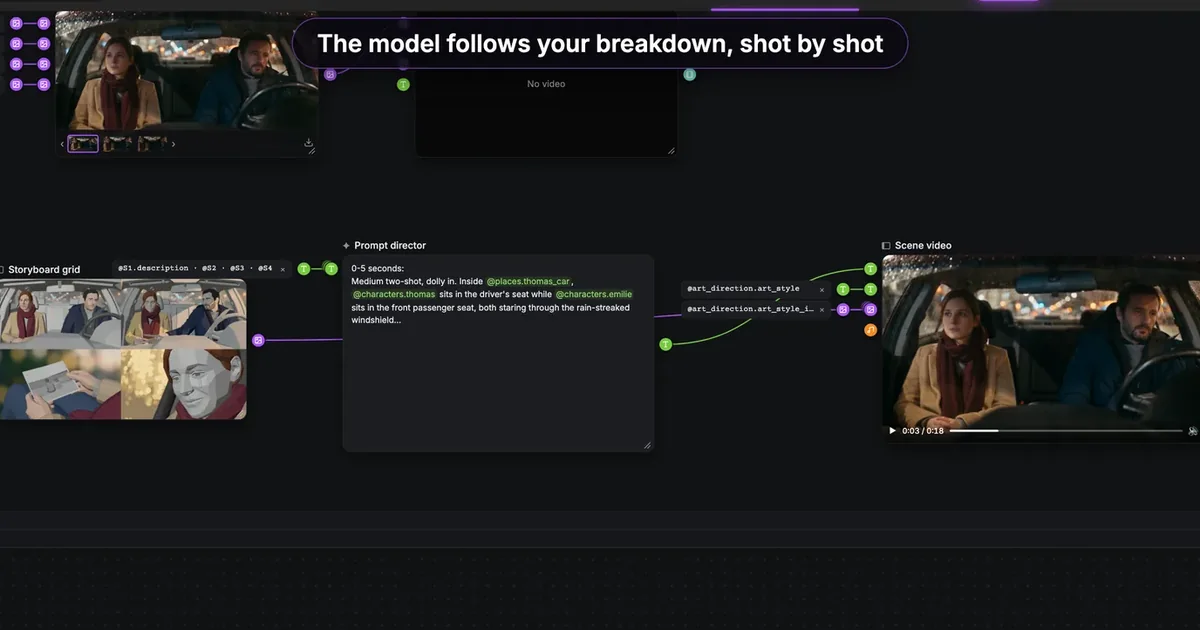

The short answer: to get a multi-shot AI video, generate the scene, not the shots. In ScreenWeaver, a pipeline gathers the shots of a scene, writes one timed staging for all of them and sends it, with the reference sheets of the characters, places and objects, to a single video node. Seedance 2.5 then films the whole scene as one clip of 4 to 30 seconds, with the cuts inside it.
Most AI video tools make you work one shot at a time. You write a prompt for the medium shot, another for the close-up, another for the insert, and you hope the four clips belong to the same film. They rarely do. This guide shows the other way: one scene, one generation, one clip with its cuts already in place.
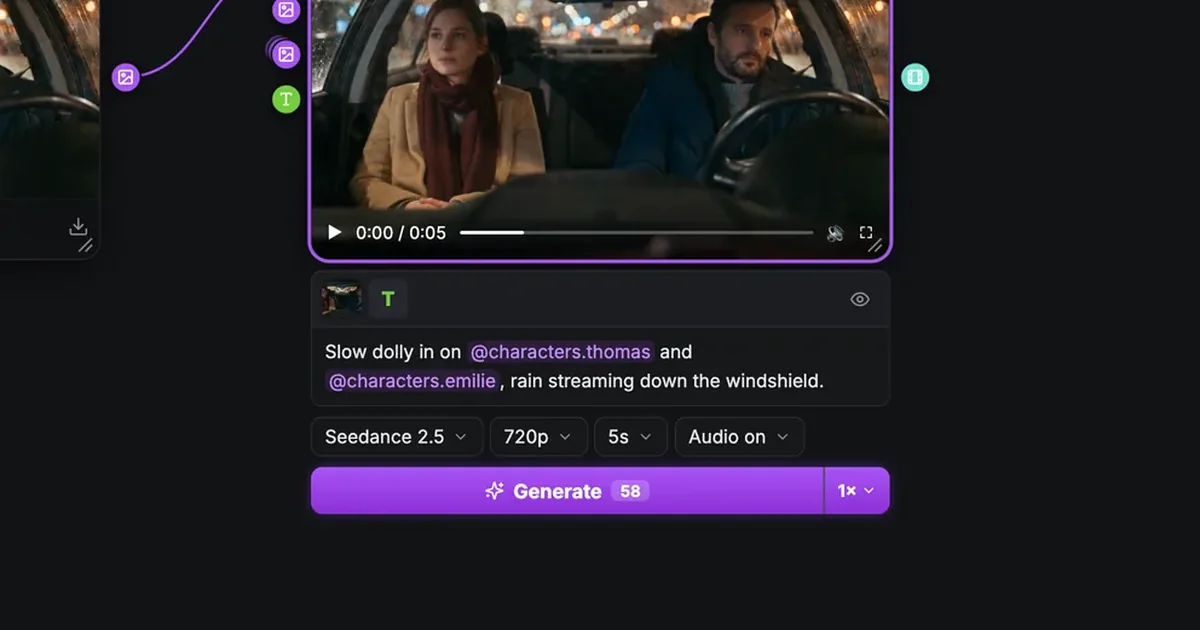
We use the demo project The Photo throughout. One scene, INT. THOMAS'S CAR - NIGHT, rain. Thomas (40, short beard, navy coat) hands his sister Émilie an old photo of the two of them as children, found at their mother's house. He says "I found it at Mom's." Her eyes fill with tears, then she smiles. Four shots: S1 medium, dolly in, 5 s; S2 medium, static, 4 s; S3 insert on the photo, 4 s; S4 close-up, dolly in, 5 s. The screenshots below show the ScreenWeaver interface with this project.
Why shot-by-shot generation breaks a scene
A video model has no memory between two generations. Each clip starts from zero, so every shot reinterprets the scene a little:
- Faces drift. Émilie's scarf turns from burgundy to red, Thomas loses his beard in the close-up. We cover the mechanics in character drift in AI video.
- Light changes. The rain on the windshield, the warm streetlamps, the blue night: each clip lights the car its own way.
- You rewrite the prompt every time. The car, the coats, the weather, the mood, four times over, with four chances to forget a detail.
- The cuts do not match. Thomas's hand holds the photo at the end of S2 and is somewhere else at the start of S3.
Recent video models can cut inside a single clip: one generation, several framings, the same people and the same light from the first frame to the last. What they need is the right context: the order of the shots, what happens in each, and pictures of who and what is in the scene. ScreenWeaver's pipelines gather that context from your project and hand it to the model.
What a multi-shot clip is, and what it is not
A pipeline produces one video file per scene, with the cuts baked in. It is not four separate files, and it is not a finished edit. You still bring the clip into your editor, trim it, cut it where you want, add sound and music. Think of it as a take of the whole scene, the way a live-action crew shoots a scene in one continuous run and the editor cuts it afterwards.
That changes how you judge a result. You are not looking for the prettiest frame. You are looking for a scene that holds: same faces, same light, cuts that land where your storyboard says.
Where it happens: the scene's Production group
Pipelines live in the Production tab. The canvas is built from your storyboard: under the Shot production section, each scene shows its shots side by side, and below them an empty group where the video gets made.
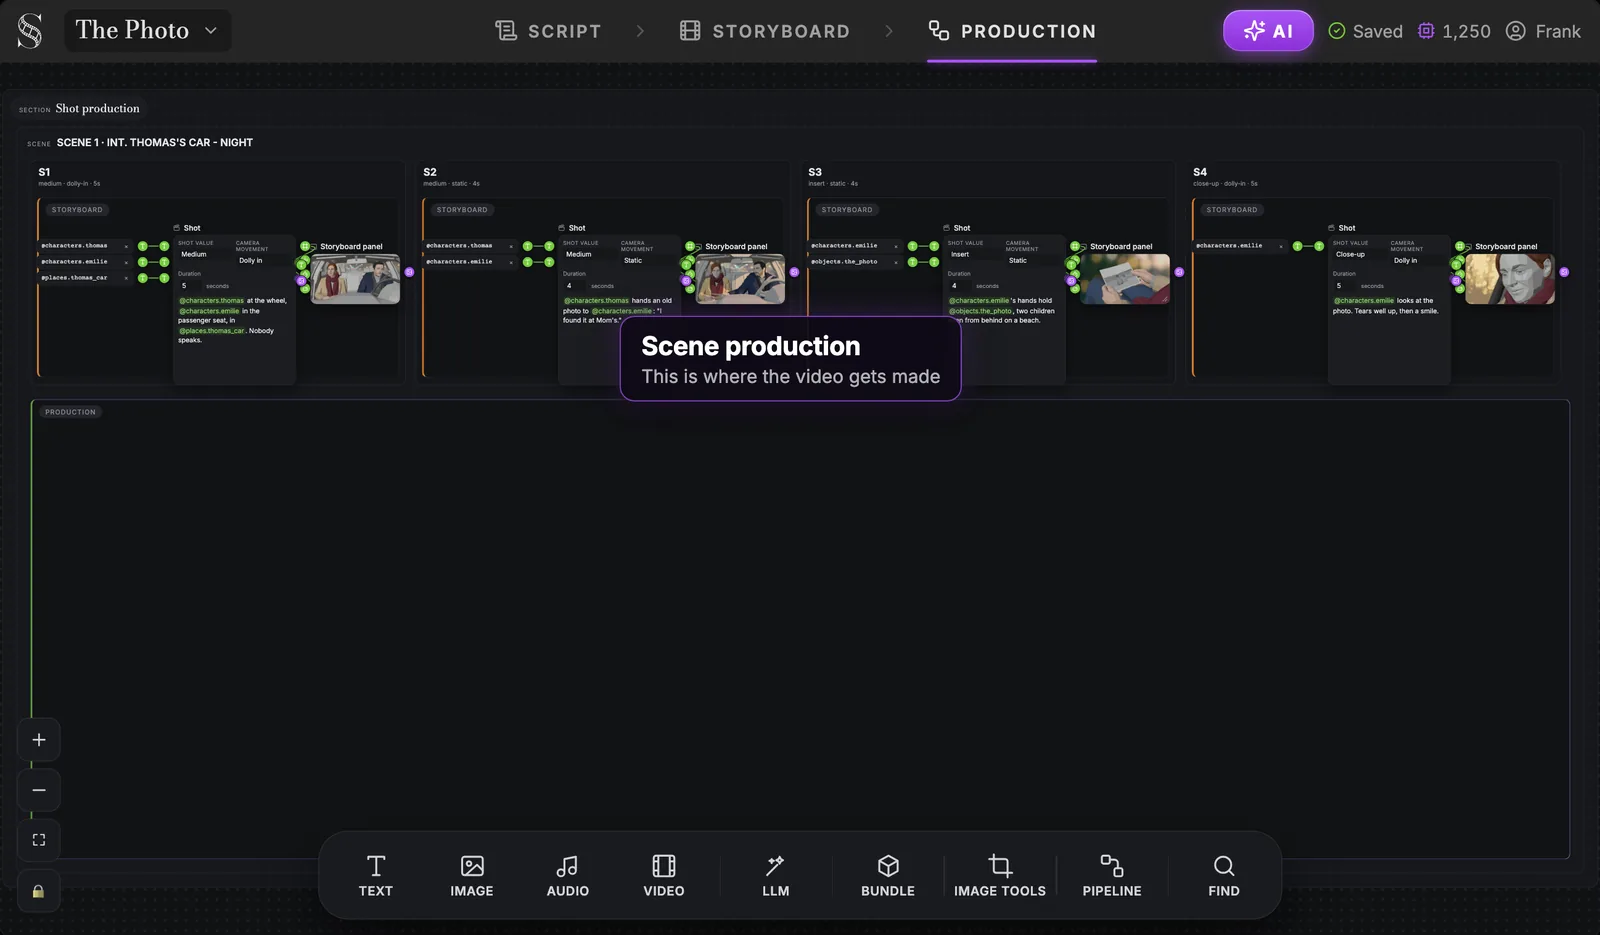
Each shot group already holds its Shot node (shot value, camera movement, duration, action text) with its characters, places and objects wired in, next to its storyboard panel. If you have not built that board yet, start with how to turn a script into an AI previz storyboard. For a tour of the whole canvas, see the AI video production node canvas.
Step 1: add a pipeline and choose its type
Click the Pipeline tile in the bottom toolbar, place it in the scene's Production group, and the Add pipeline window opens. Its first step, Choose a pipeline, offers two options.
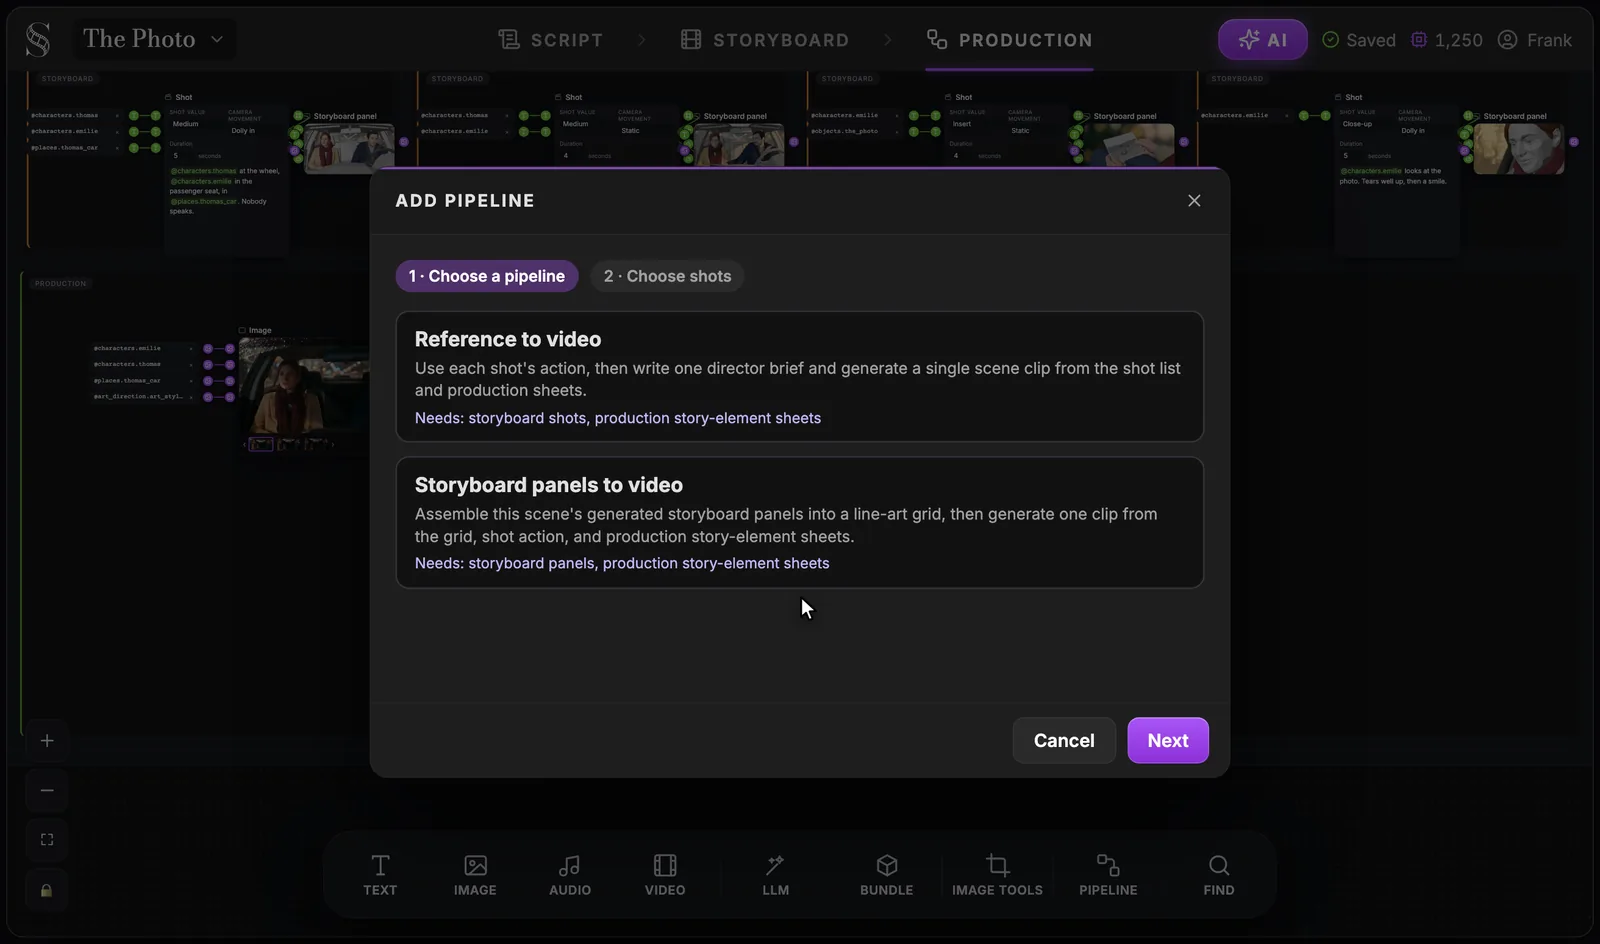
- Reference to video needs storyboard shots and production story-element sheets. It works from the action written in each shot.
- Storyboard panels to video needs storyboard panels and production story-element sheets. It also works from your board's images.
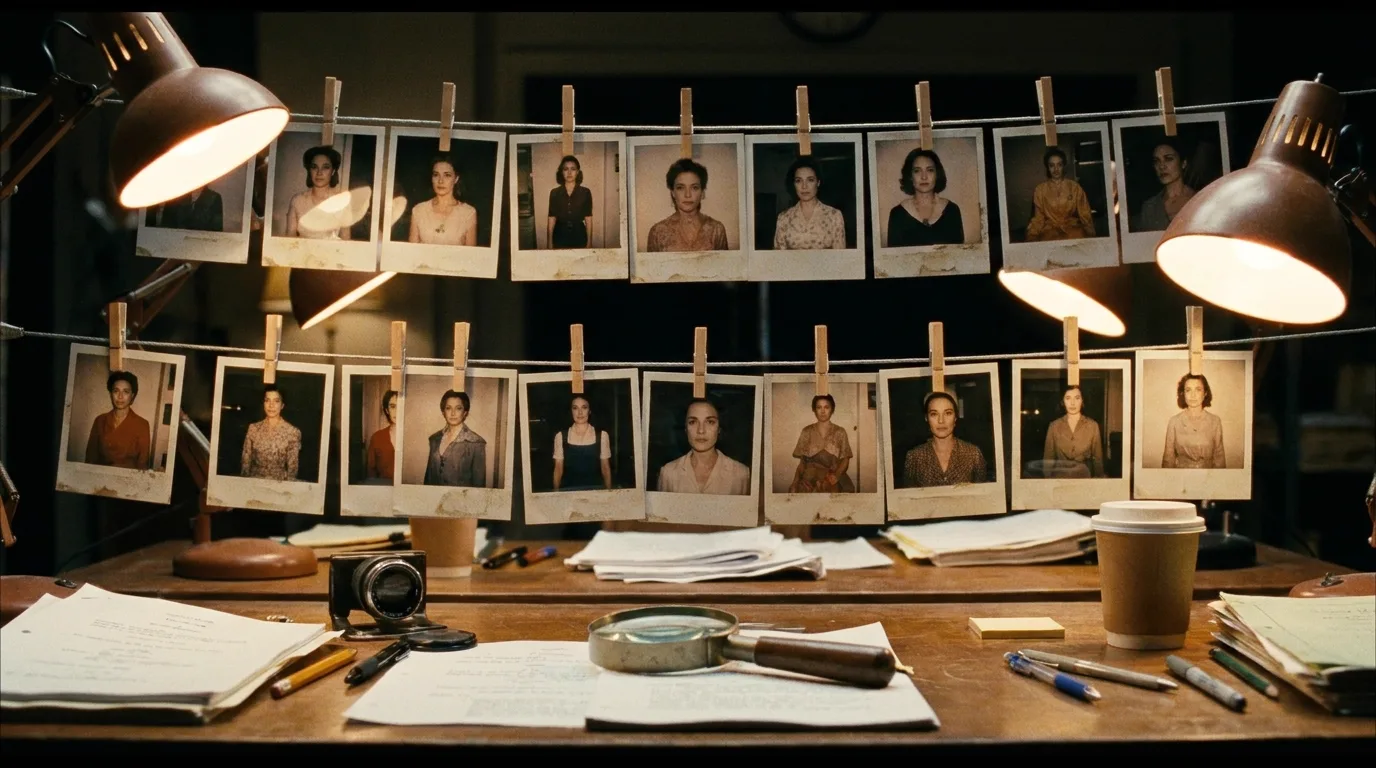
Read the Needs line before you choose. If your characters do not have a Production reference sheet yet, generate those first in the Characters, Places and Objects sections of the canvas: the pipeline uses those sheets to keep faces and places the same.
Step 2: choose the shots and watch the duration
Click Next. The second step, Choose shots, lists every shot of the scene with its thumbnail and its duration.
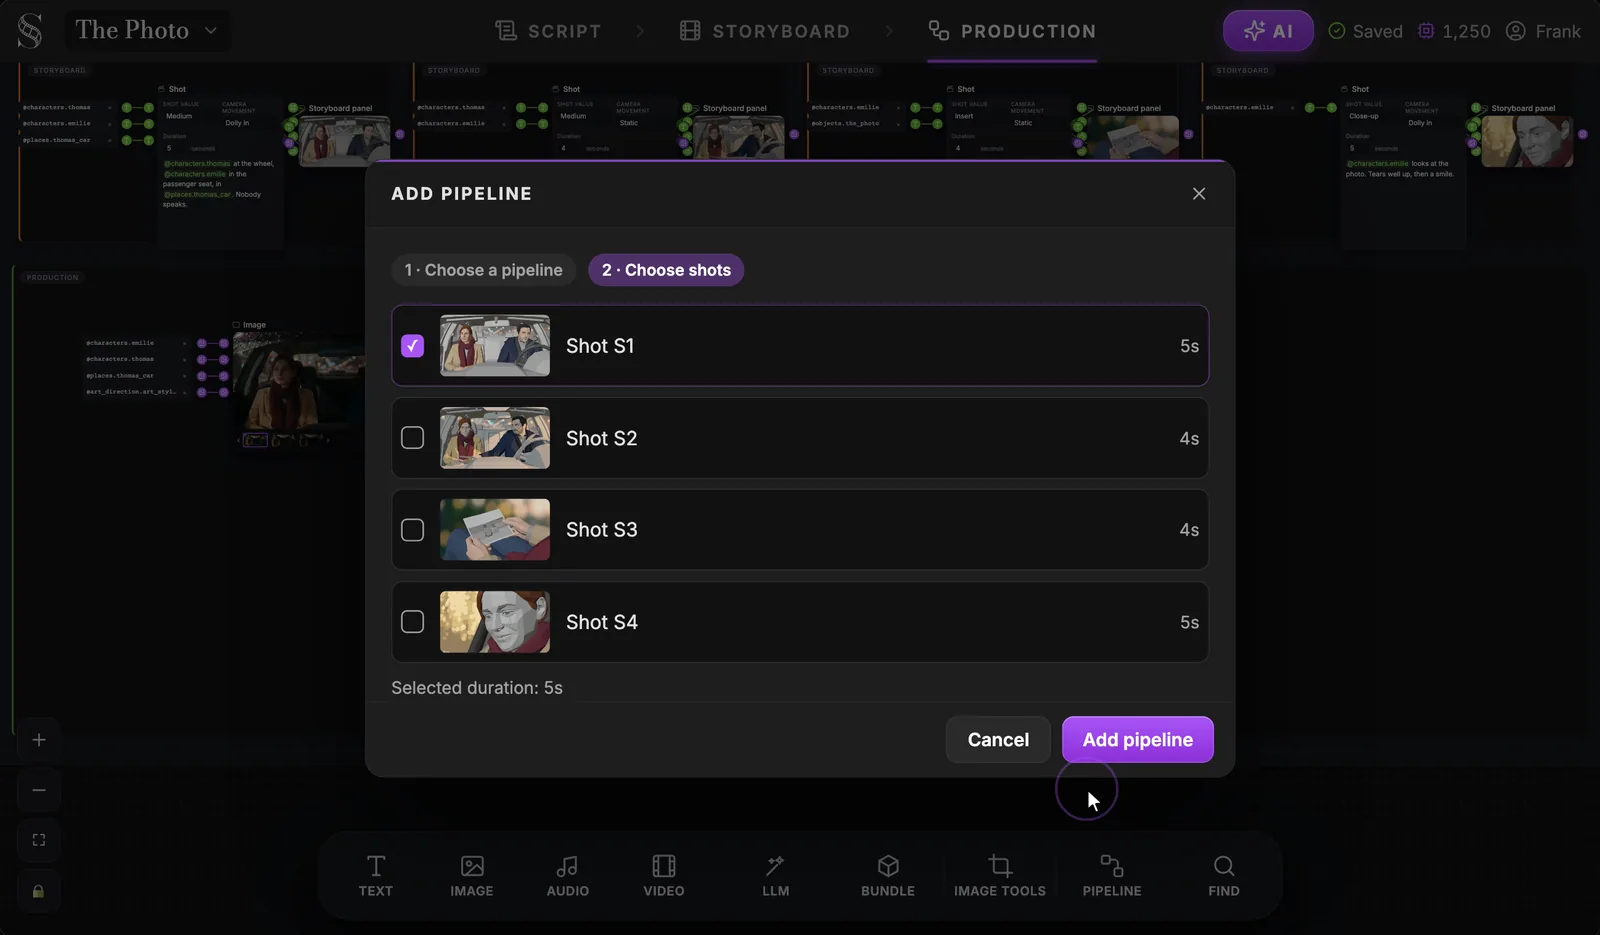
All shots are checked by default. Untick the ones you want to leave out; in this screenshot only S1 is ticked, so Selected duration reads 5s. With all four shots of The Photo, it reads 18 s.
That number matters because the clip duration is the sum of the selected shots, held inside the limits of the video model. Seedance 2.5, the default model, accepts 4 to 30 seconds. Below 4 seconds, the clip is raised to 4. Above 30, it is capped at 30 and your shots get squeezed. For a long scene, split it into several pipelines of consecutive shots, each under 30 seconds. The scene to clip splitter helps you plan those segments before you start.
Click Add pipeline. The nodes appear in the Production group, already wired.
Reference to video, node by node
Everything the scene needs, gathered for you
Reference to video creates two nodes: a Prompt director and a Scene video. Their inputs come straight from your project.
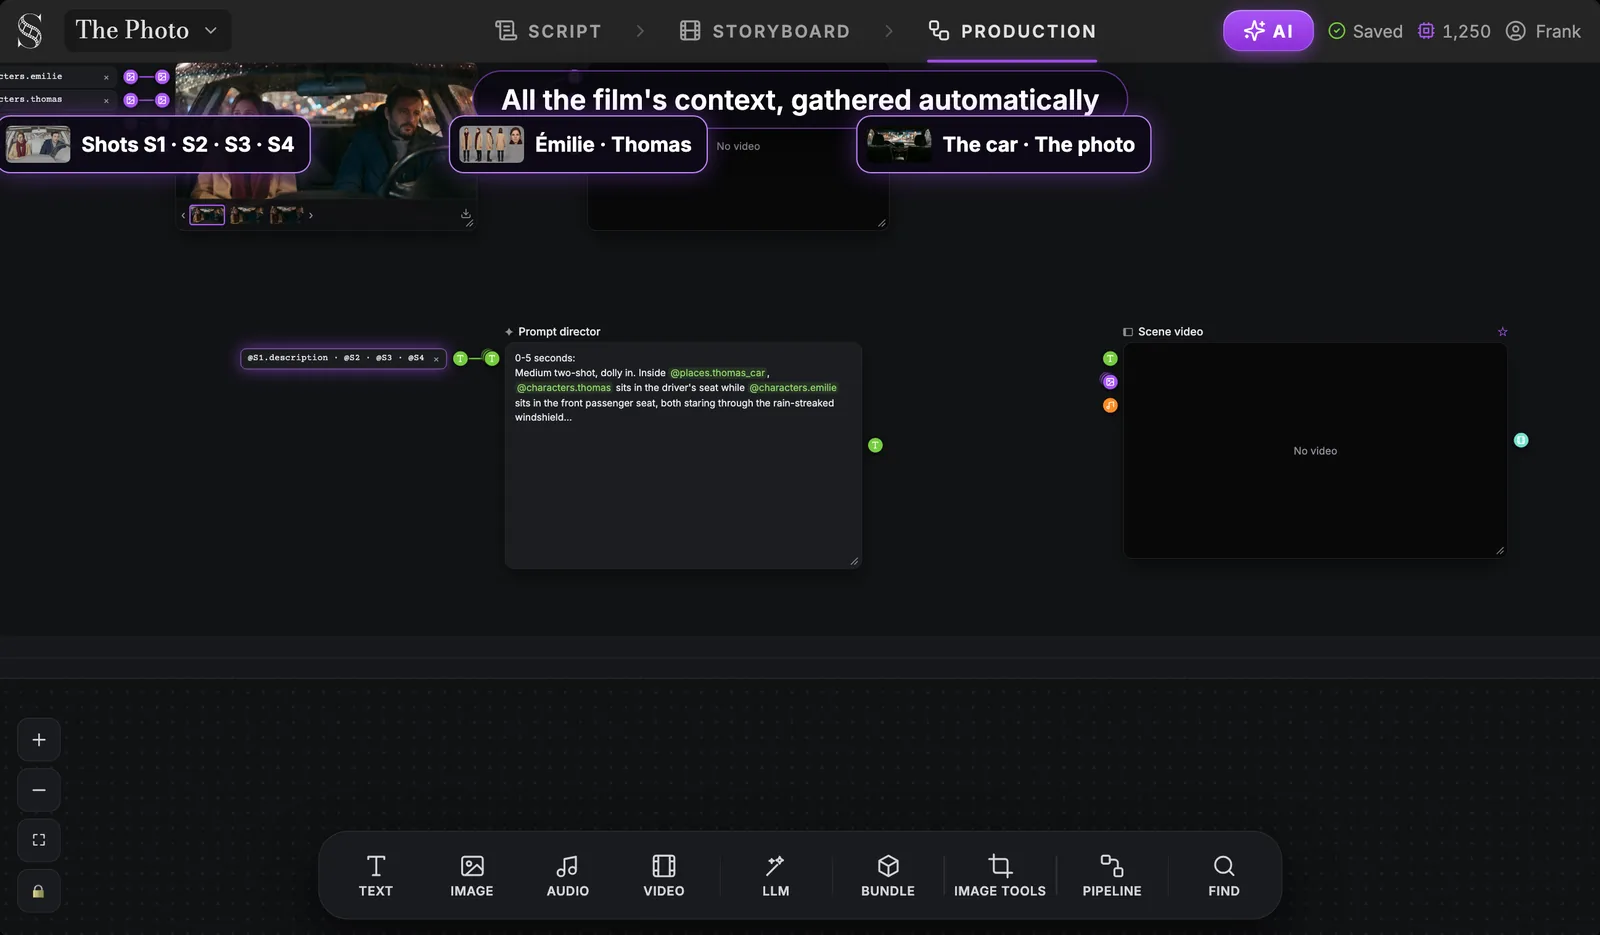
The Prompt director receives the action text of each selected shot, and only that. It does not see the storyboard panels or the art direction. The characters, places and objects your shots cite (here Émilie, Thomas, the car and the photo) travel separately: at the Scene video node, each one is attached as its Production reference sheet. Because those sheets were rendered in the film's final style, the look comes with them.
The Prompt director writes the staging
The Prompt director is an LLM node. It turns your shot list into one staging for the whole scene, broken down by time.
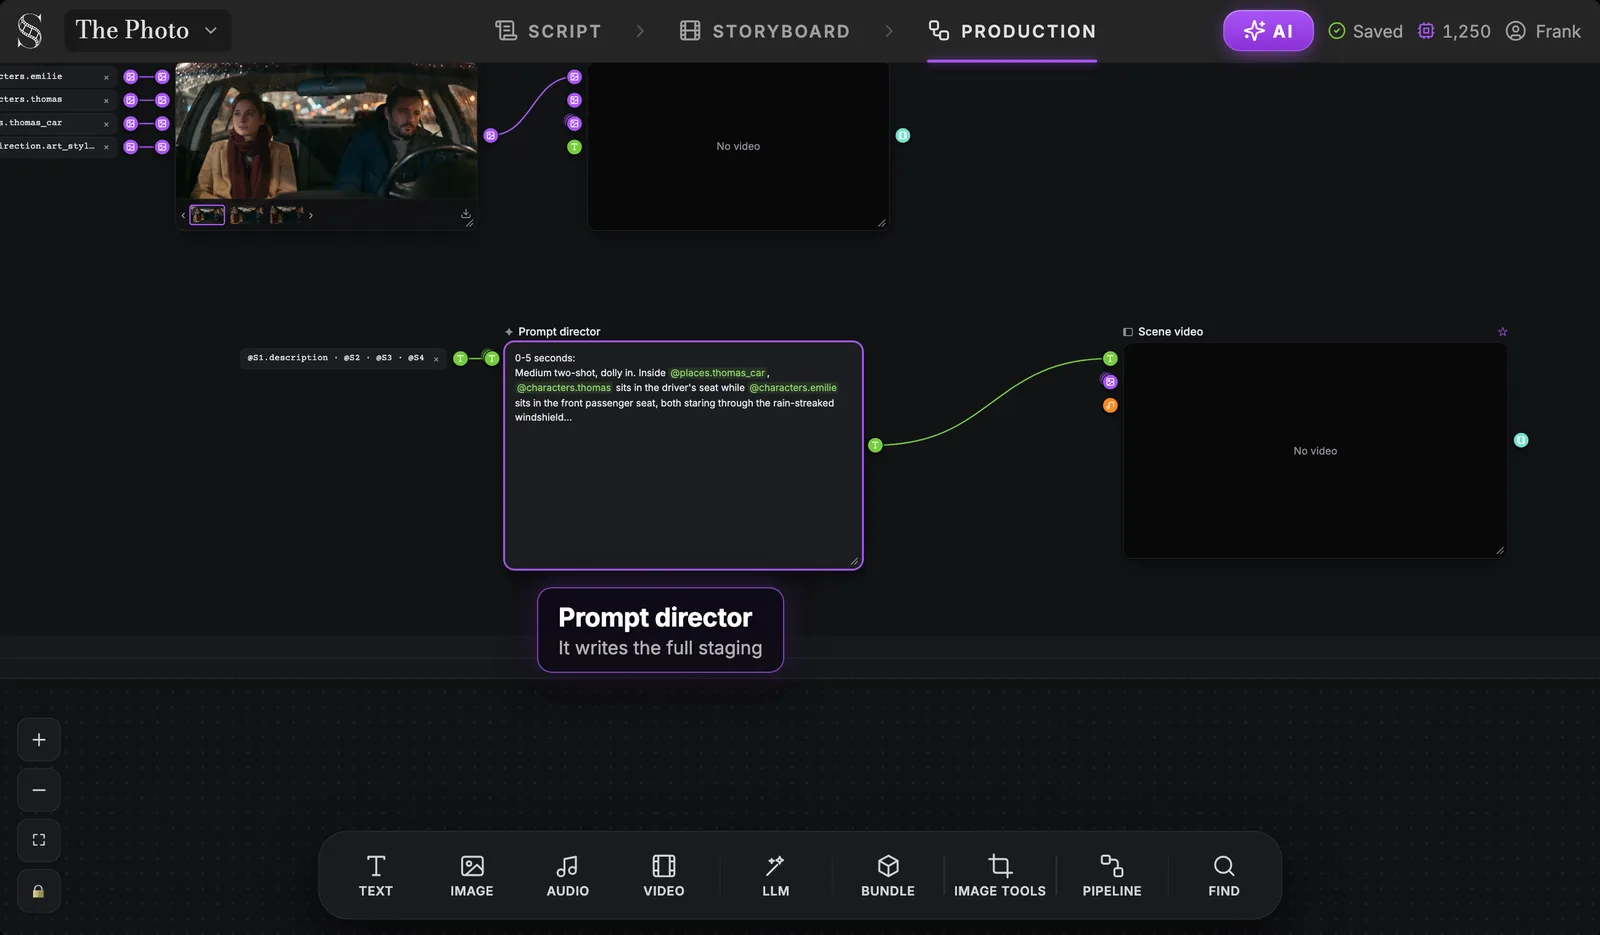
Read this text before you generate. It is the brief the video model will follow: if a beat is missing or in the wrong order, fix it here, in plain words, rather than paying for a clip that gets it wrong. Notice that it names the entities (@characters.emilie, @places.thomas_car) instead of describing them again. The pictures do the describing.
Reading the result
Generate on the Scene video node. The model films the four shots as one clip.
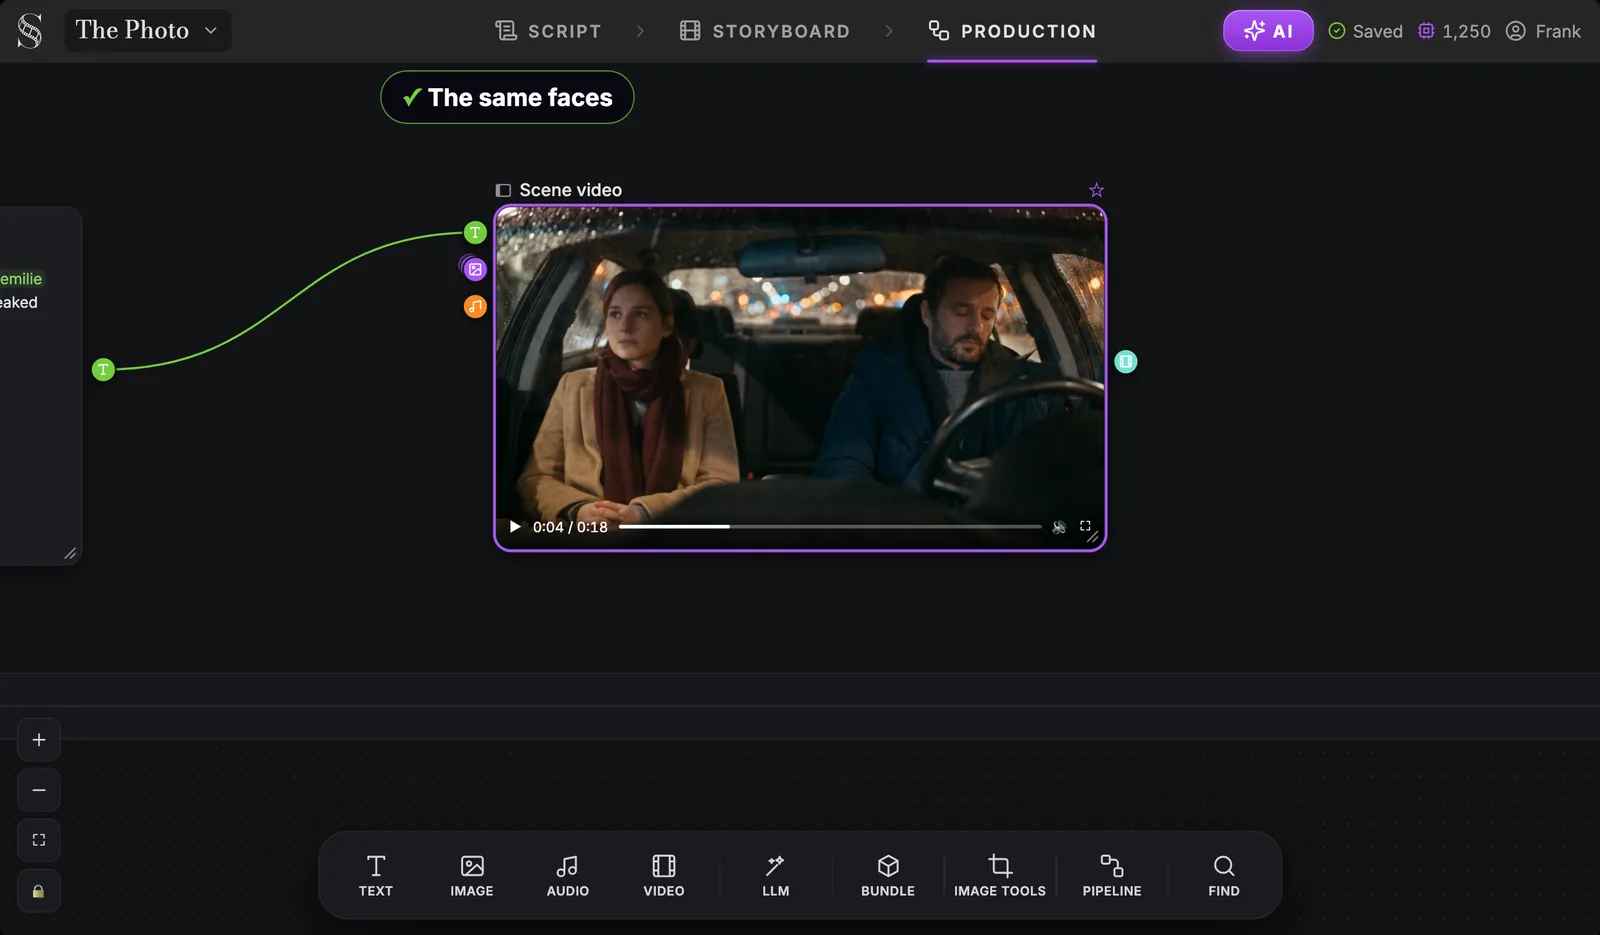
Watch it three times, each time for one thing:
- Identity. Same faces, same coats, same scarf from the first cut to the last.
- Order. The beats come in the order of your shots: the silence, the photo handed over, the insert, the tears and the smile.
- Cuts. Each cut lands on an action you can edit around. A gesture that starts in one framing and finishes in the next is your match on action.
With Reference to video, the model chooses the exact framings from the staging text. That freedom is the point of this pipeline: when your action lines are strong, the model often finds good coverage on its own.
Storyboard panels to video, node by node
The storyboard grid
When the framing and order of your board must be respected, use the second pipeline. Storyboard panels to video creates three nodes: Storyboard grid, Prompt director and Scene video.
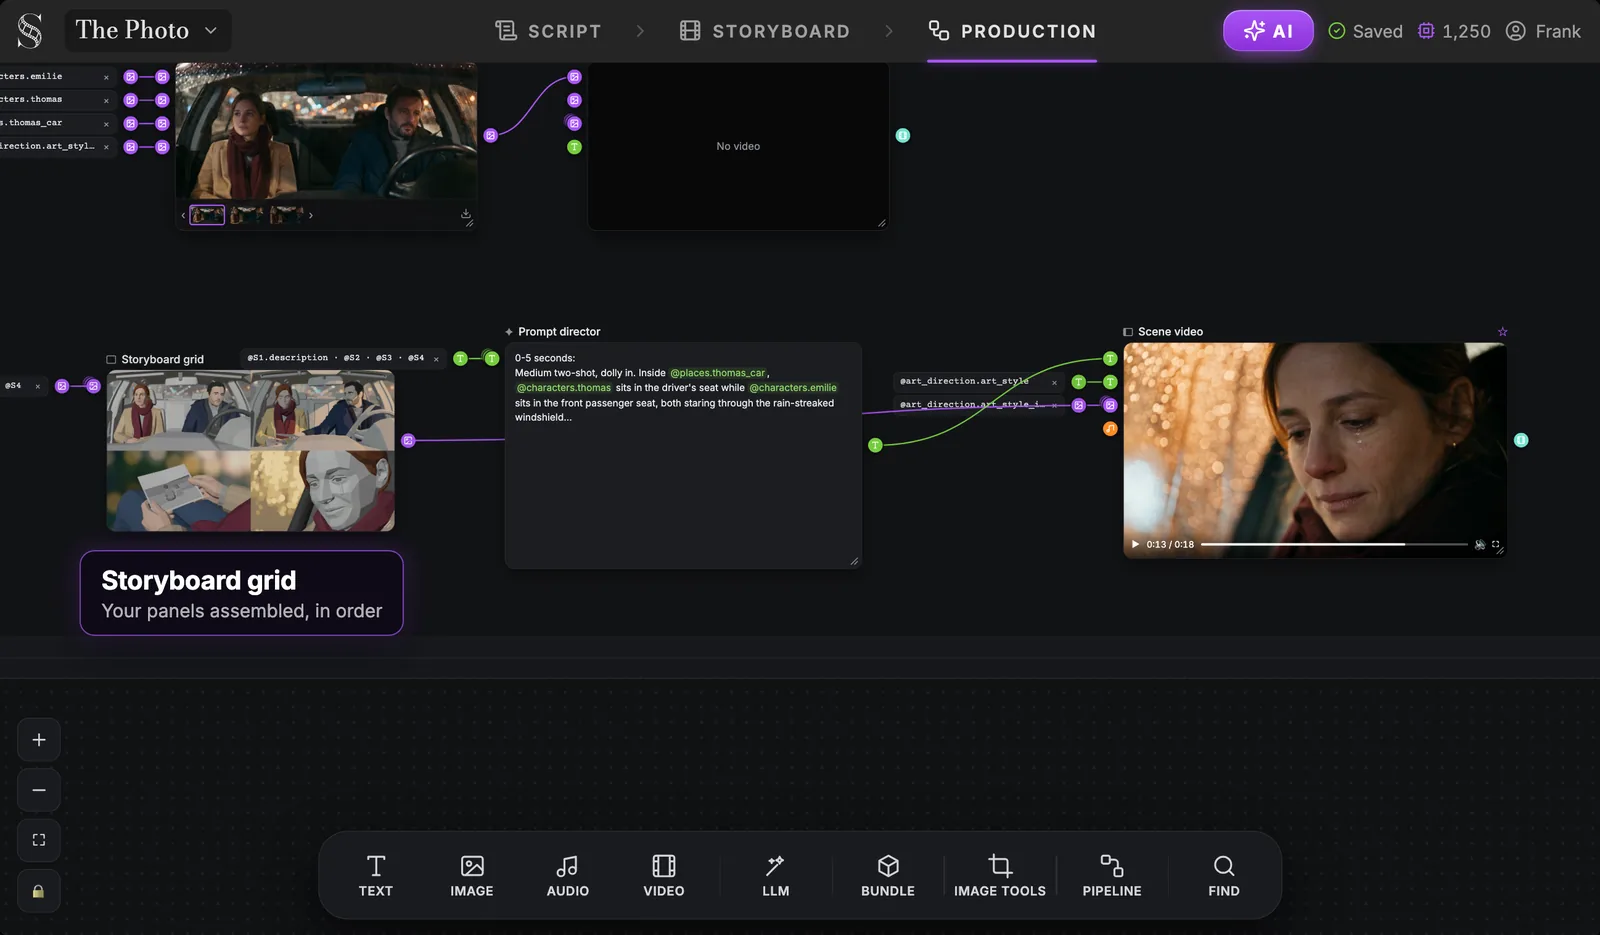
The Storyboard grid is an image node. It assembles the panels of the selected shots, up to 14, in reading order: four panels make two rows of two, nine make three rows of three. You launch it by hand, check that every panel is there and in order, then launch the video.
The Prompt director still receives text only: the action of each shot, plus a block that tells it about the storyboard grid. It never sees the panels themselves. The Scene video node receives the grid as its first image, with an instruction to use it for shot order and composition only, together with the Art Style text and the Art Style image from your Artistic direction, and the production sheets of the elements your shots cite.
The clip follows the board
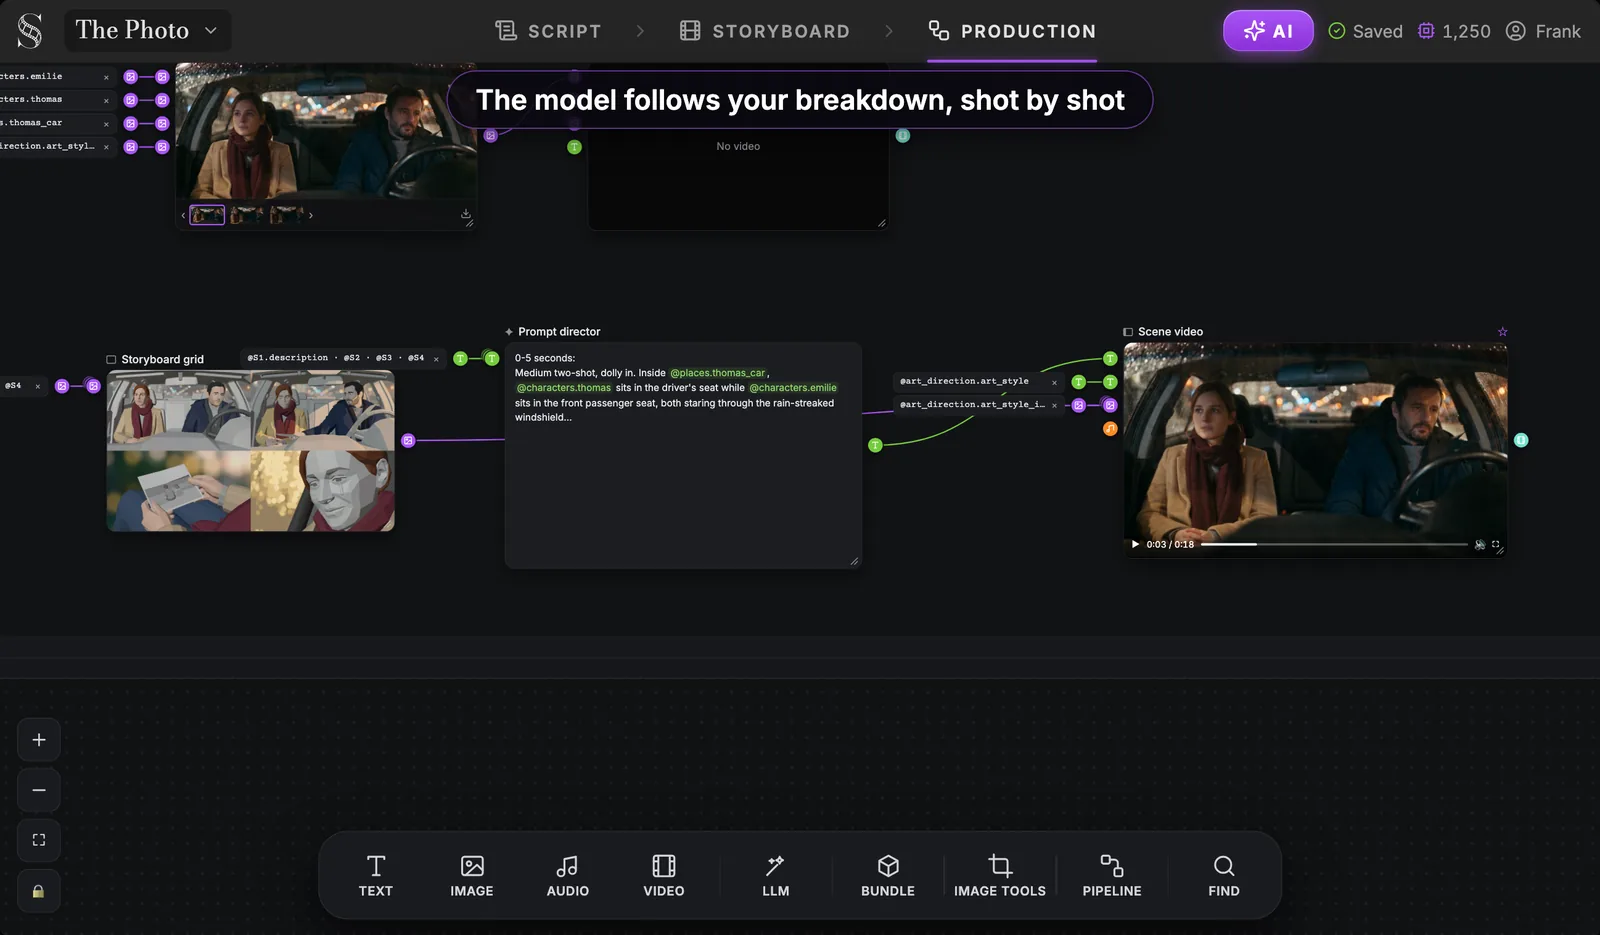
In the screenshot, the clip opens on the medium two-shot of S1, framed like the first panel of the grid. The grid only guides the order and the composition: the faces, the coats and the car come from the production sheets, the look comes from the art direction, and the instruction tells the model to take nothing else from the grid, so the grey previz look stays out of the film. This is the method we describe in our storyboard-first AI video workflow.
Try it free
Try Screenweaver for free on your script
It is free. Import your existing project, get a clearer view of your outline, and regain control of your story structure in minutes.
Start FreeSee exactly what the model receives
Any video node can show you its final prompt. On the Scene video node, open "Show what the model receives".
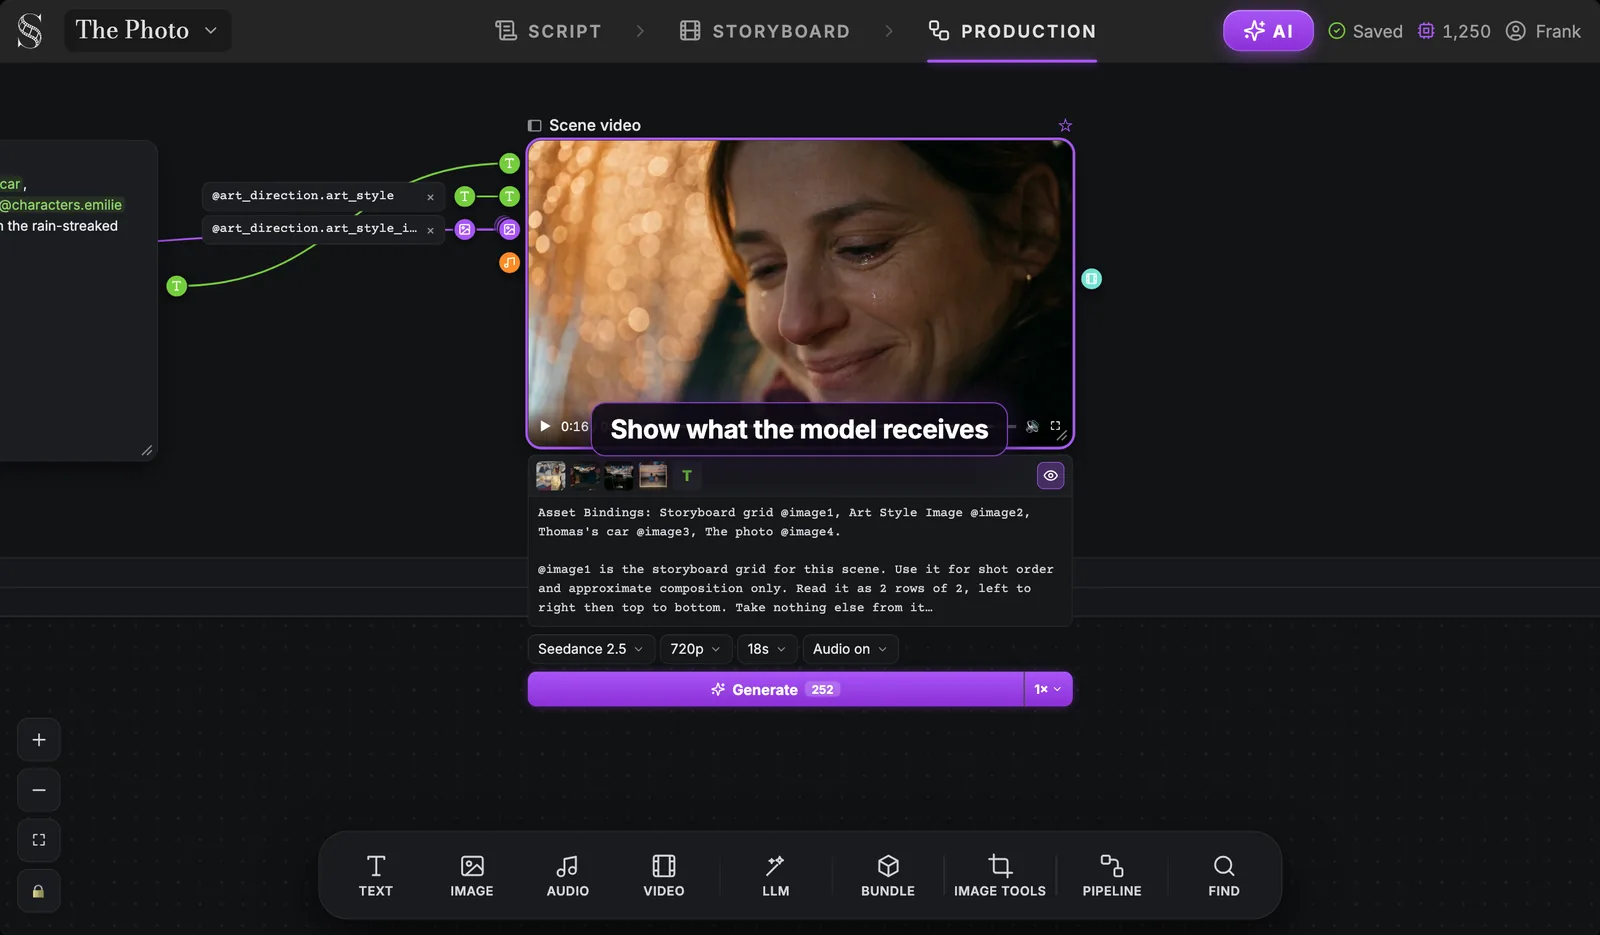
At the top, the Asset Bindings legend maps every attached picture to a handle: here the storyboard grid is @image1, the Art Style Image is @image2, then the story elements follow. Below it, the full prompt, starting with the instruction for the grid: use it for shot order and approximate composition only, read it as 2 rows of 2, left to right then top to bottom.
This panel is where you debug. If a character looks wrong, check that their sheet is in the bindings. If the order is off, check the grid line. Under the panel, the settings row shows the model (Seedance 2.5), the resolution, the duration computed from your shots (18s) and the audio switch, and the Generate button shows the credit cost before you spend anything.
When an input changes: the re-run banner
You will change things: a line of action, a shot you drop, a sheet you regenerate. The canvas tracks it.
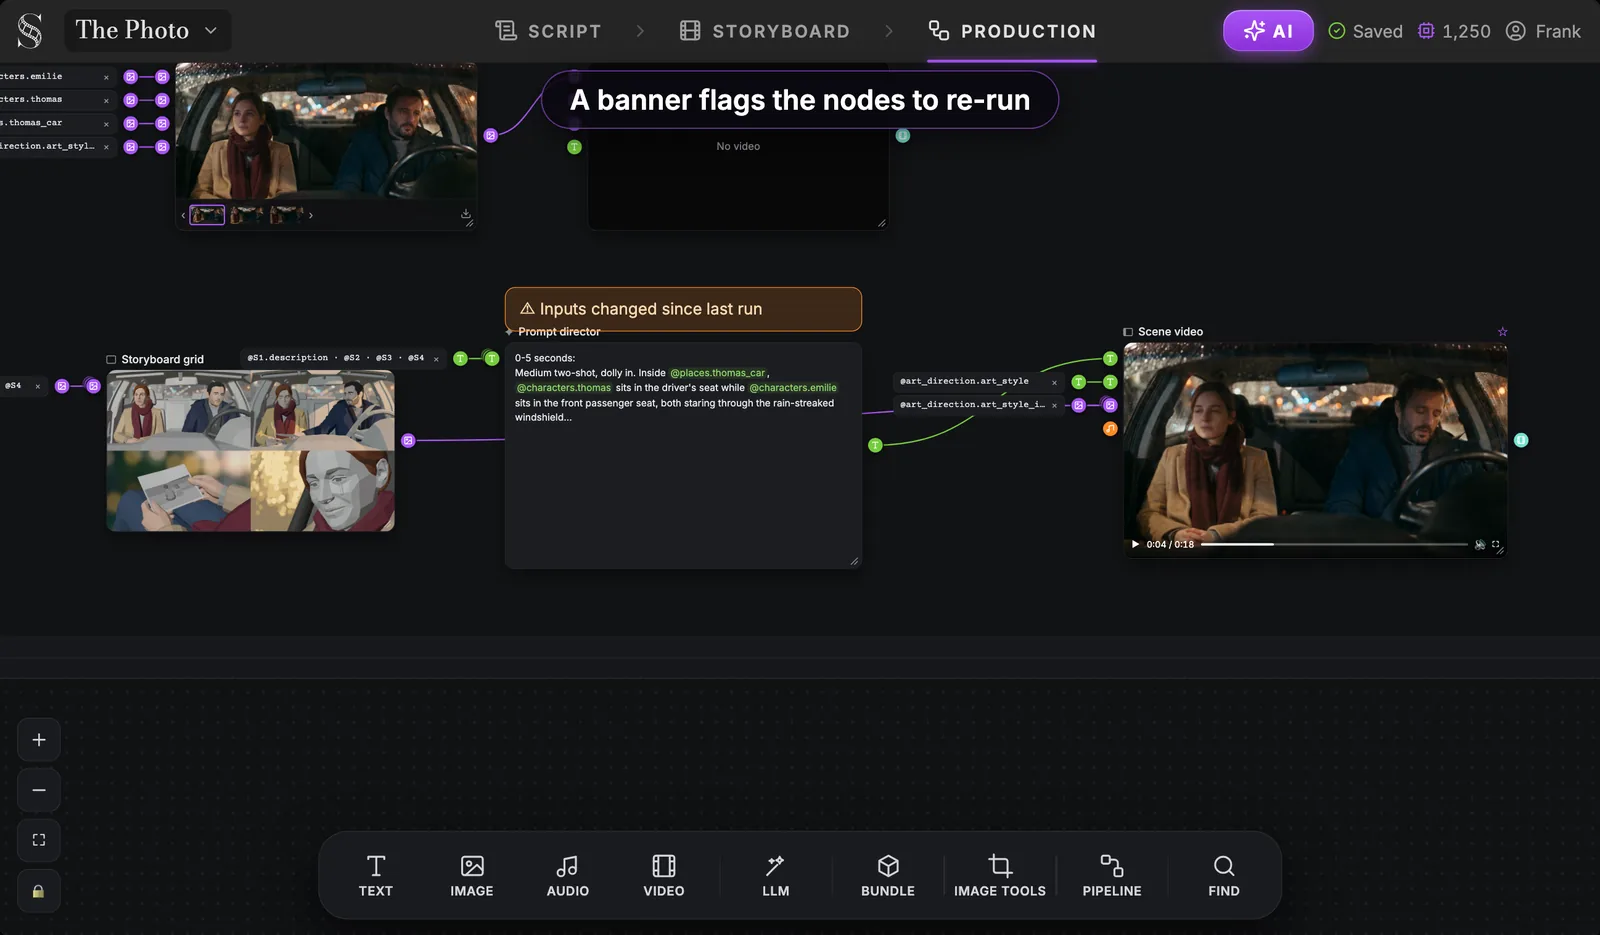
An orange "Inputs changed since last run" banner appears on every node that is now out of date. Re-run in order, upstream first: the grid if a panel changed, then the Prompt director, then the Scene video. The banner tells you exactly what is out of date before you spend a single credit. For a realistic view of how often you will reroll, read what an AI film really costs in credits and rerolls.
Cut the clip, bundle the takes
Every Scene video node keeps the history of its takes. When you have the ones you want, wire them into a Bundle node.
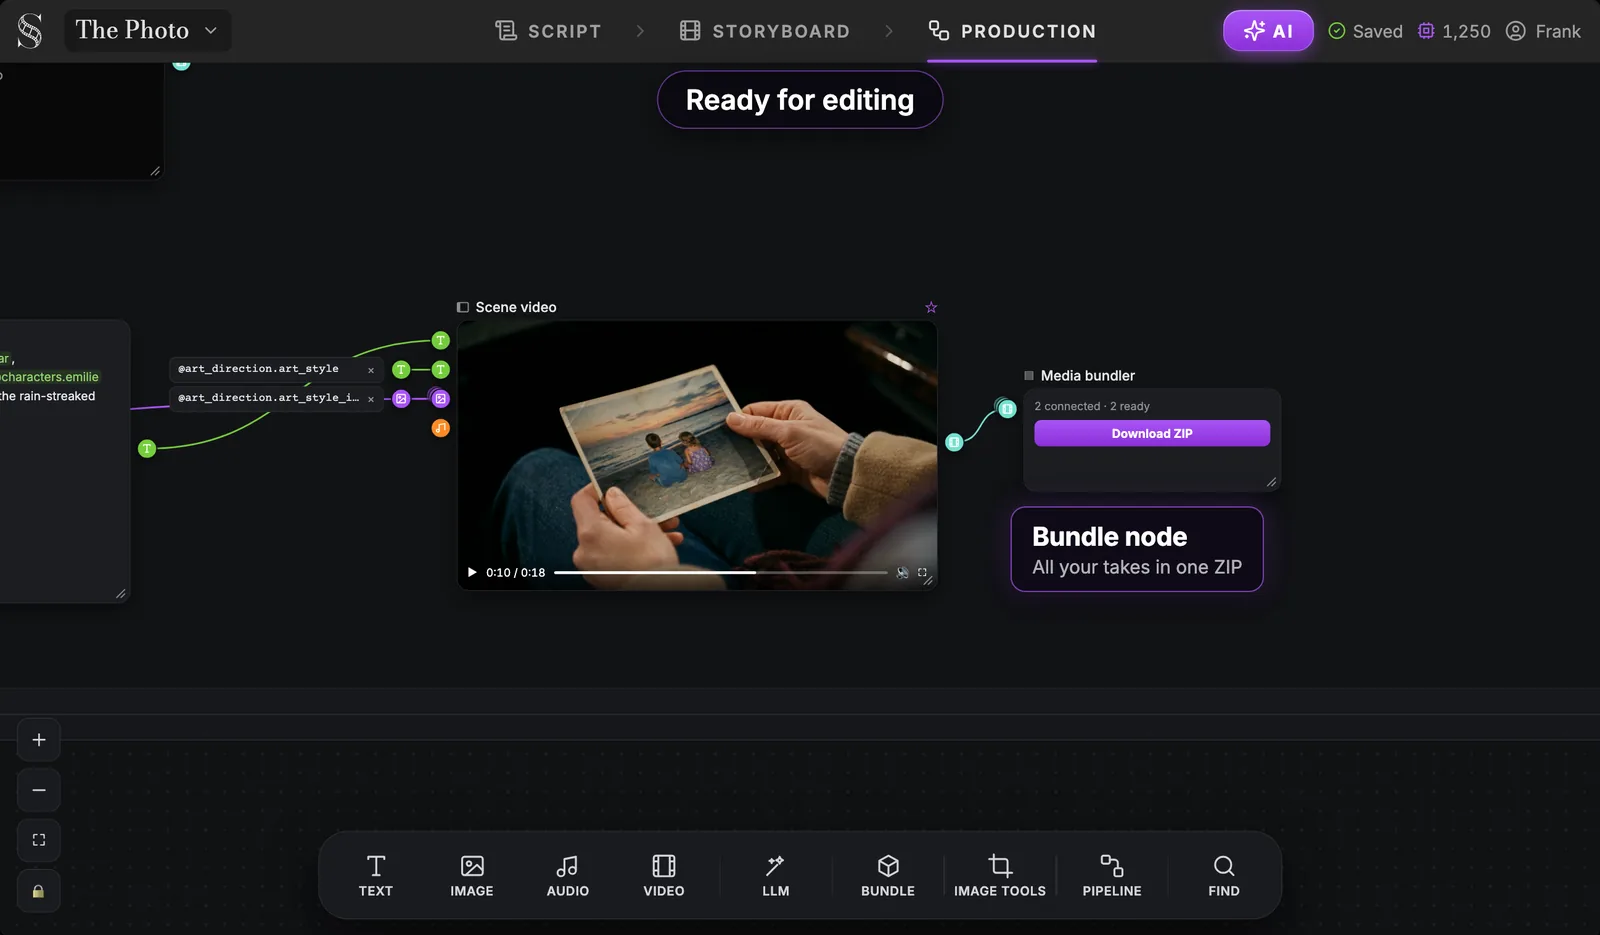
The Media bundler gathers the connected videos and downloads them as one ZIP. From there, the work moves to your editor: cut the scene clip at its natural cuts, tighten the pauses, add sound and music. ScreenWeaver does not export a finished edit; the pipeline gives you the material, the cut is yours.
Which pipeline should you choose?
| Reference to video | Storyboard panels to video | |
|---|---|---|
| Nodes | Prompt director, Scene video | Storyboard grid, Prompt director, Scene video |
| What drives the clip | The action text of each shot | Your board's order and composition, plus the action text |
| Reference images | Production sheets of the cited characters, places, objects | The grid, the Art Style image, and the production sheets |
| Framing | The model chooses | Follows your panels |
| Choose it when | Your action lines are strong and you want the model free on framing | The order and composition of your board must be followed |
A simple rule: for dialogue and quiet scenes where performance matters more than angles, start with Reference to video. For scenes built on precise framing (an insert that must come third, a reveal, a strict shot order), use Storyboard panels to video. You can add both pipelines to the same scene and compare the clips. For more on boards made for generation, see our page on storyboards for AI video generation, and for the model itself, Seedance on ScreenWeaver.
Common mistakes, and how to fix them
1. Selecting more than 30 seconds of shots. The clip is capped and your shots get compressed. Fix: split the scene into consecutive groups, one pipeline each.
2. Skipping the Production reference sheets. Without them, the model invents the faces. Fix: generate the sheets in Characters, Places and Objects before you add a pipeline.
3. Vague action lines. Reference to video only reads the action text. "They talk" gives the model nothing to stage. Fix: write what the camera sees: who does what, with which object.
4. Generating without reading the Prompt director. Fix: read the staging first, it is cheaper to correct words than clips.
5. Ignoring the orange banner. A clip made from old inputs will not match your new board. Fix: re-run the flagged nodes, upstream first.
6. Expecting four files. The pipeline delivers one clip per scene. Fix: plan the cut in your editor, that is where the shots become shots again.
FAQ
Can AI generate a video with multiple shots?
Yes. Recent video models, Seedance 2.5 among them, can cut between several framings inside a single clip. The hard part is giving them the right context: the shot order, the action of each shot, and pictures of the characters and places. ScreenWeaver's pipelines gather that from your storyboard and production sheets automatically.
How long can a multi-shot AI video be?
With Seedance 2.5, the default model in ScreenWeaver, a clip runs from 4 to 30 seconds. The pipeline adds up the durations of the shots you select and keeps the total inside those limits. Longer scenes go into several pipelines, each covering consecutive shots.
How do I keep characters consistent across shots?
Generate the whole scene in one clip, and attach reference sheets instead of describing people in words. In ScreenWeaver, each character, place and object gets a Production reference sheet once, and the pipeline attaches it to the video node for every scene where it appears.
What is the difference between Reference to video and Storyboard panels to video?
Reference to video works from the action text of each shot and the production sheets; the model chooses the framings. Storyboard panels to video adds a grid of your storyboard panels, up to 14, which the model follows for shot order and composition only, together with your art direction.
Can I get each shot as a separate file?
No, each pipeline delivers one clip for the selected shots. You cut it in your editor like any take of a full scene. The Bundle node downloads all your takes in one ZIP to make that step faster.
Is Seedance multi-shot available in ScreenWeaver?
Yes. Seedance 2.5 is the default and recommended video model in the Production tab, at 480p, 720p or 1080p, with audio on or off. Veo 3.1, Seedance 2.0, Kling v3.0, MiniMax H3 and Grok Imagine Video 1.5 are also available on the same node.
Do I need a paid plan?
Writing the script is free on the Screenwriter plan. Storyboard and AI video production start with the Auteur plan at $39.99 a month with 6,000 credits; the Studio plan at $149.99 a month adds 25,000 credits and collaboration. Failed generations are refunded.
Make your first scene clip
Write one scene, board it, and let a pipeline film it in one take. Start with the free script editor and follow the whole path in the ScreenWeaver guide: open ScreenWeaver.
Final Step
Build your next script with Screenweaver
Move from ideas to production-ready pages faster with timeline-native writing and AI-assisted story flow.
Try Screenweaver