How to finish an AI film made in ScreenWeaver: takes, upscale, downloads, sound and the edit
Choose your best takes, finish and upscale them, get every file out of ScreenWeaver, then build the voices, the sound and the cut in your editor.
Chapters (7)
Video: lesson 6.1 of the free AI Filmmaking Course.
Pick the take, not the first result
Every Image node keeps its takes in the strip under the preview, and every Video node keeps a "Generation history". Nothing you generate is overwritten, so you can always go back to the second take of yesterday if today's run is worse.
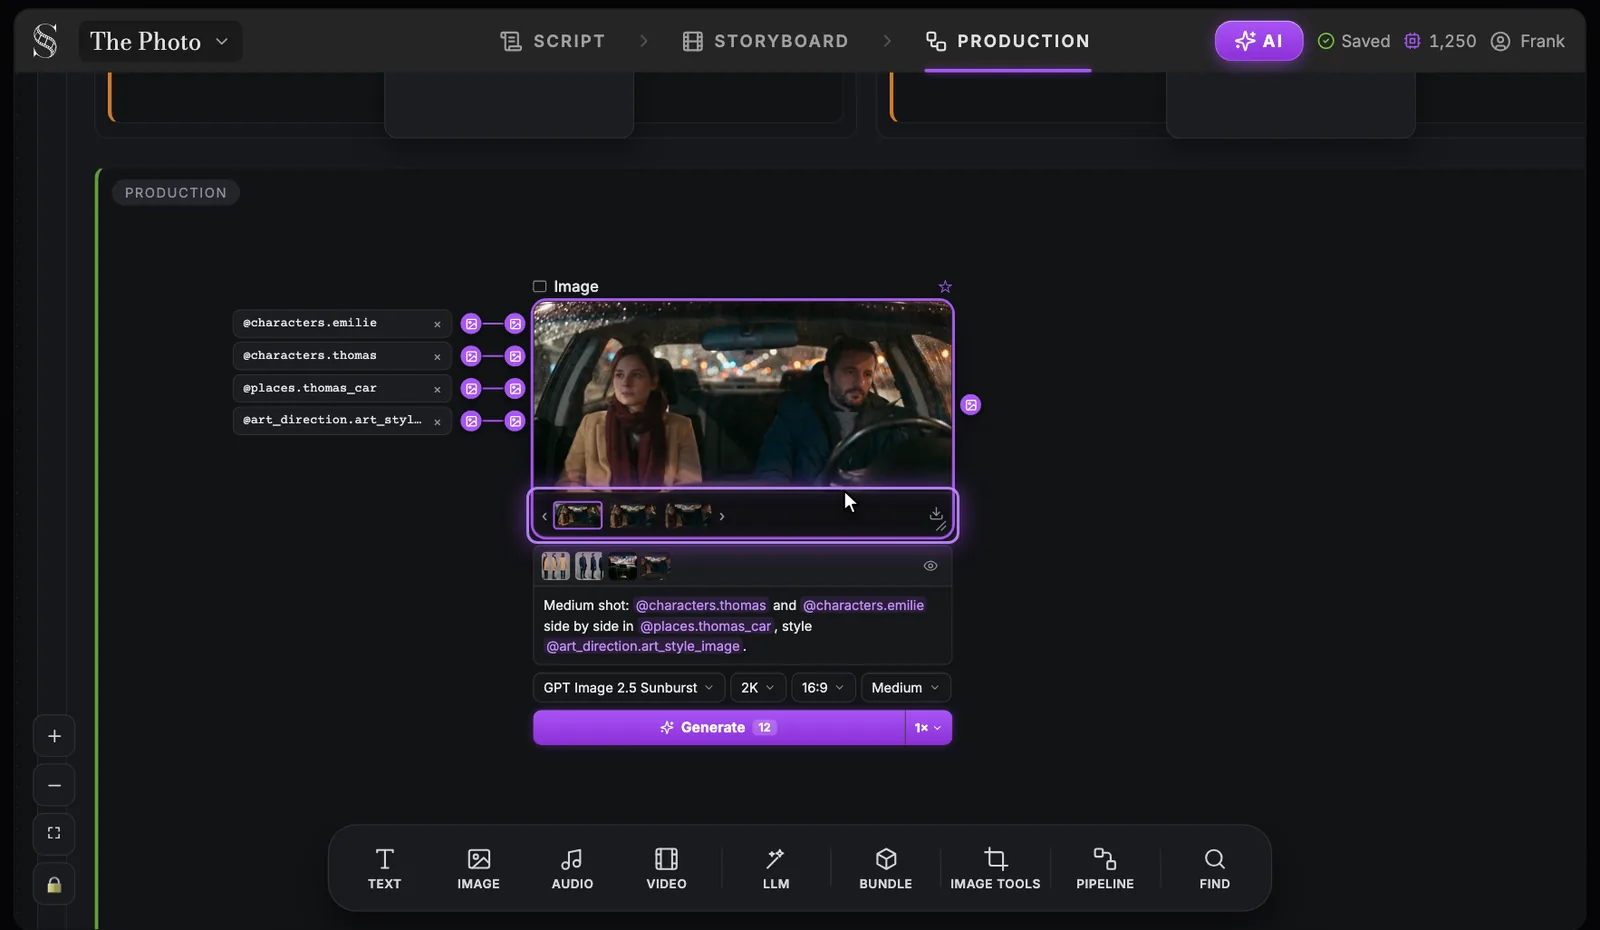
Swipe sideways to see the whole screen.
- 1References. The entity sheets and art style wired into the node (@characters, @places, @art_direction). Wire a reference in, then cite it in the prompt by its @handle.
- 2Image preview. The current image of the node. Its output can feed a video node as a start frame or a reference.
- 3Takes. Every image this node has generated. Browse them with the arrows and save one with the download icon; running again does not erase earlier takes.
- 4Show what the model receives. "Show what the model receives" switches to the final prompt sent to the model; "Back to editable prompt" returns to your text. Check it when a result ignores an instruction.
- 5Prompt. Your instruction, with @references to the wired sheets. Spend the words on framing, action and light; the look comes from the art style reference.
- 6Model. GPT Image 2.5 Sunburst (default), Nano Banana 2.1, Seedream 5.0 Pro, GPT Image 2.5 Flare or Grok Imagine Image.
- 7Quality. Low, Medium, High, Extra high or Max. Explore at a lower quality, render the chosen frame higher, and check the cost in the Generate tooltip.
- 8Generate. Runs the node. The credit cost shows on the button and in its tooltip, and the job appears in Generations.
- 9Images per generation. 1, 4 or 8 images per run. Generate several to choose a composition, one once you know what you want.
A shot does not need to be perfect. It needs to work in the cut, for the time it is on screen. Watch it at full speed with the shots around it before you decide. If the audience will not notice the flaw and the emotion lands, keep it and spend your time on the shots that carry the story.
Track everything in the AI Center
Click AI in the header. The "Generations" column lists everything you launched, from every tab, with its status: "Running", "Done", "Failed", "Error" or "Canceled".
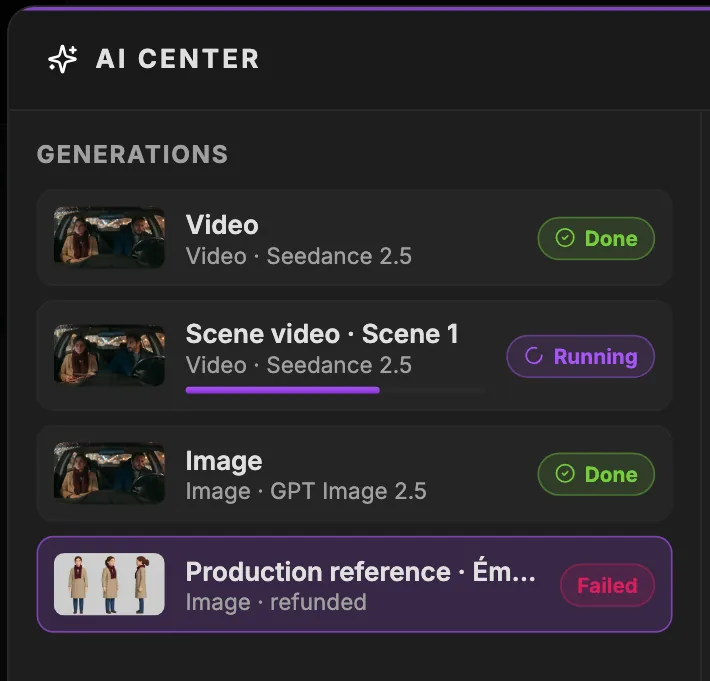
- 1Generations. The list itself. Empty, it reads "No generations yet. Start one from the storyboard, production canvas, or entity panels."
- 2Generation. One job: its name, type and model. "Preview generated media" shows its "Model", "Prompt", "Parameters", "Credits" and "Created"; "Download" saves it and "Go to node" jumps to the node that made it.
- 3Done. Finished and ready. The other statuses are "Running", "Failed", "Error" and "Canceled"; "Remove from list" tidies the column.
- 4Running. Still generating. "Cancel generation" stops it.
- 5Progress. How far the job has gone. Videos take longer than images: keep working, the list updates on its own.
- 6Failed, refunded. A run that fails is refunded, so you do not pay for it. "Retry generation" runs it again; if it fails twice, check the prompt and the inputs first.
- "Cancel generation" stops a run you no longer need, and "Retry generation" relaunches one.
- "Preview generated media" shows the result with its "Model", "Prompt", "Parameters", "Credits" and "Created" date.
- "Download" saves the file, and "Go to node" takes you to the node that made it.
- "Remove from list" tidies the column. Failed generations are refunded.
Finish drafts and upscale your keepers
If you drafted with Seedance 2.5 at "480p · Draft", use "Finish seedance draft" on the take you keep to get it at 1080p. Drafts can be finished for 7 days, so finish your selects the same week.
For more resolution, click "Video tools" in the toolbar and place an Upscale node. Wire your finished video into it and pick a model: "Topaz Starlight Precise 2.6", "Topaz Starlight Fast 2", or "Seedance 2.5 Draft finish" for a Seedance draft. The targets are 1080p and 4k.
Get your files out
- "Download image" and "Download video" save a single result to your computer.
- The Bundle tile adds a Media bundler: wire your chosen takes into it and click "Download ZIP" to get them all in one archive.
- In the AI Center, "Download" on any generation.
- The script leaves from Import / Export in the Script tab: PDF, FDX (Final Draft) or a ScreenWeaver backup. See import, export and version history.
Voices and dialogue
ScreenWeaver produces your pictures and scene clips, not voices or music, and it has no lip sync tool. You have three routes for spoken lines.
- 1Native dialogue: with "Audio on", some video models generate the voice, the lip movement and the ambience in the same take. Put the words in quotes in the prompt with the language and the delivery, keep it to one or two sentences, and keep the speaker clearly in frame.
- 2A separate voice: generate it first with a text-to-speech service, so you control the performance and the timing. In ScreenWeaver, "Add voice" on a character's Story element node creates an audio node where you upload the file, and that audio can be sent as a reference to the video models that accept audio.
- 3Voice-over: an inner monologue, a narrator, a letter read over images. No lips to sync, and often the most cinematic choice.
The edit happens in your editor
ScreenWeaver has no timeline and no film export. The cut is where the film is actually made, in DaVinci Resolve, Premiere, CapCut or the editor you prefer.
- 1Assemble the shots in script order and watch the whole thing once.
- 2Cut for rhythm: cut on motion, not on clip length. Trim the warped or frozen first and last fractions of a second. Join the best halves of two takes with a cut on a natural movement.
- 3Use J cuts and L cuts, letting sound start before its picture or carry over the cut, so separate AI shots play as one scene.
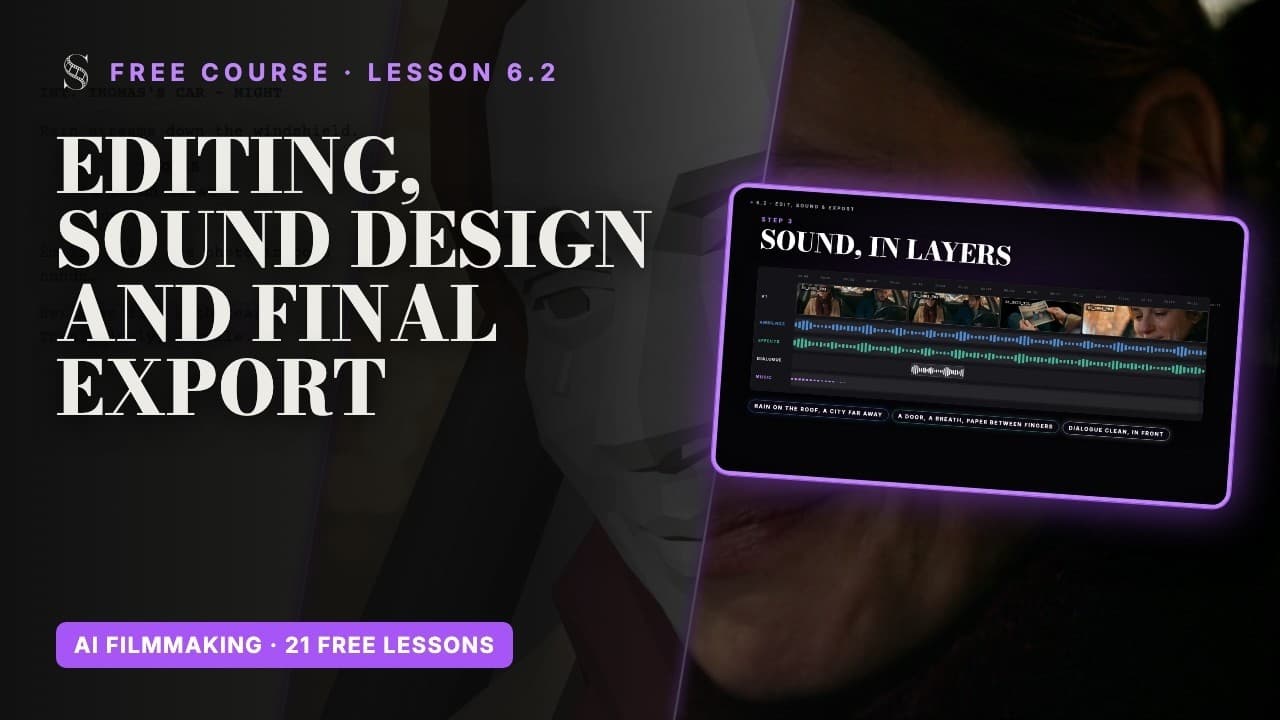
- 4Build the sound in four layers: an ambience bed, the effects the action needs, the dialogue clean and in front, then music last and lower than you think. Always fade out at the end of a scene, never stop dead.
- 5Grade the shots into one world: match skin tones first, then the overall look.
- 6Export a full-quality master, then make every delivery from it. For online platforms, a 1080p or 4K H.264 file with loudness around minus 14 to minus 16 LUFS. For festivals, read each one's technical specs.
Grading is what turns takes from different runs, and sometimes different models, into one film. When the first episode of Lost Garden, the AI anime series Frank Houbre made alone in ScreenWeaver, was graded in DaVinci Resolve, pulling every shot into the same cold blue is what made it feel like a single film.
Do it now
Practice in ScreenWeaver
- 1For one scene, choose your keeper take of every shot and note its model and parameters from the AI Center preview.
- 2Finish your Seedance drafts with "Finish seedance draft", then upscale only the final selects.
- 3Wire the keepers into a Media bundler and click "Download ZIP".
- 4Rename the files by scene, shot and take, and assemble them in your editor in script order.
- 5Lay the four sound layers, grade the scene, and export a master.
Watch the video lessons
Questions about this step
Can I edit my final film inside ScreenWeaver?
No. ScreenWeaver produces your shots and scene clips; you download them and cut the film in your own editor. The Media bundler downloads all your takes in one ZIP.
Can ScreenWeaver generate voice-over or music?
No. Some video models generate dialogue and ambience with the picture when audio is on. Voices, music and lip sync are made with other tools; "Add voice" only brings in an audio file you upload.
How do I get my video in 4K?
Place an Upscale node from "Video tools", wire your finished video into it, choose a Topaz model and the 4k target. Veo 3.1 can also generate 4k directly for 8-second clips.
Where do I find a video I generated last week?
In the AI Center, under Generations. Preview it to see its model, prompt and parameters, download it, or click "Go to node" to jump back to it.
What happens if a generation fails?
It shows as Failed in the Generations list and its credits are refunded. Use "Retry generation" once you have checked what the model received.
What export settings should I use for YouTube?
A 1080p or 4K H.264 file with loudness around minus 14 to minus 16 LUFS, made from a full-quality master. Lesson 6.2 of the AI filmmaking course walks through it.
More answers in the Academy FAQ and the button-by-button interface guide.