लाइन्ड स्क्रिप्ट जनरेटर
स्क्रिप्ट सुपरवाइज़र की तरह अपनी स्क्रिप्ट पर लाइनें खींचिए, मुफ़्त
यह मुफ़्त लाइन्ड स्क्रिप्ट जनरेटर स्क्रिप्ट सुपरवाइज़र, निर्देशकों और फ़िल्म छात्रों को पटकथा पर कैमरा कवरेज वैसे ही दर्ज करने देता है जैसे सेट पर होता है: हर सेटअप के लिए एक खड़ी लाइन, पहली कवर हुई पंक्ति से आख़िरी तक। स्क्रिप्ट चिपकाइए, अपने सेटअप तय कीजिए, और हर पन्ने पर ब्राउज़र में ही लाइनें खींचिए, पैमाना, काग़ज़ी स्क्रिप्ट और पेंसिल के बिना।
लाइन खींचने की परंपरा तारतम्य के काम का मानक तरीक़ा है: सीधी लाइन का मतलब है कि उन पंक्तियों की क्रिया उस सेटअप में पूरी तरह कैमरे में है, और लहरदार लाइन का मतलब है कि वह कैमरे से बाहर हो रही है (आवाज़ रिकॉर्ड हुई, तस्वीर नहीं)। हर सेटअप को अपनी खड़ी लेन मिलती है और एक लेजेंड प्रविष्टि, जिसमें उसका स्लेट नंबर और कवरेज नोट होता है, ताकि एडिटर एक नज़र में देख सके कि सीन के किस पल पर कौन-से सेटअप हैं।
सब कुछ आपके ब्राउज़र में चलता है। आपकी स्क्रिप्ट कभी इस पन्ने से बाहर नहीं जाती, और आपके सेटअप तथा लाइनें स्थानीय रूप से अपने आप सहेजे जाते हैं, ताकि आप टैब बंद करके लौट सकें।
हर सेटअप के लिए एक पंक्ति, बिल्कुल आपके स्लेट जैसी: नंबर (12A), कवरेज नोट (दो लोगों का मीडियम), टेक, और लाइन की शैली।
लाइन खींचना शुरू करने के लिए एक सेटअप जोड़िए। सेटअप यानी एक कैमरा स्थिति और एक फ़्रेमिंग, जैसे 12A या 12B।
पन्ना 1, कुल 1 में से
लेजेंड
इस पन्ने पर अभी किसी सेटअप की लाइन नहीं खिंची।
अभी कोई लाइन नहीं खिंची। एक सेटअप चुनिए, फिर स्क्रिप्ट में शुरू और अंत की पंक्ति पर क्लिक कीजिए।
आपकी लाइन्ड स्क्रिप्ट
0 सेटअप, 0 कवरेज लाइनें, 1 पन्ने।
इसी ब्राउज़र में अपने आप सहेजा गया। एडिटर को देने या प्रोडक्शन फ़ाइलों में रखने के लिए PDF डाउनलोड कीजिए।
यह कैसे काम करता है
टूल आपके चिपकाए पाठ को मानक Courier पटकथा पन्नों में लगाता है जो 55 पंक्तियों पर टूटते हैं, वही लेआउट जो Final Draft छापता है। आप सेटअप वैसे ही तय करते हैं जैसे वे स्लेट पर दिखते हैं, फिर स्क्रिप्ट का वह हिस्सा चिह्नित करते हैं जिसे हर सेटअप कवर करता है। हर सेटअप की अपनी खड़ी लेन होती है, इसलिए लाइनें कभी एक-दूसरे पर नहीं चढ़तीं, पन्ना बदलने पर हिस्से साफ़-सुथरे बँट जाते हैं, और हर पन्ने पर एक लेजेंड होता है जिसमें उसके सेटअप, कवरेज नोट और यह भी होता है कि लाइन सीधी है या लहरदार। PDF एक्सपोर्ट jsPDF से वही पन्ने दोबारा बनाता है, कैमरे में कवरेज के लिए ठोस लाइन और लहरदार के लिए बिंदुदार।
स्क्रिप्ट सुपरवाइज़र की तरह स्क्रिप्ट पर लाइन कैसे खींचें
स्क्रिप्ट पर लाइन खींचना यह दर्ज करता है कि कौन-से कैमरा सेटअप पटकथा की कौन-सी पंक्तियाँ कवर करते हैं। सेट पर स्क्रिप्ट सुपरवाइज़र हर सेटअप के लिए एक खड़ी लाइन खींचता है, पहले कवर हुए पल से आख़िरी तक, और उस पर स्लेट नंबर लिखता है। फ़िल्म छात्र आज भी इसे पैमाने और काग़ज़ी स्क्रिप्ट से सीखते हैं, और ज़्यादातर डिजिटल विकल्प पेशेवरों के लिए बने महँगे ऐप हैं। यह टूल मुफ़्त है, ब्राउज़र में चलता है, और उन्हीं परंपराओं का पालन करता है।
सीधी और लहरदार का फ़र्क़ इस पूरी व्यवस्था का दिल है। किसी क्रिया या संवाद के हिस्से से गुज़रती सीधी लाइन कहती है कि वह सेटअप उस सामग्री को कैमरे में रखता है। लहरदार लाइन कहती है कि वह सामग्री उस सेटअप के चलते हुए घटती है पर फ़्रेम से बाहर: कोई परदे के बाहर का जवाब, कोई प्रतिक्रिया जो सुनाई देती है पर दिखती नहीं। जब एडिटर काटने के कमरे में लाइन्ड स्क्रिप्ट खोलता है, तो ये दो निशान हर कट का पहला सवाल हल कर देते हैं: इस पल के लिए कौन-सी कवरेज मौजूद है?
इसीलिए एडिटर एक अच्छी लाइन्ड स्क्रिप्ट को कवरेज का नक्शा मानते हैं। उसके बिना यह जानने के लिए कि सीन 12 की प्रतिक्रिया का कोई साफ़ सिंगल है या नहीं, हर टेक खंगालनी पड़ती है। उसके साथ, बस पन्ने पर एक नज़र काफ़ी है। अगर आप शूट की तैयारी कर रहे हैं, तो इस लाइन्ड स्क्रिप्ट साँचे को निशान लगी शूटिंग स्क्रिप्ट और टेक लॉग के साथ रखिए, और पोस्ट प्रोडक्शन को ऐसा दस्तावेज़ दीजिए जो हर सीन पर घंटों बचा दे।
इसका इस्तेमाल कौन करता है
- कम बजट सेट पर स्क्रिप्ट सुपरवाइज़र। ब्लॉकिंग और कैमरा रिहर्सल के दौरान हर सीन पर डिजिटल तरीक़े से लाइन खींचिए, फिर पेंसिल वाले पन्ने स्कैन करने के बजाय PDF प्रोडक्शन बुक में डालिए।
- तारतम्य सीखते फ़िल्म छात्र। असली सीन पर सीधी और लहरदार की परंपरा का अभ्यास कीजिए, बिना स्क्रिप्ट छापे, और अलग-अलग अभ्यासों के लाइन वाले पन्ने आपस में मिलाइए।
- तैयारी में लगे निर्देशक और एडिटर। शूट से पहले सोची हुई कवरेज खींच डालिए: हर सीन के लिए इच्छित सेटअप की लाइनें बनाइए और वे पल पकड़िए जिन्हें कोई कैमरा कवर नहीं करता, जब बदलाव अब भी सस्ता है।
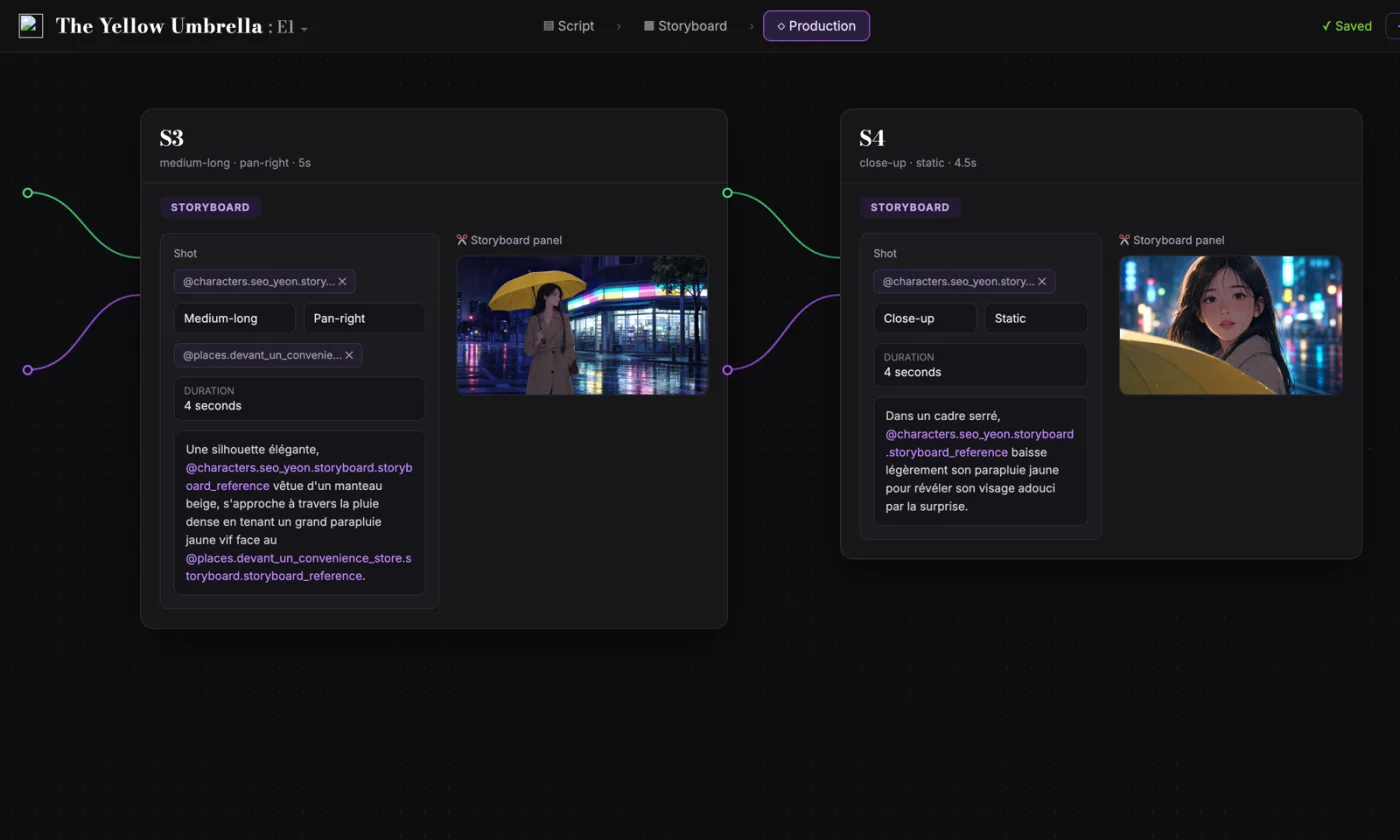
स्क्रिप्ट से शॉट्स तक,एक ही जगह।
ScreenWeaver आपकी स्क्रीनप्ले का ऑटोमैटिक शॉट ब्रेकडाउन बनाता है, फिर स्टोरीबोर्ड। किरदार, लोकेशन और रेफ़रेंस एक शॉट से दूसरे शॉट तक साथ चलते हैं।
- $0, कभी ख़त्म नहीं होता
- PDF और Final Draft में एक्सपोर्ट
- Mac, Windows, Linux, iPad
लाइन्ड स्क्रिप्ट जनरेटर: पूरी गाइड
यह आपकी चिपकाई पटकथा को 55 पंक्तियों वाले Courier पन्नों में ढालता है, आपको स्लेट लेबल और कवरेज नोट के साथ कैमरा सेटअप बनाने देता है, और हर सेटअप के लिए ठीक उन्हीं पंक्तियों पर एक लेबल वाली खड़ी लाइन खींचता है जिन्हें वह ढँकता है, कैमरे पर हो तो सीधी और कैमरे से बाहर हो तो लहरदार, हर पन्ने पर संकेत सूची और PDF एक्सपोर्ट के साथ।
इस काम में असली दिक़्क़त साफ़ है: डिजिटल तरीक़े से स्क्रिप्ट पर लाइन खींचने के लिए आम तौर पर Scriptation या ScriptE जैसे पेड ऐप चाहिए, इसलिए ज़्यादातर कम बजट प्रोडक्शन पेंसिल, पैमाने और स्कैन किए काग़ज़ पर लौट आते हैं। इसे यूँ ही छोड़ दिया जाए तो आगे के चरणों में रगड़ पैदा होती है और फ़ैसले धीमे पड़ जाते हैं। असल लक्ष्य है एक साफ़, एक्सपोर्ट लायक़ लाइन्ड स्क्रिप्ट, जो दर्ज करती है कि कौन सा कैमरा सेटअप स्क्रिप्ट की कौन सी पंक्तियाँ ढँकता है, सीधी और लहरदार लाइन की मानक परंपरा से।
यह सीमा याद रखिए: यह कवरेज और टेक की गिनती दर्ज करता है; यह पूरी निरंतरता की कागज़ी कार्रवाई की जगह नहीं लेता, जैसे आमने-सामने के पन्ने, हर टेक पर संपादक के नोट, या समय की सूची, जिनके लिए बड़ी प्रोडक्शन में अलग तरीक़ा चाहिए।
आगे का इस्तेमाल: तजुर्बेकार स्क्रिप्ट सुपरवाइज़र ब्लॉकिंग के दौरान लाइन खींचती हैं, कैमरा रिहर्सल के बाद सुधार करती हैं, और दिन के अंत में लाइन्ड पन्नों को कैमरा तथा साउंड रिपोर्ट से मिलाती हैं, ताकि संपादक को हर सीन का एक भरोसेमंद कवरेज नक़्शा मिले।
क़दम दर क़दम तरीक़ा
- अपना Fountain या सादा पटकथा टेक्स्ट चिपकाइए और जाँचिए कि सीन शीर्षक, नाम और संवाद सही इंडेंट पर बैठे हैं।
- हर कैमरा पोज़िशन के लिए एक सेटअप जोड़िए, उसके स्लेट लेबल, कवरेज नोट, टेक की गिनती और सीधी या लहरदार शैली के साथ।
- एक सेटअप चुनिए और पहली तथा आख़िरी ढँकी पंक्ति पर क्लिक करके उसका दायरा तय कीजिए, या चयनकर्ता से पंक्ति संख्याएँ चुनिए।
- हर पन्ने की संकेत सूची देखिए, फिर PDF डाउनलोड कीजिए और दिन की निरंतरता वाली फ़ाइल में रखिए।
किसके लिए, किस काम में
- स्क्रिप्ट सुपरवाइज़र: जैसे-जैसे सेटअप स्लेट हों, हर सीन पर लाइन खींचिए और PDF दिन की प्रोडक्शन फ़ाइल में एक्सपोर्ट कीजिए।
- फ़िल्म का छात्र: असली सीनों पर सीधी और लहरदार लाइन की परंपरा का अभ्यास कीजिए, बिना एक भी पन्ना छापे।
- संपादक: पहले असेंबली से पहले लाइन्ड पन्ने पढ़िए, तो तुरंत पता चल जाएगा कि किसी पल को कौन से सेटअप ढँकते हैं।
आम ग़लतियाँ जिनसे बचिए
- पूरी सीन पर एक ही लाइन खींच देना, जबकि सेटअप उसका सिर्फ़ एक हिस्सा कैमरे पर रखता है।
- कैमरे से बाहर के संवाद पर लहरदार की जगह सीधी लाइन इस्तेमाल करना, जिससे संपादक को उपलब्ध तस्वीर के बारे में ग़लत संदेश जाता है।
- कवरेज नोट छोड़ देना, और बाद के पाठकों के लिए स्लेट नंबर छोड़ना, बिना यह बताए कि फ़्रेम कैसा था।
पेशे के आज़माए तरीक़े
- सेटअप के नाम ठीक वैसे रखिए जैसे वे स्लेट होते हैं (12, 12A, 12B), तो लाइन्ड स्क्रिप्ट कैमरा रिपोर्ट से टेक दर टेक मिलेगी।
- रिहर्सल के दौरान लाइन खींचिए और पहले टेक के बाद ठीक कीजिए; कवरेज की योजनाएँ कलाकारों से टकराकर शायद ही बचती हैं।
- टेक की गिनती साथ-साथ अपडेट कीजिए, क्योंकि एक इस्तेमाल लायक़ टेक वाला सेटअप संपादन कक्ष में छह टेक वाले से बहुत अलग पढ़ा जाता है।
इस टूल के नतीजे को फ़ैसले में मदद मानिए, लिखाई की जगह नहीं। अच्छी पटकथा अपने ठोस चुनावों, भावनात्मक सटीकता और नाटकीय गति की साफ़गोई से याद रह जाती है। टूल का काम शोर हटाना है, ताकि आपकी ऊर्जा वहाँ लगे जहाँ मायने रखता है: किरदार, टकराव, चढ़ाव और भुगतान। हर दौर के बाद नतीजे दोबारा देखिए और जो बदलाव आपने माने उनका हिसाब रखिए, तो आपका तरीक़ा हर ड्राफ़्ट के साथ तेज़ और ज़्यादा भरोसेमंद होता जाता है। पेशेवर साथी इसी टिकाऊपन को क़ीमत देते हैं: कम चौंकाने वाली बातें, ज़्यादा साफ़ वजहें, और एक पटकथा जो सोच-समझकर आगे बढ़ती है।
विस्तार से सवाल
स्क्रिप्ट सुपरवाइज़र सेट पर लाइन कैसे खींचती हैं?
हर सेटअप के दौरान वे पहली ढँकी पंक्ति से आख़िरी तक एक खड़ी लाइन खींचती हैं, जिस पर स्लेट नंबर लिखा होता है। सीधे हिस्से का मतलब है कि क्रिया कैमरे पर है; लहरदार हिस्से का मतलब है कि टेक चलते वक़्त वह कैमरे से बाहर हो रही है। ये लाइनें सेटअप दर सेटअप जमा होती जाती हैं जब तक पूरी सीन की कवरेज पन्ने पर न आ जाए।
लाइन्ड स्क्रिप्ट और आमने-सामने के पन्नों में क्या फ़र्क़ है?
लाइन्ड स्क्रिप्ट वही स्क्रिप्ट पन्ना है जिस पर निशान लगे हैं, जो हर सेटअप की कवरेज दिखाता है। आमने-सामने के पन्ने हर पन्ने के सामने के नोट हैं: टेक नंबर, लेंस की जानकारी, समय, गोल किए गए टेक, और निरंतरता की टिप्पणियाँ। पेशेवर निरंतरता दोनों इस्तेमाल करती है; यह टूल लाइन्ड पन्ना बनाता है।
एक सीन में कितने सेटअप ट्रैक कर सकते हैं?
कोई तय हद नहीं। हर सेटअप की अपनी लेन होती है, इसलिए लाइनें कभी ऊपर-नीचे नहीं चढ़तीं, और पन्ने की संकेत सूची हर सेटअप को उसके लेबल और कवरेज नोट के साथ गिनाती है। असल में ज़्यादातर सीन तीन से आठ सेटअप रखते हैं, और पन्ना ख़ूब पढ़ने लायक़ रहता है।
क्या संपादक सचमुच लाइन्ड स्क्रिप्ट इस्तेमाल करते हैं?
लगातार। यह कवरेज का नक़्शा है: फ़ुटेज खंगालने से पहले संपादक लाइन्ड पन्ना देखकर जान लेता है कि कौन से सेटअप किसी बीट को ढँकते हैं और सामग्री कैमरे पर है या लहरदार में। लाइन्ड स्क्रिप्ट के बिना हर टेक खंगालना पड़ता है, उन सवालों के लिए जो यह पन्ना कुछ सेकंड में सुलझा देता।
क्या Fountain पटकथा पर सीधे लाइन खींच सकते हैं?
हाँ। Fountain टेक्स्ट चिपकाइए और टूल सीन शीर्षक, किरदारों के नाम, संवाद, कोष्ठक वाली टिप्पणियाँ और ट्रांज़िशन पढ़ लेता है, शीर्षक पन्ने का खंड छोड़ देता है, और सब कुछ मानक Courier इंडेंट पर बिछा देता है। बिना बनावट का सादा टेक्स्ट भी चलता है; उसे ऐक्शन मानकर उसी तरह पन्नों में बाँटा जाता है।
क्या यह लाइन खींचने वाला सॉफ़्टवेयर सचमुच मुफ़्त है?
हाँ। न साइनअप, न वॉटरमार्क, न अपलोड; पूरा टूल आपके ब्राउज़र में चलता है और PDF आपके ही कंप्यूटर में बनता है। आपका काम आपकी मशीन के लोकल स्टोरेज में अपने आप सहेजा जाता है, इसलिए टैब बंद होने से लाइन्ड पन्ने नहीं जाते।
लाइन्ड स्क्रिप्ट पर आम सवाल
लाइन्ड स्क्रिप्ट शूटिंग स्क्रिप्ट की वह प्रति है जिस पर स्क्रिप्ट सुपरवाइज़र निशान लगाता है। हर कैमरा सेटअप को उन्हीं पंक्तियों से गुज़रती एक खड़ी लाइन मिलती है जिन्हें वह कवर करता है, और उस पर स्लेट नंबर लिखा होता है। सामने के पन्ने के नोट के साथ मिलकर यह एडिटर को ठीक-ठीक बताती है कि हर सीन के हर पल के लिए कौन-सी कवरेज मौजूद है।
लहरदार लाइन उस सामग्री को दिखाती है जो उस सेटअप के दौरान कैमरे से बाहर घटती है: शब्द या क्रिया कैमरे के चलते हुए होती है, पर फ़्रेम से बाहर। उस टेक में आवाज़ है, तस्वीर नहीं। सीधी लाइन का मतलब है कि सामग्री पूरी तरह कैमरे में है। यह टूल लहरदार कवरेज को बिंदुदार लाइन से खींचता है और पन्ने के लेजेंड में उसका मतलब हमेशा लिखता है।
हाँ। यह वही परंपराएँ मानता है जो फ़िल्म स्कूल में सिखाई जाती हैं: हर सेटअप के लिए एक खड़ी लाइन, कैमरे में के लिए सीधी, कैमरे से बाहर के लिए लहरदार, और हर पन्ने पर एक लेजेंड। लंबे पेशेवर काम के लिए आपको आगे चलकर कोई ख़ास सशुल्क ऐप चाहिए हो सकता है, पर शॉर्ट फ़िल्म, छात्र फ़िल्म और स्वतंत्र फ़ीचर के लिए यह मुख्य काम बिना ख़र्च के कर देता है।
नहीं। पाठ पढ़ना, लाइन खींचना और PDF बनाना, सब आपके ब्राउज़र में स्थानीय रूप से चलता है। कुछ भी अपलोड नहीं होता, कोई अकाउंट नहीं है, और अपने आप सहेजने में सिर्फ़ ब्राउज़र की लोकल स्टोरेज इस्तेमाल होती है।
PDF डाउनलोड कीजिए दबाइए। एक्सपोर्ट हर 55 पंक्तियों वाले Courier पन्ने को आपकी खड़ी सेटअप लाइनों के साथ दोबारा बनाता है, सीधी या लहरदार के हिसाब से ठोस या बिंदुदार, साथ में हर पन्ने का लेजेंड जिसमें हर सेटअप का नंबर, कवरेज नोट और टेक की गिनती होती है। फ़ाइल स्थानीय रूप से बनती है और सीधे आपके डिवाइस पर सहेजी जाती है।
Related tools
आठवें हिस्से का कैलकुलेटर
चिपकाए गए पाठ से हर सीन को पन्ने के आठवें हिस्सों में नापिए।
स्क्रिप्ट ब्रेकडाउन चेकलिस्ट जनरेटर
हर सीन के लिए प्रोडक्शन चेकलिस्ट बनाइए।
सीन हेडिंग एक्सट्रैक्टर
पटकथा के पाठ से सीन हेडिंग निकालिए।
सीन नंबरिंग टूल
स्पेक स्क्रिप्ट को नंबर वाली शूटिंग स्क्रिप्ट में बदलिए, अक्षर वाले और हटाए गए सीन के साथ।
You can also browse the full library on /tools.
Core blog guides
- Idea → first draft (process hub)
- Screenplay format guide 2026
- Hidden costs of “free” software
- Affordable software & TCO
- Revision passes (structure → dialogue)
फिल्म तकनीकें
जानने लायक फ़िल्म तकनीकें
हर तकनीक के साथ एक छोटा क्लिप, पटकथा का अंश और शॉट लिस्ट की पंक्ति।